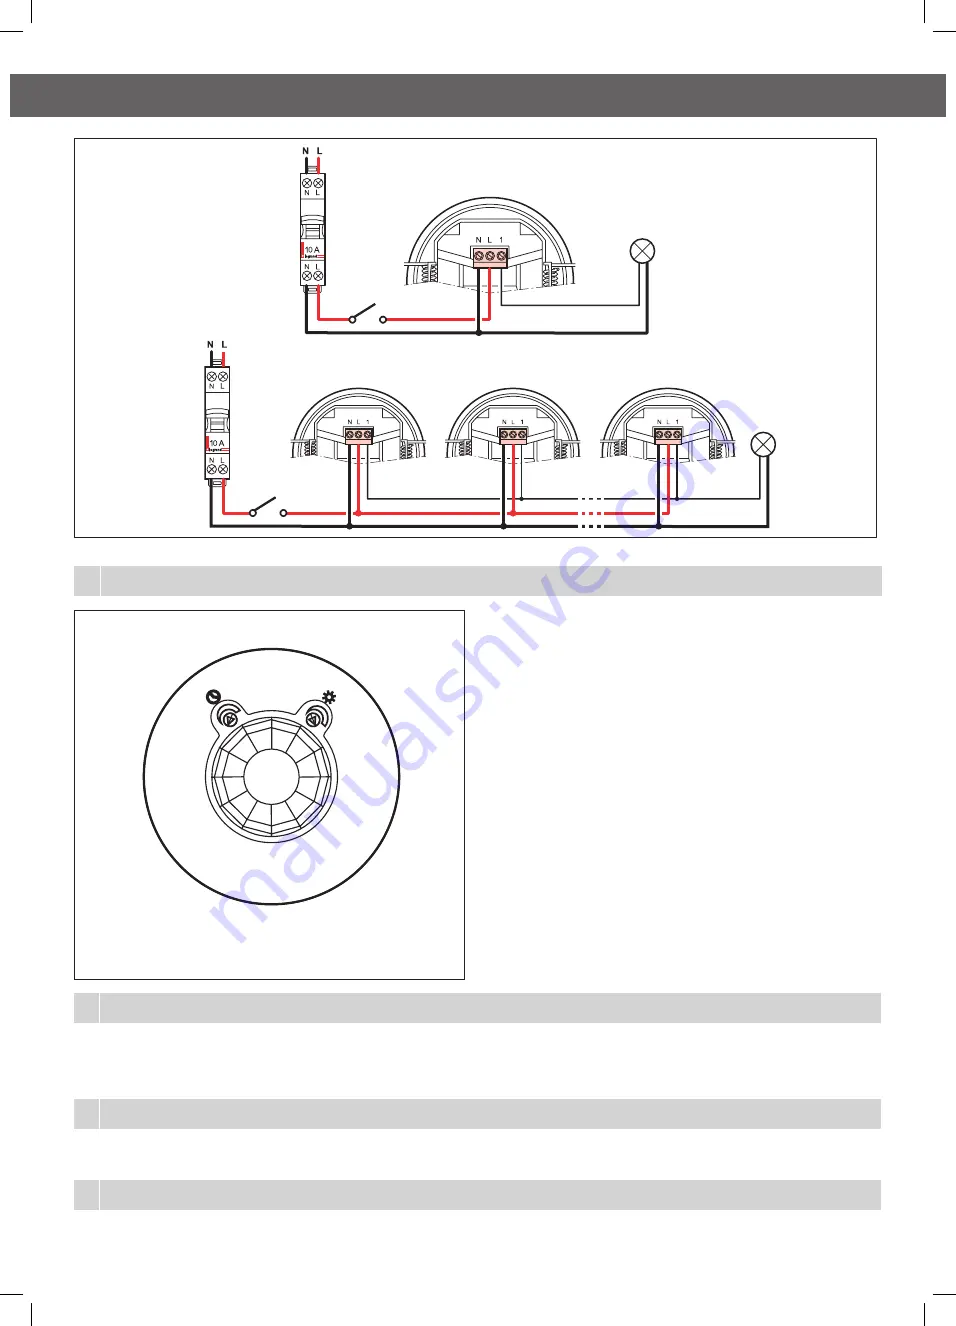
4 Setting the controls
Dial settings show
TEST MODE
Fig. 4
4.3A max
4.3A max
Fig. 3
5 Time Adjustment
The TIME knob controls how long the light/s will stay on after movement is detected. Rotating the TIME knob clockwise increases the duration time. The
duration time varies between approximately 10 seconds (minimum) to approximately 10 minutes (maximum).
Note: Once the light has been triggered by the PIR sensor, any subsequent detection will start the timed period again from the beginning.
6 Lux Adjustment
The LUX knob controls the ambient light level at which the sensor will switch on. At the fully clockwise position, the sensor will operate 24 hours a day.
At the fully anti-clockwise position, the sensor will only operate at night. You can set the sensor to operate at the desired lux level by adjusting the LUX knob.
7 Maintenance / Cleaning
This product should only be cleaned with a damp cloth. Cleaning agents and solvents should not be used.
ON/OFF
switch
ON/OFF
switch
With the Sensor fully installed by an electrician and power on
1. Turn the TIME knob to minimum and turn the LUX knob to light as
shown in Fig. 4.
2. Turn the wall switch on. The light/s should turn on immediately and
will remain on while the sensor warms up, for approximately 30
seconds. It will then turn off.
3. Walk through the coverage area and the light should turn on. This
confirms that the wiring is correct and that the light is operational.
4. Adjust the TIME knob to your desired setting.
5. To set the ambient light level at which the sensor will switch on, turn
the LUX knob to its fully anti-clockwise position. Wait for the desired
ambient light level, then turn the LUX knob clockwise while someone
walks through the coverage area. When the light switches on, release
the LUX knob.


