background image

ON 

12 

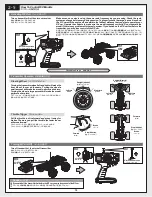
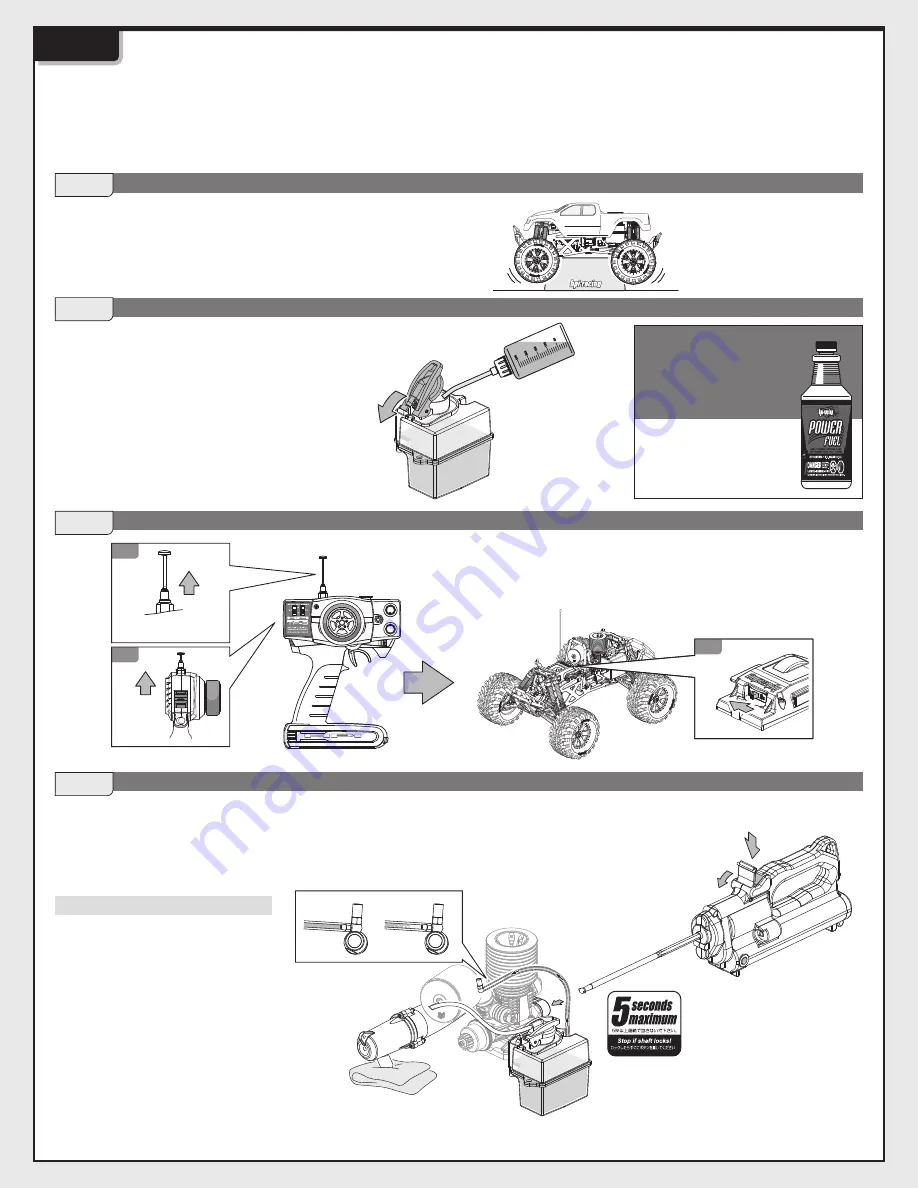
Keep the wheels off the ground. 

タイヤが地面から離れるように台の上にシャーシを置きます。 

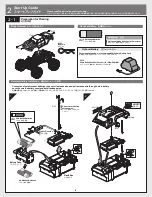
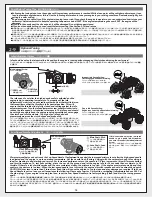
These instructions will explain the running procedure, how to prepare the car, turn on radio equipment, start the engine, break in the engine, 

shut off the engine, and shut off the radio equipment. When starting the engine for the first time, you must perform the break in procedure. 

Make sure no one is using the same frequency. Turn on transmitter first and receiver second. If you turn on the receiver first, it can cause you 

to lose control of the car. 

エンジンの始動から走行するまでの手順の説明です。初めて走行させる前にはエンジンのブレークイン(step 6参照)を行う必要があります。走行させる前に、他の人が同じクリスタルバンド(周波数)を使
用されていない事を必ず確認してください。また、スイッチを入れる順番は間違えないようにしてください。他の電波の混信によって車が暴走する場合があります。事前にスロットルリンゲージのセットアッ
プを確認してください。 
 

Step 1 

Step 2 

Step 3 

Step 4 

Preparation for Engine Start   

エンジン始動の準備 

Fill Fuel Tank   

燃料の給油 

Turn On Radio System   

電源を入れます 

Priming Engine   

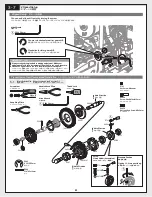
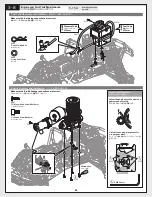
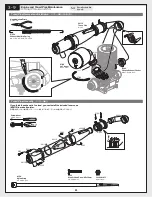
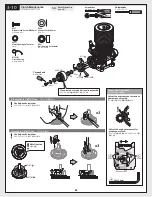
燃料をキャブレターに送る 

Flooded


Engine   

オーバーチョーク 

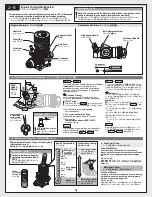
Fill the tank completely with fuel. Use only 20 to 25% 

nitro content fuel. Use high quality model car fuel only. 

Using non-car fuels could void your warranty. 

燃料を燃料ポンプに移してから、燃料タンクいっぱいに給油します。燃料は
HPI製RCカー専用燃料もしくは、ニトロ含有量20-25%の高品質RCカー専
用燃料を使用してください。指定以外の燃料を使用するとエンジンが破損し
ます。 

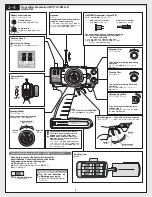
Make sure no one is using the same frequency. Turn on transmitter first, then turn 

on receiver. Check the throttle and steering functions and check the radio range 

before starting engine. If you switch on the R/C car first before the transmitter, 

you may lose control of the R/C car. 

クリスタルバンドを確認後、アンテナを伸ばし送信機、受信機の順番でスイッチを入れ、ステアリングとスロットルの

動作確認と電波範囲の確認をします。スイッチを入れる順番を間違えるとR/Cカーが暴走する恐れがあるので注意

してください。 

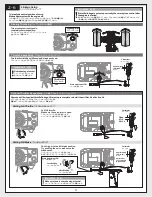
To prime the engine, use your finger to cover the exhaust tip. crank engine with Roto 

Start until fuel reaches the carburetor and no bubbles are seen. Using Roto Start too 

long will cause the engine to be flooded. 

エンジン始動準備のためマフラー出口を塞いでロートスターターを装着しスイッチを数秒押し、燃料がキャブレターまで到
達するようにします。ロートスターターを長時間回しつづけると、燃料がエンジン内にあふれエンジンが始動できなくなる 
(オーバーチョーク)ので注意してください。 

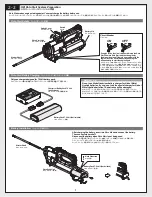
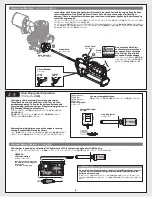
Starting Engine and Break In 

エンジンの始動とブレークイン 

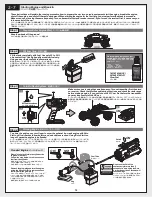
Remove the glow plug and turn the engine 

using the Roto Starter to remove excess 

fuel. Reinstall the glow plug . 

グロープラグを取り外し、ロートスタートでエンジンを回

しエンジン内にあふれた燃料を抜き取ります。この時プ

ラグ穴から燃料が吹き出すので燃料が目にはいらないよ

うに注意してください。 

燃料が抜けた後、再びグロープラグを取り付けます。 


If there is too much fuel in the cylinder, the 

engine will not start. 

Follow the step below to remove excess 

fuel from the cylinder. 

燃料を多く送りすぎるとエンジン内に燃料があふれ、エ
ンジンの始動ができなくなります。 
次の手順でエンジン内の燃料を取り除いてください。 

Extend the antenna 

アンテナをのばします 

1

2

ON 

NO! 

OK! 

74318/74348 (US) 

38704/38705 (JP) 

Glow Fuel 

グロー燃料 

2-7

70332 

3

ON 

ON 

Rag 

ウエス 

Fuel Tube 

燃料チューブ 

Switch 

スイッチ 

Do not use the Roto Start 

continuously for more than 5 

seconds at a time. Using the Roto 

Start for longer than 5 seconds will 

cause damage. 

ロートスターターは5秒以上連続で作動しな
いようにしてください。連続で使用するとエン
ジンが破損する原因となります。 

We recommend that you use fuel 

containing 20-25% nitro glow fuel. 

ニトロ含有量20-25%のR/Cカー用グロー燃
料を使用してください。 

20

% - 

25

%

Summary of Contents for Savage X 4.6 RTR

Page 1: ...12867 1 Instruction Manual 取扱説明書 En En Jp Savage X 4 6 RTR ...

Page 2: ...struction manual you are reading was designed to be easy to follow yet thorough in its expla nations HPI Racing wants you to enjoy driving your new Savage X 4 6RTR If you come across any problems or need some help getting through a step give us a call and we will do our very best to help you You can also contact us on the internet at www hpiracing com The caution or attention symbols will warn you...

Page 3: ...ープラグ Troubleshooting 17 2 12 トラブルシューティング Option Guide オプションガイ ド 4 35 Engine Guard 35 4 1 エンジンガー ド 18 Maintenance メンテナンス 3 Maintenance Chart 18 3 1 メンテナンス項目 Chassis 19 3 2 シャーシ Wheel 19 3 3 タイヤ Air Filter 20 3 4 エアフィルター Radio 21 3 5 プロポシステム Spur Gear 22 3 6 スパーギア Engine and Fuel Tank 24 3 8 エンジン 燃料タンク Engine and Tuned Pipe 25 3 9 エンジン マフラー Gear Box and Differential 27 3 11 ギアボックス Shock 29 3 13 ショ ッ...

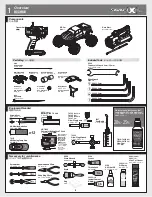
Page 4: ...Instant Cement 瞬間接着剤 Z190 Air Filter Oil エアフィルターオイル 39014 JP Oil Spray オイルスプレー Z164 Grease グリス Components セッ ト内容 Included Tools キッ トに入っている工具 Parts Bag パーツ袋詰 Equipment Needed 用意するもの Necessary for maintenance メンテナンスに必要なもの Z960 Turnbuckle Wrench 4mm 5 5mm ターンバックルレンチ 74151 HPI Racing Temp Gun HPI 温度計 74318 74348 US 38704 38705 JP Glow Fuel グロー燃料 20 25 2 mm 2 5 mm 1 5 mm 3 mm x12 1 Overview 製品概要 Rag ウエ...

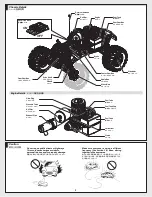
Page 5: ...e Tube プレッシャーパイプ Air Filter エアフィルター Fuel Tank Cap 燃料タンクキャ ップ Fuel Tube 燃料パイプ Fuel Tank 燃料タンク Carburetor キャブレター Clutch クラッチ Exhaust Pipe マフラー Rear Gear Box リアギアボックス Do not run on public streets or highways This could cause serious accidents personal injuries and or property damage 道路など車や人が通る場所での走行はさせないでください Make sure everyone is using a different frequency See section 3 5 when driving together in t...

Page 6: ...123 Attention 注 意 2 1 2 Please read the instructions before running スター トアップガイ ドではR Cカーを走行させるまでの手順を紹介します 走行させる前に内容をよくお読みになった上で走行を初めてください Optional Battery オプションバッテリー LOCK ロック 2012 Hump Battery Pack For Receiver 6V 1200mAh Ni MH レシーバーパック 俵型 6V 1200mAh ニッケル水素 6123 Body Pin ボディピン For extended running we recommend 2012 Hump Battery Pack 連続走行する場合は 2012レシーバーパックがおすすめです Z150 AA Alkaline Batteries アルカリ単三型電池...

Page 7: ...o Start Unit ロー トスターター本体 Roto Start Unit ロー トスターター本体 Circuit Breaker ブレーカー Battery Lid バッテリーカバー Switch スイッチ Switch Cover スイッチカバー Starter Shaft スターターシャフ ト Starter Shaft スターターシャフ ト Battery Pack 7 2 Volt Not included 7 2V バッテリー 別売 Battery Pack 7 2 Volt Not included 7 2V バッテリー 別売 Do not use Nickel Cadmium battery charger for Nickel Metal Hydride batteries If you do not use the special charger for Nick...

Page 8: ...harger for Nickel Metal Hydride batteries If you do not use the special charger for Nickel Metal Hydride batteries the batteries will be damaged Ni MHバッテリーの充電にはNi MHバッテリー対応の充電器を必ず使用してください Ni MHバッテリー に対応しない充電器を使用した場合 バッテリーの破損などの事故の起こる恐れがありますので注意してく ださい Switch スイッチ Switch Cover スイッチカバー Remove glow plug igniter as soon as the engine is running Leaving it connected will drain the battery エンジン始動後プラグヒータ...

Page 9: ...tter Crystal TX AM 27MHz送信機用クリスタル TX The crystal can be replaced to change frequencies Note You must also change receiver crystals Do not use FM crystals クリスタルを交換することで周波数が変更できます 注意 受信機のクリスタルも同じものに変更してください FM用クリスタルは使用できません Steering Trim ステアリング トリム To be used for trimming the steering operation ステアリングの直進位置 ニュートラル が 調整できます Throttle Trim スロッ トル トリム To be used for trimming the throttle operation スロットルの...

Page 10: ...応するか確かめてください プロ ポに正しく反応しない場合は走行を始めないでください スイッチを入れる順番を間違えるとR Cカーが暴走しますので注意してくだ さい If you switch off the transmitter first before the R C car you may lose control of the R C car スイッチを切る順番を間違えるとR Cカーが暴走する恐れがあるので注意してください Turning the transmitter wheel left and right will make the front tires of the car do the same Turning the wheel a small amount will make the model perform a wide turn Turning the whee...

Page 11: ... works スロットルトリガーをブレーキ位置にします 車を手で押してみてブレーキが効くように調節します Brake Adjustment Dial ブレーキ調整ダイヤル Carburetor キャブレター Carburetor キャブレター Carburetor キャブレター Brake Adjustment Dial ブレーキ調整ダイヤル More Braking ブレーキが強くなる Less Braking ブレーキが弱くなる Turn steering trim to set tires in completely centered position タイヤがまっすぐになるようにステアリングトリムを 左右にまわして調整します If throttle linkage is not set up correctly the car may lose control after the ...

Page 12: ...the radio range before starting engine If you switch on the R C car first before the transmitter you may lose control of the R C car クリスタルバン ドを確認後 アンテナを伸ばし送信機 受信機の順番でスイッチを入れ ステアリングとスロッ トルの 動作確認と電波範囲の確認をします スイッチを入れる順番を間違えるとR Cカーが暴走する恐れがあるので注意 してください To prime the engine use your finger to cover the exhaust tip crank engine with Roto Start until fuel reaches the carburetor and no bubbles are seen Usi...

Page 13: ...ng with the Roto Start Remove the glow igniter as soon as the engine is running If the glow plug igniter is left connected while the engine is running it will drain the battery and damage the glow plug グロープラグにプラグヒーターを取り付けロー トスターターを使 用してエンジンを始動します エンジンが始動したらすぐにプラ グヒーターを取り外します プラグヒーターをプラグに取り付け たままにするとプラグの破損やプラグスターターのバッテリーが すぐに消耗してしまいます The engine must never be run without the air filter in place エアフ...

Page 14: ... hesitates or bogs Reduced top speed and loss of power Overheating Temperatures above 250 F 120 C at the glow plug If your engine is running lean turn the needle counter clockwise 1 4 turn to richen the fuel mixture and repeat ステップ1 ステップ4 ステップX ステップX ステップ1 ステップ4 メインニー ドルを時計回りに1 8回転ずつ閉めこんでいく ことで燃料の混合比を薄くすることができ スロッ トル操作 に対する反応 最高速が向上します 車を操作しながらスピ ー ドとスロッ トルに対する反応の違いに注意してください 調整を続けます メインニー ドルを1 8回転...

Page 15: ...dle is set correctly the engine s throttle response should be smooth and quick CAUTION Never turn in more than 2 turns from flush this will cause the engine to run too lean and may damage your engine If the Low Speed Needle is set too lean you will experience the following Flame out at part or 3 4 throttle overheating temperatures above 280 F at the glow plug If your engine is running too lean res...

Page 16: ... to getting the maximum performance out of your Nitro Star Engine グロープラグの選択は 使用燃料 燃料のニ トロ含有量 天候 走行場所の標高など環境に大 きく影響されます 使用環境に適した燃料とグロープラグを使用することでエンジンの持つ 性能を最大限に引き出すことができます Extending the Life of your Glow Plug グロープラグを長持ちさせるコツ To maximize and extend the life of your glow plug follow these simple tips Remove the glow igniter when using more than 1 2 throttle or if the engine does not start after a few...

Page 17: ...の清掃 交換をしてください Engine is overheated エンジンがオーバーヒー トしていませんか Allow engine to cool and then restart エンジンが冷えるのをまってから再始動します Idle speed is set too low アイ ドリングの設定が低くすぎませんか Adjust the idle speed アイ ドリングの調整をします Do you have a drivetrain problem 駆動系に異常はありませんか Check drivetrain for damage 駆動系の点検をします Throttle isn t adjusted properly キャブレターの調整不良 Throttle servo is improperly set up サーボリンケージの調整不良 Set servo to neutral...

Page 18: ...ださい page 26 3 10 Gear Box and Differential Maintenance ギアボックスのメンテナンス Maintain Gear Box after each day s running 走行後ギアボックスメンテナンスを行ってください page 27 3 11 Front and Rear Differential Maintenance フロン ト リアデフのメンテナンス Maintain Differential after each day s running 走行後デフギアメンテナンスを行ってください page 28 3 12 Shock Maintenance ショ ックのメンテナンス Check the Shocks before every run 走行前にショ ックの動作確認を行ってください page 29 3 13 Servo Main...

Page 19: ... 六角ハブの選択 3 2 Wheel Maintenance タイヤのメンテナンス 3 3 After running clean the car and lubricate these points Replace damaged parts check that all the screws are tight 走行後はR Cカーの掃除を行いながら R Cカーの点検をし メンテナンスを行います ビスの増し締めをし シャーシの可動部分には市販のオイル潤滑スプレーを吹き付けます ブレーキにオイルが付着しないように注意してください Oil Spray オイルスプレー Rag ウエス Brush ブラシ 87546 Glow Plug Wrench グロープラグレンチ 86804 Hex Wheel Hub 17mm 六角ハブ 17mm Z260 PIN 2 5x12mm ピン Z680 Fl...

Page 20: ...れエアフィルターオイルを 注ぎフィルターエレメン ト全体にいきわたるようにしてください After properly cleaning the filter element make sure it is reinstalled correctly Make sure there are no gaps between the element and body Make sure the filter is fully seated on the carburetor and secure it with a tie strap Never run the engine without the air filter エアフィルターの洗浄後 エアフィルター本体にエアフィルターを隙間がないように注意して取り付けます エアフィルターがキャブレターにしっかりと取り付けられているか確認してください ...

Page 21: ...BROWN 2 RED 3 ORANGE 4 YELLOW 5 GREEN 6 BLUE 80601 80602 80603 80604 80605 80606 02 04 06 08 10 12 26 995 MHz 27 045 MHz 27 095 MHz 27 145 MHz 27 195 MHz 27 255 MHz Band US EU バンド US EU仕様 Band JP バンド 日本仕様 Frequency 周波数 Receiver AM 27MHz 2ch 受信機 80556 HPI RF 1 80559 HPI SF 1 80560 HPI SF 2 80575 80576 Battery case バッテリーケース Attention 注 意 AA Alkaline Batteries アルカリ単三型電池 Only use alkaline batteries in...

Page 22: ...1 Z578 5 1 22 Z950 Cross Wrench ミニクロスレンチ Screwdriver プラス ドライバー TP Flat Head Screw M3x18mm T Pサラスクリュー Z581 TP Flat Head Screw M3x12mm T Pサラスクリュー Z578 TP Binder Head Screw M3x15mm T Pバイン ドスクリュー Z569 PIN 2 5x12mm ピン Z260 METAL BUSHING 5x11x4mm メタル B072 WASHER 4 3x10x1 0mm ワッシャ b 87042 SPRING 4 9x8x7mm スプリング a 87042 Flanged Lock Nut M4 フランジナイロンナッ ト Z684 The spur gear should slip when firm pressure is ...

Page 23: ...トポイン トの調整は必ずエンジンを停止した状態で1 4回転ずつまわして調節してください シフ トチェンジが早すぎる場合は調整ネジを締めこみ 遅すぎる場合は緩めて調整します Needle Nosed Pliers ラジオペンチ Snap Ring Pliers スナップリングプライヤー Screwdriver プラス ドライバー B023 Z245 86084 34T Z897 76924 39T 86369 B085 86368 B023 86094 Z721 Z721 94036 Z260 Z235 76914 44T 86087 86088 PIN 2 5x12mm ピン Z260 E CLIP E5mm Eリング Z245 Button Head Screw M2x5mm ナベスクリュー 94036 Clutch Holder Assembled クラッチホルダーセッ ト 組立済 S...

Page 24: ...クの取り付け取り外し Engine Removal and Installation エンジンの取り付け取り外し TP Binder Head Screw M3x10mm T Pバイン ドスクリュー Z567 Cap Head Screw M4x8mm キャ ップスクリュー Z792 Body Pin Medium ボディピン中 6122 O ring 5x8x1 5mm Oリング 6899 Z792 3 mm Adjust the engine mount screws so gears mesh smoothly ギアが軽く回るように隙間を調整します Adjust the engine placement for proper gear mesh エンジンの位置を移動させてバックラッシュの調 整をします Z792 Z905 3 0mm 3 mm 3 mm Z792 3 mm Prope...

Page 25: ...ーの取り付け取り外し Tuned Pipe Assembly マフラーの組立 86110 a 86110 c 86110 b Air Cleaner エアフィルター 87198 Tuned Pipe マフラー 86110 Shaped Exhaust Gasket エキゾース トガスケッ ト 87049 Exhaust Manifold Spring エキゾース ト マニホール ド スプリング 87054 Lock Nut M3 ナイロンナッ ト Z663 Binder Head Screw M3x18mm バイン ドスクリュー Z520 87054 87052 6154 6154 Z520 86112 Z520 Z663 Z663 Z663 Z520 86061 Needle Nosed Pliers ラジオペンチ 6154 Nylon Strap ナイロンス トラップ Screwdri...

Page 26: ...gear mesh エンジンの位置を移動させてバックラッシュの調 整をします Clean inside of clutch bell and reassemble クラッチベルの内側を脱脂して組み立てます Note Direction 向きに注意 Clutch Maintenance クラッチメンテナンス 3 10 Z694 B021 B021 A992 17T 86171 Z517 Thread Lock ネジロック剤 Screwdriver マイナス ドライバー 87151 a 87151 b 87151 b 87151 a Z792 87151 b x3 x3 26 Z905 3 0mm 3 mm 3 mm Z792 3 mm Binder Head Screw M3x8mm バイン ドスクリュー Z517 Clutch Spring クラッチ スプリング a 87151 Metal...

Page 27: ...r or replace them according to the instruction below Rear gear box removal is same as front 部品が消耗していたら交換してください フロン ト側 リア側とも同じように取り付け取り外しができます Bumper Holder Removal and Installation バンパーホルダーの取り付け取り外し Differential Gear Removal and Installation デフギアの取り付け取り外し Screwdriver プラス ドライバー 86048 Z649 Z649 Z634 85235 1 85234 2 85234 2 Z634 TP Binder Head Screw M4x15mm バイン ドタッピングスクリュー Z649 TP Flat Head Screw M4x...

Page 28: ...ation see Section 3 11 デフギアの組み付けは3 11を参照してください Screwdriver プラス ドライバー Z164 Grease グリス Refer to Exploded View 組立参考図 5 3 Z892 Washer 5x7x0 2mm ワッシャー 6811 O Ring 6x9 5x2mm Oリング Z260 Pin 2 5x12mm ピン 86827 Washer 6x19x0 2mm ワッシャー c 86827 Washer 4x10x0 15mm ワッシャー d B032 Ball Bearing 10x16x5mm ボールベアリング 87194 Shaft For 4 Bevel Gear Diff 4x27mm 4ベベルデフ用シャフ ト 86099 Diff Case Washer 0 7mm デフケースワッシャー 86827 Diff...

Page 29: ...リング 6819 Silicone O ring S 10 シリコン O リング 6816 Lock Nut M2 6 ナイロンナッ ト Z661 Washer 2 7x6 7x0 5mm ワッシャー Z685 Shock Spring 14 4x117x1 4mm 26 Coils Black ショ ックスプリング ブラック 6749 Move the shaft up and down slowly to remove all air bubbles ゆっくりピス トンを動かし空気を抜 いてください 1 2 3 5 4 6819 6816 86055 87058 Z685 Z661 85049 3 85049 4 85049 1 85049 6 85049 2 85049 5 85050 8 85050 6 85050 5 85050 7 8505010 1 2 3 Needle No...

Page 30: ...r プラス ドライバー Screwdriver プラス ドライバー TP Binder Head Screw M2 6x8mm T P バイン ドスクリュー Z481 TP Binder Head Screw M3x10mm T P バイン ドスクリュー Z567 23 Airtronics JR KO Sanwa サンワ JR KO 8505820 24 Hitec ハイテック 8505815 25 Futaba HPI SF フタバ HPI SF Airtronics JR KO Sanwa サンワ JR KO Hitec Futaba HPI SF ハイテック フタバ HPI SF TP Flanged Screw M2 6x12mm T Pフランジスクリュー Z488 TP Flanged Screw M3x10mm T P フランジスクリュー Z561 TP Flanged Sc...

Page 31: ...ュー Z288 8505011 8505011 8505012 130mm 56mm 5mm 85050 3 85050 3 86356 c 86356 c 850584 Z288 86356 b 86356 e 86356 e 86356 a 8505012 86356 a 86356d 86356d Z515 50mm Do not overtighten Make sure the linkage moves freely リンケージが軽く動くように調整します Return to section 2 6 and follow the Linkage Setup スロッ トルリンケージ組み付け後は2 6リンケージセッ トアップを参照してください Refer to Exploded View 組立参考図 5 1 Spring 3 8x20x0 5mm スプリング 72360 72360 ...

Page 32: ... 4 GASKET FOR CYLINDER 0 2mm F4 6 シリンダーガスケッ ト 0 2mm F4 6 1463 1 Slide Carburetor Complete Composite F4 6 D Cut スライ ドキャブレターセッ ト コンポジッ ト F4 6 1477 1 Uniball スロッ トルバルブボール 1485 1 Idle Needle Valve F4 6 D cut アイ ドルニー ドルバルブ F4 6 D Cut 1488 1 Cylinder Piston Set F4 6 シリンダー ピス トンセッ ト F4 6 1489 1 Cylinder piston Connecting Rod Set F4 6 シリンダー ピス トン コンロッ ドセッ ト F4 6 1490 1 Aluminum Heatsink Head Purple F4 6 ア...

Page 33: ...トン シリンダー等に傷が入っている場合はエンジン内に異物 が入り込んだ可能性があります 再組み立てをする前に 異物の付着がないようにしっかりと洗浄してください エンジンの組み立ては 分解の逆の順番で 行います ステップ6 ステップ1 組み立てる際には コンロッ ドの油溝の向きとシリンダーの向きに充分注意してください 各部がスムーズに動くように 少量のオイルを付けながら組み立てを行います リビル ド終了後は 新しく組み込んだパーツのブレークインが必要です 説明書2 7を参考にブレークイン を行ってください After assembling the engine follow the instructions on these pages to break in and set up your rebuilt engine エンジンのリビル ド後は下記項目を参照にブレークイン 調整を行ってくだ...

Page 34: ...いか オーバーチョーク グロープラグの不良など の原因が考えられます Number 品 番 Qty 入 数 Description 品 名 87114 x1 Gear Set for Motor Unit ギヤセッ ト B021 2 Ball Bearing 5x10x4mm ボールベアリング B085 2 Ball Bearing 8x16x5mm ボールベアリング Z721 4 Set Screw M4x4mm セッ トスクリュー Number 品 番 Qty 入 数 Description 品 名 Number 品 番 Qty 入 数 Description 品 名 87133 b 87133 b 87133 c 87133 c 87114 e 87133d 87133 d 87114 b 87114 a 87114 c 87114 d 87133 a 87133 a 87134 b...

Page 35: ... 4 852393 Adjust to fit for proper body height or trim body to fit ボディに合わせて高さを調整 またはエンジン ガー ドが干渉する部分をカッ トしてください Screwdriver プラス ドライバー Allen Wrench 六角レンチ Z903 2 5mm 2 5 mm Z567 Z567 Z581 94398 94398 Z581 Z663 Z663 6123 6123 6123 Z581 Z578 TP Flat Head Screw M3x18mm T Pサラスクリュー Z581 Body Pin Large ボディピン大 6123 Cap Head Screw M3x55mm キャ ップスクリュー 94398 TP Binder Head Screw M3x10mm T Pバイン ドスクリュー Z567 Lock...

Page 36: ...85058 85058 85058 85058 85058 85058 85058 86090 Z561 Z561 85058 85058 80560 Z569 85050 Z481 Z613 86319 Z282 Z282 86319 86319 Z613 Z613 Z567 Z567 Z567 Z581 Z581 Z567 Z567 Z632 Z632 Z632 Z632 85237 85236 87027 85237 80556 80576 80575 85237 Z613 Z150 85237 85236 Z569 85235 85235 86079 6899 85058 87149 85058 86069 Z567 85239 Z663 85239 85239 94398 85239 Z526 Z526 Z567 73962 73961 85059 Z632 Z632 Z288 ...

Page 37: ... 39T 94036 Z897 86087 86088 86084 32T Z245 B023 Z260 76914 44T Z235 Z721 85052 B023 The Savage X includes a two channel TF 3 Radio When installing a reverse module you must use option part 87039 which includes a mixer that allows the reverse module to function with the third servo リバースモジュールを使用する場合は 87039リ バースギアボックス ミキサーセッ トを使用してくだ さい TF 3は2c hのため2c h送信機に対応したミ キサーが付属しています Z260 86130 72130 72131 769...

Page 38: ...0 Z286 85048 Z288 Z288 86073 85238 86071 Z569 Z569 Z243 86065 85048 B085 B085 86804 Z663 86074 Z632 Z649 Z569 Z569 Z569 Z569 85059 85059 85059 Z581 Z581 Z581 Z581 Z567 B085 85050 86030 86095 85234 85234 Z303 Z303 85059 Front フロン ト Front フロン ト Optional body mount for high roof body ハイルーフボディ用ボディマウン ト Rear リア Rear リア 86826 Z529 6811 6811 86278 86278 B032 B032 Z892 Z892 86030 86099 86827 86827 86827 6...

Page 39: ... 87151 Z694 B021 Z792 Z792 86060 87119 87119 Z421 Z423 Z423 87118 A992 6154 6154 6154 87204 87204 86110 86110 86110 Z663 87049 86061 87054 87052 86112 B021 86121 Z260 86804 Z680 3192 4462 4462 Z303 85049 85049 6816 Z661 85049 Z685 86055 86049 85050 6749 6819 6819 85050 85050 85050 85049 85049 Z569 85050 Z663 Z517 ...

Page 40: ... Pサラスクリ ュー Z649 x9 TP Flat Head Screw M4x30mm T Pサラスクリ ュー Z792 x9 Cap Head Screw M4x8mm キャ ップスクリ ュー Z520 x5 Binder Head Screw M3x18mm バイン ドスクリ ュー Z526 x5 Flat Head Screw M3x8mm サラスクリ ュー Z529 x8 Flat Head Screw M3x15mm サラスクリ ュー Z530 x3 Flat Head Screw M3x18mm サラスクリ ュー 6 Z547 x4 Cap Head Screw M3x20mm キャ ップスクリ ュー Z561 x11 TP Flanged Screw M3x10mm T Pフランジスクリ ュー Z567 x26 TP Binder Head Screw M3x10mm T...

Page 41: ...eibe Rondelle ワッシャー Z245 x2 E Clip E5mm Eリング Z260 x6 Pin 2 5x12mm ピン B021 x2 Ball Bearing 5x10x4mm ボールベアリング B023 x5 Ball Bearing 5x10x4mm ボールベアリング B032 x4 Ball Bearing 10x16x5mm ボールベアリング B085 x14 Ball Bearing 8x16x5mm ボールベアリング 87194 x4 Shaft For 4 Bevel Gear Diff 4x27mm 4ベベルデフ用シャフ ト 86059 x8 Ball 6 8x7 3x3mm Kugelkopf Rotule ボール 86144 x4 Ball 6 8x8x3mm Kugelkopf Rotule ボール 86066 x4 Hex Wheel Hub 1...

Page 42: ...ーパッ ド 86099 x2 Diff Case Washer 0 7mm デフケースワッシャー 86369 x1 Clutch Hub クラッチハブ 86827 x2 Differential Case デフケース 86827 x8 Differential Plate 8x13x2 5mm デフプレー ト 86032 x4 Bevel Gear 20 Tooth ベベルギア 20T 86032 x8 Bevel Gear 10 Tooth ベベルギア 10T 86031 x2 Bevel Gear 13 Tooth ベベルギア 13T 76914 x1 Transmission Gear 44 Tooth トランスミ ッシ ョ ンギヤ44T 76924 x1 Transmission Gear 39 Tooth トランスミ ッシ ョ ンギヤ39T 86101 x1 Linkage Lo...

Page 43: ...haft 14x34mm デフシャフ ト 86065 x4 Axle 8x9x44mm アクスル 86083 x2 CUP JOINT 8x19mm カップジョイン ト 86082 x1 CUP JOINT 6x13x20mm カップジョイン ト 86322 x1 CUP JOINT 6x19x21mm カップジョイン ト 86070 x4 Lower Arm Brace 4x54x3mm ロアアームブレース 86048 x2 Upper Arm Brace 4x54x3mm アッパーアームブレース 86071 x4 Flange Shaft 4x62mm フランジシャフ ト 86073 x4 Shaft 4x78mm シャフ ト 86074 x4 Shaft 4x46mm シャフ ト 86803 x2 Joint Post 4x6x74mm ジョイン トポス ト 86079 x2 Eng...

Page 44: ...late 2 5mm バルクヘッ ドロアプレー ト 86069 x1 Engine Plate 3mm エンジンプレー ト 3192 x4 Warlock Wheel Chrome 83x56mm ウォーロックホイール クローム 4462 x4 GT2 Tires S Compound 160x86mm GT2タイヤ Sコンパウン ド 73961 x1 Main Chassis 2 5mm Left メインシャーシ L 73962 x1 Main Chassis 2 5mm Right メインシャーシ R 4462 x4 Inner Foam インナースポンジ 87204 x2 Outer Filter Element アウターフィルターエレメン ト 6154 x4 Nylon Strap ナイロンス トラップ 6749 x8 Shock Spring 14 4x117x1 4mm 26 ...

Page 45: ...050 x2 1 2 4 5 6 3 85058 x1 1 2 4 6 8 3 5 7 9 13 10 11 12 14 15 17 19 21 16 18 20 85059 x1 1 2 3 3 4 5 85234 x2 1 2 3 4 5 85235 x2 1 2 4 3 85236 x1 1 2 85237 x1 1 2 3 5 7 6 6 8 4 85238 x2 2 2 1 3 85239 x1 3 4 2 1 5 6 1 2 3 4 5 6 7 8 9 10 11 12 45 ...

Page 46: ...SEMBLED BLACK CLUTCH HUB SAVAGE HEAVY DUTY 2 SPEED 2 2 1 10 20 10 5 4 8 6 5 4 1 2 1 1 1 1 1 1 1 1 1 2 2 1 1 1 1 2 1 1 2 4 1 1 2 2 4 1 1 2 2 2 2 1 1 1 2 2 1 1 1 1 2 1 6 6 1 1 10 1 4 1 1 1 1 1 1 1 1 87042 87049 87052 87054 87055 87056 87058 87149 87151 87192 87193 87194 87198 87199 87204 87227 94036 A992 B021 B023 B032 B072 B085 Z150 Z224 Z235 Z240 Z243 Z245 Z260 Z280 Z282 Z286 Z288 Z303 Z481 Z488 Z...

Page 47: ...ョイン ト6x19x21mm ブレーキリンケージセッ ト クラッチホルダーセッ ト サベージHD2スピー ド 組立済 ブラック クラッチハブ サベージ HD 2スピー ド 2 2 1 10 20 10 5 4 8 6 5 4 1 2 1 1 1 1 1 1 1 1 1 2 2 1 1 1 1 2 1 1 2 4 1 1 2 2 4 1 1 2 2 2 2 1 1 1 2 2 1 1 1 1 2 1 6 6 1 1 10 1 4 1 1 1 1 1 1 1 1 87042 87049 87052 87054 87055 87056 87058 87149 87151 87192 87193 87194 87198 87199 87204 87227 94036 A992 B021 B023 B032 B072 B085 Z150 Z224 Z235 Z240 Z243 Z245 Z260 Z...

Page 48: ...G CHASSIS SET TURNBUCKLE M4x70mm TITANIUM PURPLE ALUMINUM THREADED SHOCK SET 104 162mm HEAVY DUTY CLUTCH BELL 13 TOOTH 1M HEAVY DUTY CLUTCH BELL 14 TOOTH 1M HEAVY DUTY CLUTCH BELL 15 TOOTH 1M HEAVY DUTY CLUTCH BELL 16 TOOTH 1M HEAVY DUTY CLUTCH BELL 18 TOOTH 1M HEAVY DUTY CLUTCH BELL 19 TOOTH 1M STEERING UPGRADE SET 6x10x3mm BALL BEARING 1 2 1 1 1 1 1 1 1 4 1 1 1 1 2 2 2 1 1 1 1 2 2 2 1 1 1 1 2 1 ...

Reviews: