32
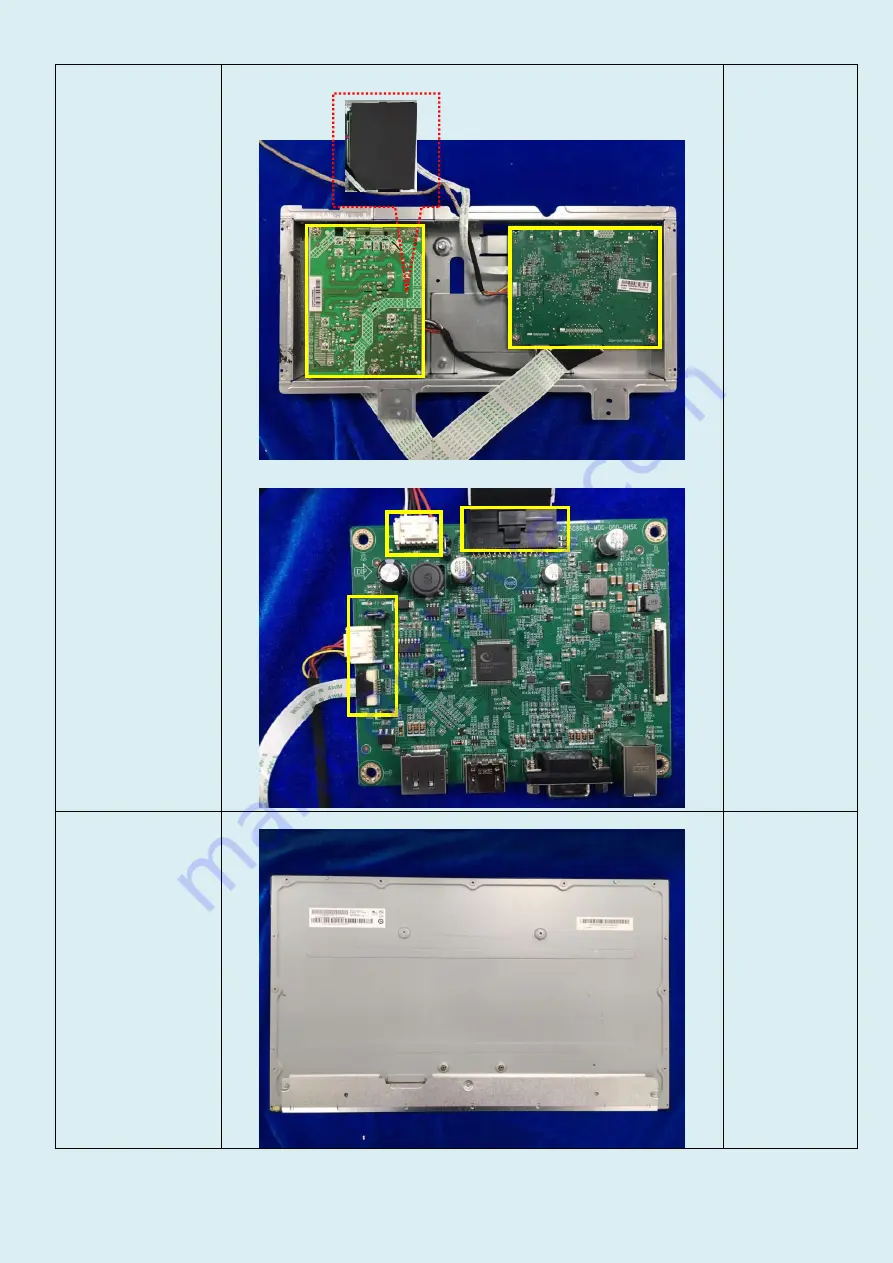
Remove the MAIN BOARD and POWER BOARD
Remove the MAYLR & screws and disconnect the connectors to remove the MAIN BOARD Power board and USB board
Remove the key board & Bezel & panel
Remove the screws to separate the key board & Bezel & panel
Page 1: ... Circuit Boards PCB or Printed Circuit Assemblies PCA With a surface greater than 10 sq cm Main Board Power Board Key Board USB Board 4 Batteries All types including standard alkaline and lithium coin or button style batteries 0 Mercury containing components For example mercury in lamps display backlights scanner lamps switches batteries 0 Liquid Crystal Displays LCD with a surface greater than 10...
Page 2: ... Description 2 Hexagonal nut screw driver for DVI and D SUB connector Description 3 Description 4 Description 5 3 0 Product Disassembly Process 3 1 List the basic steps that should typically be followed to remove components and materials requiring selective treatment 1 Remove the Stand base 2 Remove the Rear cover 3 Remove the pin and the screw 4 Remove the the tapes and the pins 5 Remove the scre...
Page 3: ...l Instructions Step Figure Description Remove the HINGE ASS Y Press the button to remove the hinge assy Remove the REAR_COVER Remove the screws first and remove the rear cover then remove the key board from rear cover ...
Page 4: ...31 Separate the MAINFRAME and PANEL 1 Remove the screws 2 disconnect the connectors 3 Tear out all tapes and disconnect the connectors to separate the MAINFRAME and PANEL 1 2 3 ...
Page 5: ...IN BOARD and POWER BOARD Remove the MAYLR screws and disconnect the connectors to remove the MAIN BOARD Power board and USB board Remove the key board Bezel panel Remove the screws to separate the key board Bezel panel ...