HP Tc4100 - Server - 256 MB RAM Upgrade Installation Manual Download Page 3

3

Installing the Processor


1. Remove the processor module from the sealed bag.

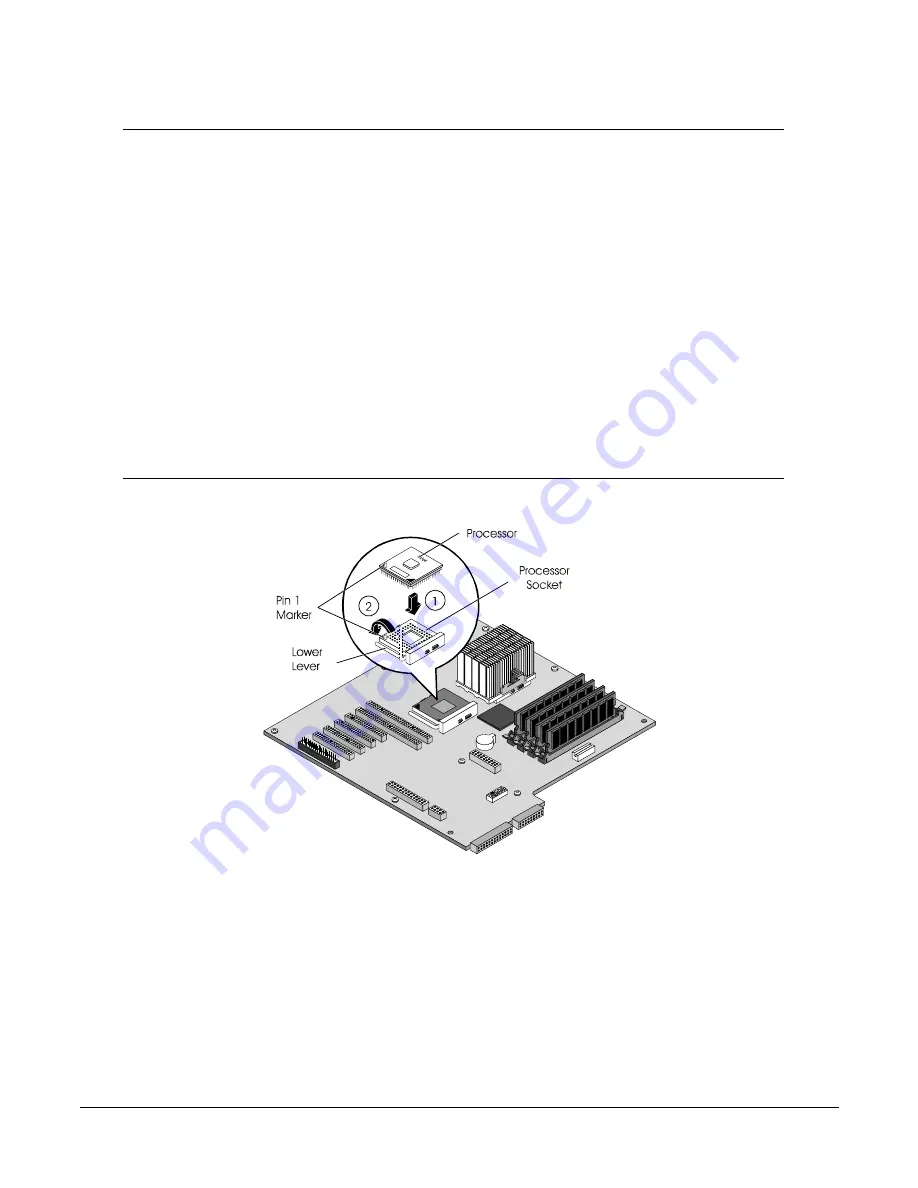
Figure 2.  Installing the Processor

2. Align the processor module over the processor socket by matching the corner of the processor that has fewer pins 

with the corner of the socket that has fewer pins.

3. Gently push down on the processor module until it seats.

4. Lower the lever to completely seat the processor module firmly in the socket.

NOTE

Thermal grease has been applied to the heat sink at the factory. No additional 
thermal grease needs to be applied to the heat sink or the processor during initial 
installation.
The tube of thermal grease in the kit should be saved and MUST be used in the 
following instances: 

If problems are experienced during installation that result in some of the grease 
getting scraped off.

Every time after initial installation that the heat sinks are removed and 
reinstalled. 

The following steps must be followed when re-applying thermal grease to ensure 
proper thermal conductivity which will prevent damage to the processor that is 
caused by overheating:
1. Clean off all of the existing thermal grease from the processor and the heat sink 

using a cloth and isopropyl (rubbing) alcohol.

2. Set the server unit in a position so that the processor top surface is parallel to the 

ground level.

3. Apply the entire tube of thermal grease to the center area of the processor.

Summary of Contents for Tc4100 - Server - 256 MB RAM

Page 1: ...Processor or Terminator The installation procedure is the same for the rack mounted models as for the pedestal models of the server once you gain access to the system board 1 Unpack the processor shipping box and check the contents against its packing list 2 Verify the processor speed and FSB setting before installing the second processor module 3 Gracefully shut down the network operating system ...

Page 2: ...a Release the heat sink from the installed processor Press down on a heat sink clip and rotate the clip to free it from the tabs on the processor socket Repeat this step for the second heat sink clip b Remove the heat sink from the processor Save the heat sink for future needs c Remove the processor from the processor socket by lifting up the lever and pulling the processor upwards Figure 1 Save t...

Page 3: ...stallation The tube of thermal grease in the kit should be saved and MUST be used in the following instances If problems are experienced during installation that result in some of the grease getting scraped off Every time after initial installation that the heat sinks are removed and reinstalled The following steps must be followed when re applying thermal grease to ensure proper thermal conductiv...

Page 4: ...ashion 5 Re install the air scoop cover and bezel onto the HP Server according to directions in the HP Server Operations and Maintenance Guide Return power to the server and restore normal operation NOTE HP recommends installing the heat sink supplied with the processor upgrade kit in the following steps CAUTION Ensure you have made good contact with the processor to avoid thermal overheating If y...

Page 5: ... telephone assistance on replacement of the component and pay shipping charges duty and taxes for any part that HP asks to be returned The customer may be required to run HP supplied configuration and diagnostic programs before a replacement will be dispatched or an on site visit is authorized Refer to the warranty statement provided with your original HP Server system documentation for the warran...

Reviews: