


1
2
3
4
5
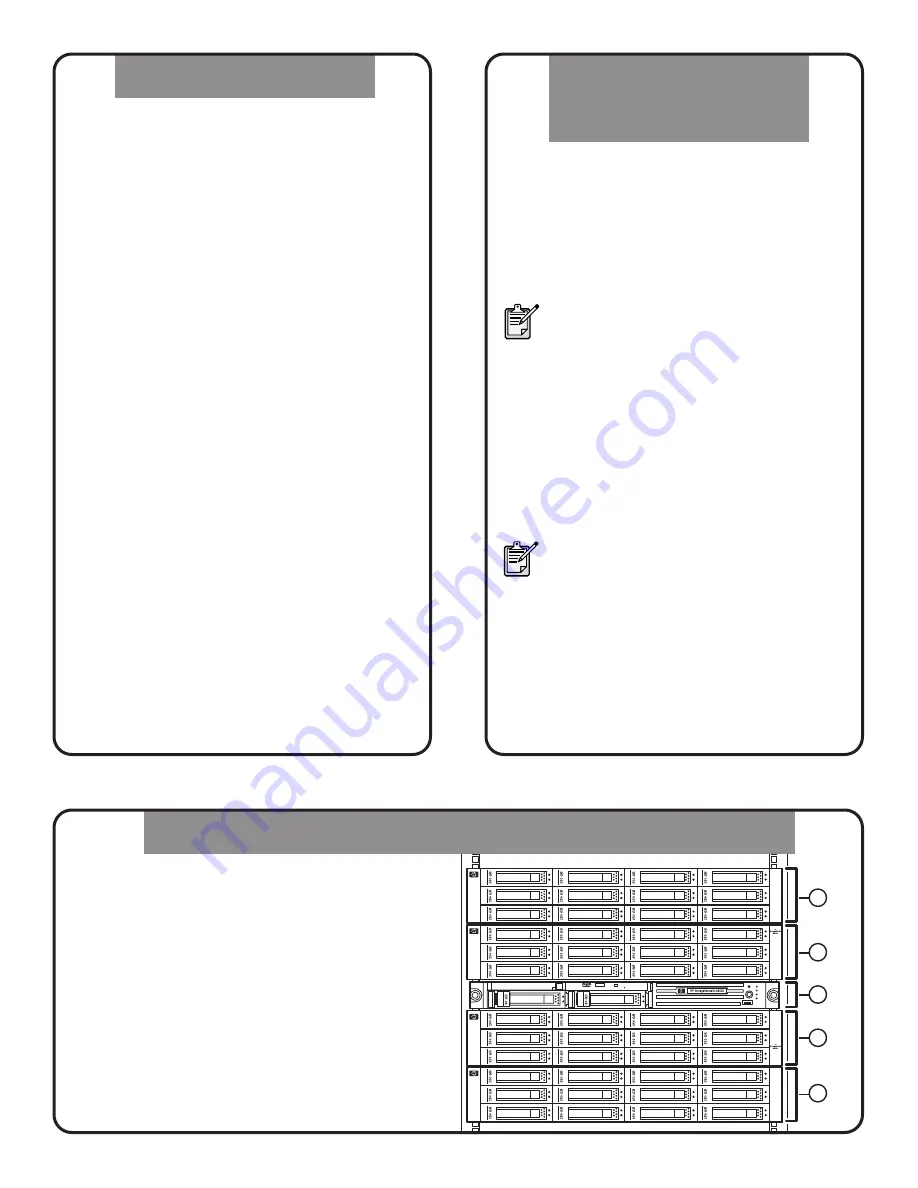
Installing the disk array(s) in the rack
4
Install the capacity
license shipped with
the capacity bundle
HP recommends that you mount the disk arrays
in the following order.
1 Disk array 4
2 Disk array 3
3 Node
4 Disk array 1
5 Disk array 2
Note:
If the VLS node is not installed, install and
cable it before installing the disk array(s). See the
HP StorageWorks 6000 Virtual Library System
Node Installation
poster.
3
Power down the node
If you are adding a disk array to an operating
VLS, power down the node. If not, skip this step.
To power down the node:
1.
Verify that any backup or restore operation has
completed and that the VLS is idle.
2.
Open a serial session and log in as the
administrator as follows:
a.
Connect a PC or workstation to the serial port
on the rear of the VLS using the null-modem
serial cable provided.
b.
Establish a CLI session using a terminal
emulation program, such as Windows
Hyperterminal.
c.
Enter
administrator
for the username.
d.
Enter
admin
for the password.
3.
Initiate a shutdown of the VLS by entering:
shutdownSystem
and then press
Enter
4.
When the VLS has completed its shutdown
operation, press the node
Power On/Standby
button to place the node in standby mode.
When the node activates standby power mode,
the system power LED changes to amber.
2
If you are installing a capacity bundle or an
existing disk array to the VLS base configuration,
install the capacity license for the additional
disk array following the instructions in the
HP StorageWorks 6000 Virtual Library System
User Guide
. Otherwise, skip this step.
Note:
The VLS 2.5TB capacity bundle
contains an MSA20 disk array and the
capacity license for the disk array. If you
want to add an existing MSA20 disk
array to the VLS, you must purchase the
capacity license for the disk array
separately.
Note:
As an option, you can add an
additional disk array to the VLS before
installing its capacity license. However, a
capacity violation will occur when the VLS
node is powered up, disabling the VLS
storage capacity so that the VLS is unable
to perform read/write operations. Later,
when the capacity license is installed and
the VLS is rebooted, the VLS storage
capacity is re-enabled.


