

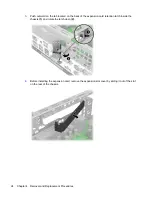


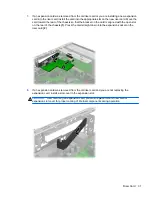

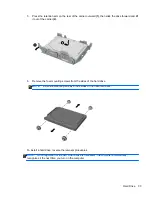


5.
Press the retention arm on the rear of the carrier outward
(1)
, then slide the drive forward and lift
it out of the carrier
(2)
.
6.
Remove the four mounting screws from the sides of the hard drive.
NOTE:
Install the mounting screws on the sides of the new hard drive.
To install a hard drive, reverse the removal procedures.
NOTE:
No configuration of the SATA hard drive is necessary; the computer automatically
recognizes it the next time you turn on the computer.
Hard Drive
33


