4
2
Getting Started
2.1
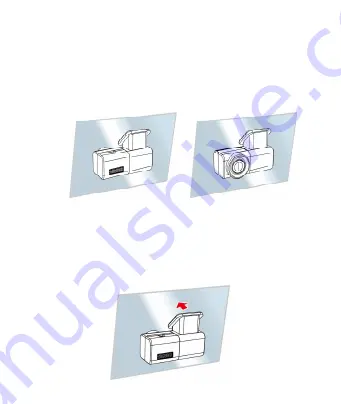
Mount Rear Camera to the Windshield
1.
Adjust rear camera position as the picture shown. Please
check the preview image is in right position (not upside down)
before installation. If the preview image is upside down,
please rotate the base 180
∘
to make it correct, or make sure
switch is REAR or FRONT position.
Rear view recording
In-car recording
2.
Connect the USB cable with primary camcorder and power it
on to enter preview screen and confirm the field of view. Then
clean the surface of the windshield with alcohol to ensure that
the adhesion surface is clean.
3.
Remove the transparent film on the base of rear camera, and
then hard press rear camera to ensure firmly stuck.
Summary of Contents for RC5
Page 1: ......
Page 2: ......
Page 16: ......
Page 19: ...3 1 3 產品概要 編號 項目 編號 項目 1 廣角鏡頭 4 鏡頭轉軸 2 底座 5 前 後影像切換開關 3 Micro USB 連接埠 6 LED 工作指示燈 ...
Page 22: ...6 3 使用惠普行車紀錄器的預覽來調整鏡頭角度 2 2 2 拍攝車內畫面 1 當後鏡頭裝置在擋風玻璃後 鏡頭應旋轉調整適合車內後視範 圍之位置 如下圖示 2 將開關滑動到 Front ...
Page 30: ......
Page 33: ...3 1 3 后镜头图解 编号 项目 编号 项目 1 广角镜头 4 镜头转轴 2 底座 5 前 后影像切换开关 3 Micro USB 端口 6 LED 工作指示灯 ...
Page 36: ...6 3 使用惠普行车纪录器的预览来调整镜头角度 2 2 2 拍摄车内画面 1 当后镜头装置在挡风玻璃后 镜头应旋转调整适合车内后视 范围之位置 如以下图标 2 将开关滑动到 Front ...


