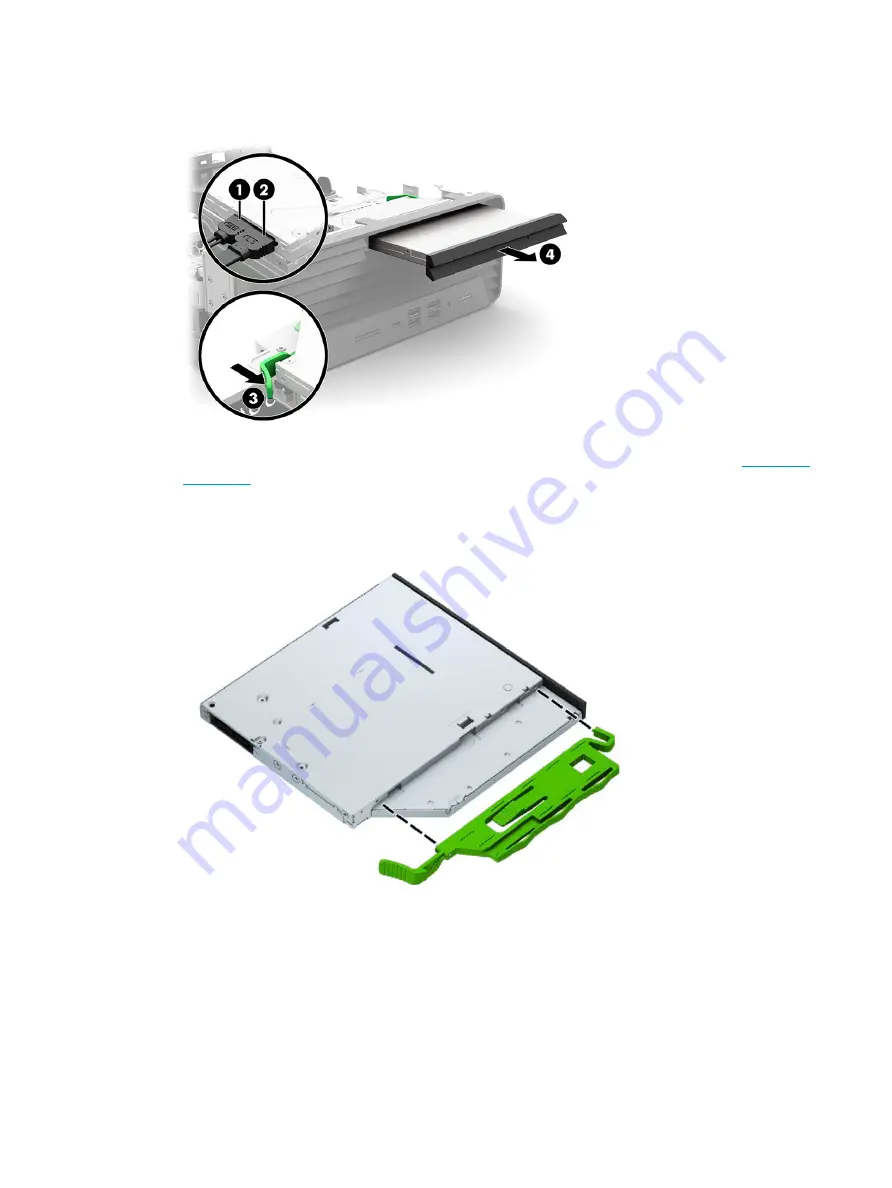
2.
Push the green release latch (3) on the right rear side of the drive toward the center of the drive, and then
slide the drive forward and out of the bay (4).
3.
If you are installing an optical drive in a bay covered by a bezel blank, remove the front bezel (
4.
Install the release latch onto the drive. Align the small pin on the release latch with the small hole on the
side of the drive, and press the latch firmly onto the drive.
5.
Connect the power cable and data cable to the rear of the drive, and then connect the opposite end of the
data cable to one of the SATA connectors on the system board labeled SATA1 or SATA2.
Front bezel
To remove the front bezel, use these procedures.
Before removing the front bezel, follow these steps:
ENWW
Front bezel
23
Summary of Contents for ProDesk 400 G7 SFF
Page 8: ...Index 125 viii ENWW ...
Page 12: ...4 Chapter 1 Product features ENWW ...
Page 56: ...48 Chapter 4 Removal and replacement procedures ENWW ...
Page 82: ...74 Chapter 5 Troubleshooting without diagnostics ENWW ...
Page 106: ...98 Chapter 7 POST error messages ENWW ...
Page 128: ...120 Chapter 11 Statement of memory volatility ENWW ...
Page 132: ...124 Chapter 13 Specifications ENWW ...
Page 136: ...128 Index ENWW ...


