


Troubleshooting
Troubleshooting Procedures
Troubleshooting Procedures
describes the error conditions and LED patterns that may occur on
a switch and switch modules.
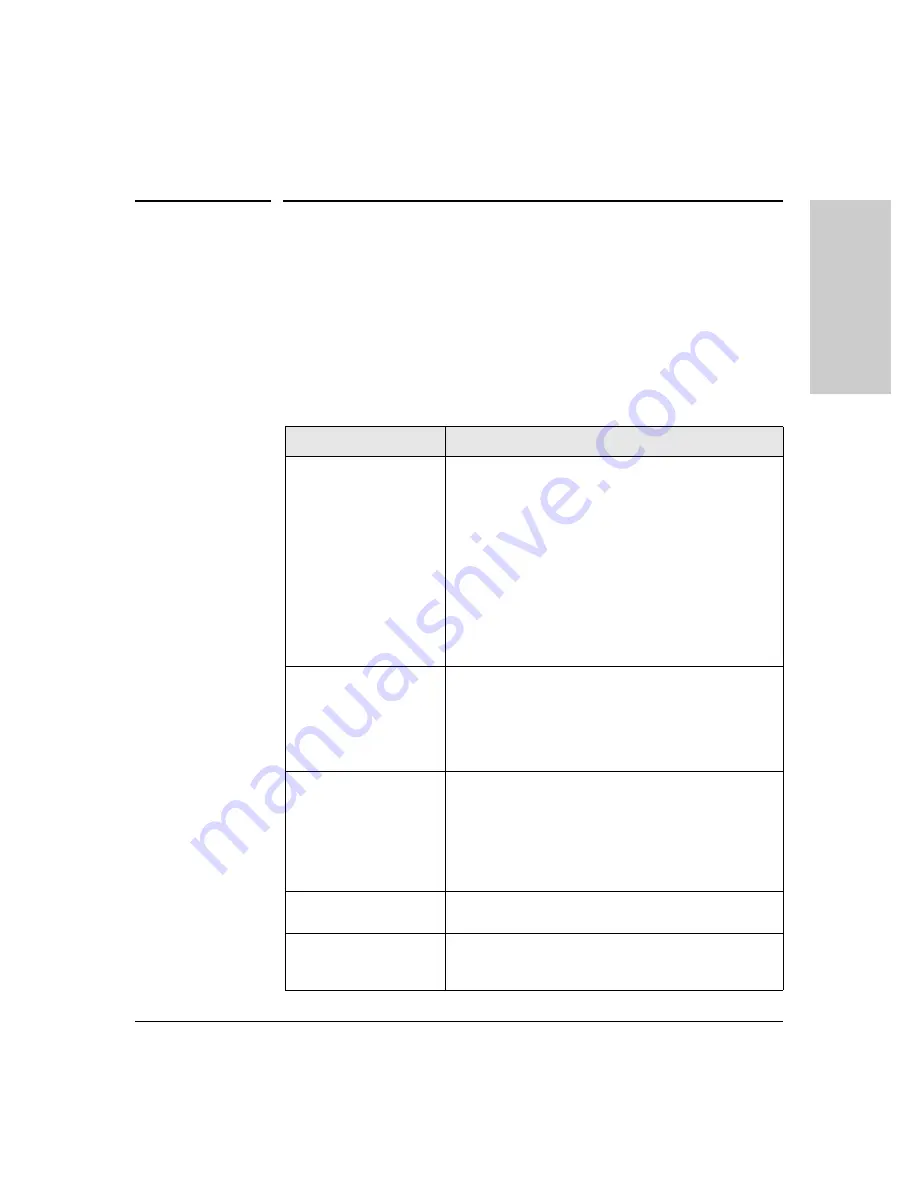
To troubleshoot Switch 8100fl operation using LEDs:
1. Find the LED pattern in
that you see on your switch.
2. Follow the associated diagnostic procedure to resolve the problem.
Table 5-1.
LED Error Conditions
Problem
Solution
The power supply is
installed but not working
(no LEDs are on, the fan
module is not operating,
and so on).
1. Verify that the power cable is plugged into an active
power source and to the switch. Ensure these connec
tions are snug.
2. If the Power LED is still not on, verify that the AC power
source works by plugging another device into the outlet.
Or try plugging the switch into a different outlet or try a
different power cable.
If the power source and power cable are OK and this
condition persists, the switch power supply may have failed.
Call your ProCurve Networking-authorized LAN dealer, or
use the electronic support services from ProCurve
Networking to get assistance. See the Customer Support/
Warranty card for more information.
The fan module is not
active.
Check the power cable and the circuit to which the power
supply is connected.
If the green status LED on the power supply indicates that it
is active, immediately power down the chassis, unplug the
power supply, and contact technical support. The fan
module may be improperly connected or damaged.
The management module
is not active.
Check the power cable and the circuit to which the power
supply is connected.
If the power supply is working, make sure the management
module is inserted all the way into its slot in the chassis and
the captive screws are screwed in. The management module
must be in the management module slot (labelled
MM
) and
not in a numbered interface module slot.
No interface modules are
active.
Check the power cable and the circuit to which the power
supply is connected.
A specific interface
module is inactive.
Make sure that the interface module is inserted all the way
into its slot in the chassis, the extractor levers are fully
closed, and the captive screws are screwed in.
T
rou
blesh
oot
ing
5-3
Summary of Contents for ProCurve 8116fl
Page 1: ...Installation and Getting Started Guide ProCurve Series 8100fl Switches www procurve com ...
Page 2: ......
Page 3: ...ProCurve Series 8100fl Switches Installation and Getting Started Guide ...
Page 10: ... This page is intentionally unused ...
Page 26: ... This page is intentionally unused ...
Page 60: ... This page is intentionally unused ...
Page 72: ... This page is intentionally unused ...
Page 88: ... This page is intentionally unused ...
Page 122: ... This page is intentionally unused ...
Page 133: ......


