background image

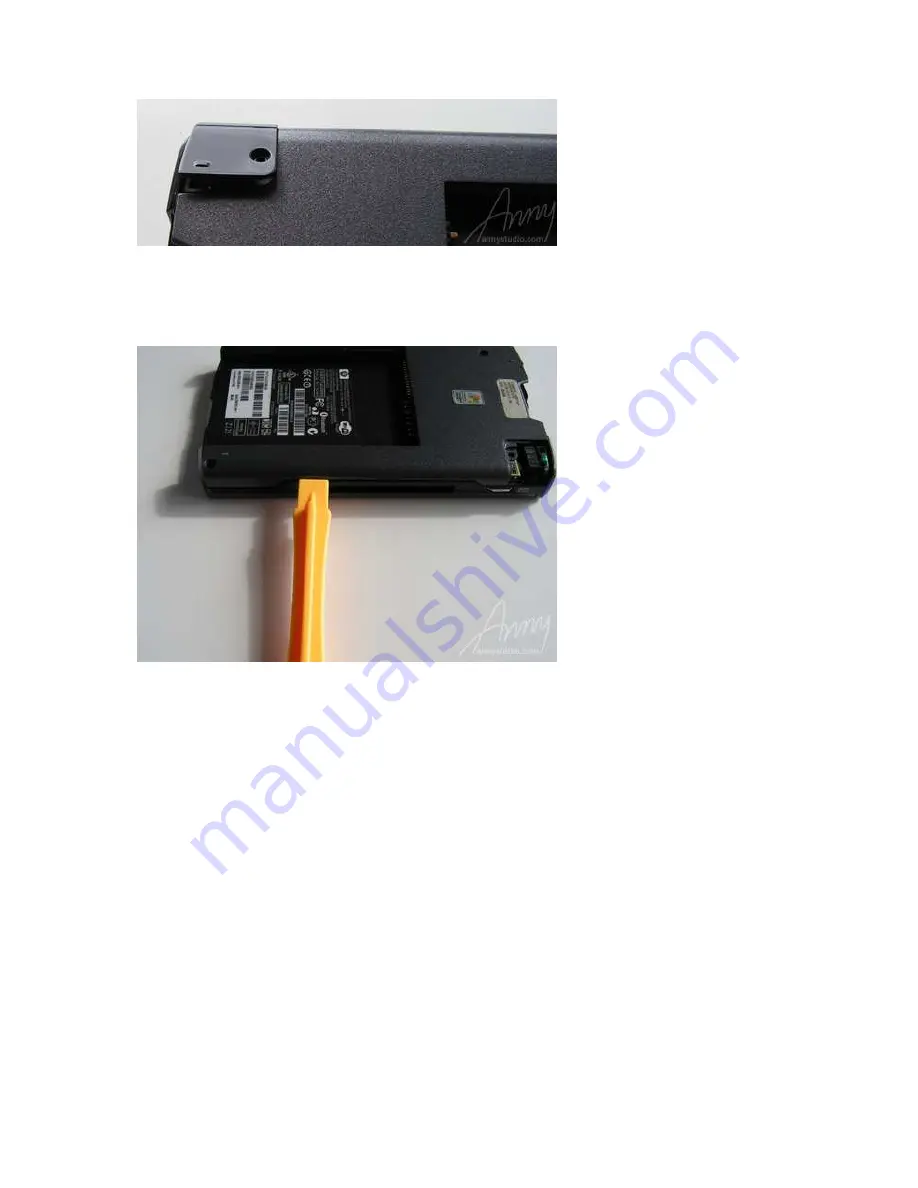
Take the plastic corner off. 


With all 4 screws removed you can take off the back cover. It is 
clipped on, so it might be hard to remove. In this case use the 
case opener tool: slide the tool all the way around the case and 
releasing the plastic tabs. 


Detach the two ribbon cables. To do this, release the tabs on 
each connector. The smaller ribbon connector has a tab, which 
should be picked and pulled upward. The larger connector has a 
tab (dark brown in the photo) which shoud be picked on its 
ribbon side and opened for up to a 45 degree angle (like a small 
door). Once the tab is lifted up, you can now slide the ribbon 
cable out. 

Be very careful, the connectors are extremely 

fragile and can be easily damaged!

 Then remove a small 

crosshead screw in the other angle of the unit.  

Page 3 of 8

HP iPAQ 4700 Disassembly, Screen Removal and Repair Guide

2008-12-11

http://www.annystudio.com/misc/ipaq4700/

Summary of Contents for iPAQ 4700

Page 1: ...ong it may take to repair a pocket PC in Adelaide or how much it may cost I decided to repair it myself I bought a new iPAQ hx4700 LCD screen from eBay it cost 70 AUD and there were a T6 screwdriver and a case opener tool in the kit Unfortunately I couldn t find any good instructions for disassembling an HP iPAQ 4700 or any other HP PDA 47xx series on the Internet so it took a bit more time to me ...

Page 2: ...ll SD MMC cards 3 Take the battery off and remove the 4 screws on the back of the unit using the T6 screwdriver 4 Page 2 of 8 HP iPAQ 4700 Disassembly Screen Removal and Repair Guide 2008 12 11 http www annystudio com misc ipaq4700 ...

Page 3: ... connector has a tab which should be picked and pulled upward The larger connector has a tab dark brown in the photo which shoud be picked on its ribbon side and opened for up to a 45 degree angle like a small door Once the tab is lifted up you can now slide the ribbon cable out Be very careful the connectors are extremely fragile and can be easily damaged Then remove a small crosshead screw in th...

Page 4: ...low show attached and detached ribbon cables 7 Remove a cross screw from the transmitting module Page 4 of 8 HP iPAQ 4700 Disassembly Screen Removal and Repair Guide 2008 12 11 http www annystudio com misc ipaq4700 ...

Page 5: ...the image Then disconnect the wire connector and remove the a crosshead screw nearby outlined by circle After that the motherboard can be easily removed 9 After motherboard removed unscrew 2 crosshead screws as image below shows Page 5 of 8 HP iPAQ 4700 Disassembly Screen Removal and Repair Guide 2008 12 11 http www annystudio com misc ipaq4700 ...

Page 6: ...se these tabs you need to remove two small items of rubber between the tabs and PC case then release the tabs and the LCD screen should come out slide the screen a little aside before bring it out Page 6 of 8 HP iPAQ 4700 Disassembly Screen Removal and Repair Guide 2008 12 11 http www annystudio com misc ipaq4700 ...

Page 7: ...12 If you carefully follow these steps backwards with a new screen your iPAQ will be alright Page 7 of 8 HP iPAQ 4700 Disassembly Screen Removal and Repair Guide 2008 12 11 http www annystudio com misc ipaq4700 ...

Page 8: ...hows the spot on the old screen beter September 10 2007 Please contact me if you have any suggestions or questions Page 8 of 8 HP iPAQ 4700 Disassembly Screen Removal and Repair Guide 2008 12 11 http www annystudio com misc ipaq4700 ...

Reviews: