


Removal and replacement procedures 26
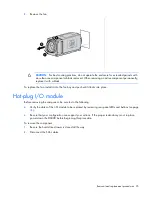
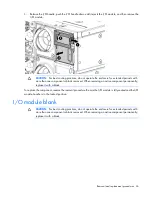
3.
Release the I/O handle, push the I/O handle down until it ejects the I/O module, and then remove the
I/O module.
CAUTION:
For best cooling practices, do not operate the enclosure for extended periods with
more than one component or blank removed. When removing an active component permanently,
replace it with a blank.
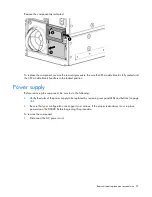
To replace the component, reverse the removal procedure. Be sure the I/O module is fully seated and the I/O
module handle is in the locked position.
I/O module blank
CAUTION:
For best cooling practices, do not operate the enclosure for extended periods with
more than one component or blank removed. When removing an active component permanently,
replace it with a blank.
Summary of Contents for D6000 Disk Enclosure
Page 12: ...Customer self repair 12 ...
Page 13: ...Customer self repair 13 ...
Page 14: ...Customer self repair 14 ...
Page 18: ...Illustrated parts catalog 18 ...


