HP D300 Digital Dispenser
26
4.
Click
OK
. All dispensing for the current fluid will occur. In the main operating window, only the
wells for the current fluid are shown, and each well is covered with an X while it is being
dispensed and then turns black when the dispensing for that well is complete.
5.
Repeat steps 1 through 4 to load and dispense each fluid in the plate configuration. Fluid
loading can occur during the dispense operation; you do not have to wait until the current
Dispensehead has finished. Just remember to click on
OK
as each fluid is loaded in its
Dispensehead, or to click on
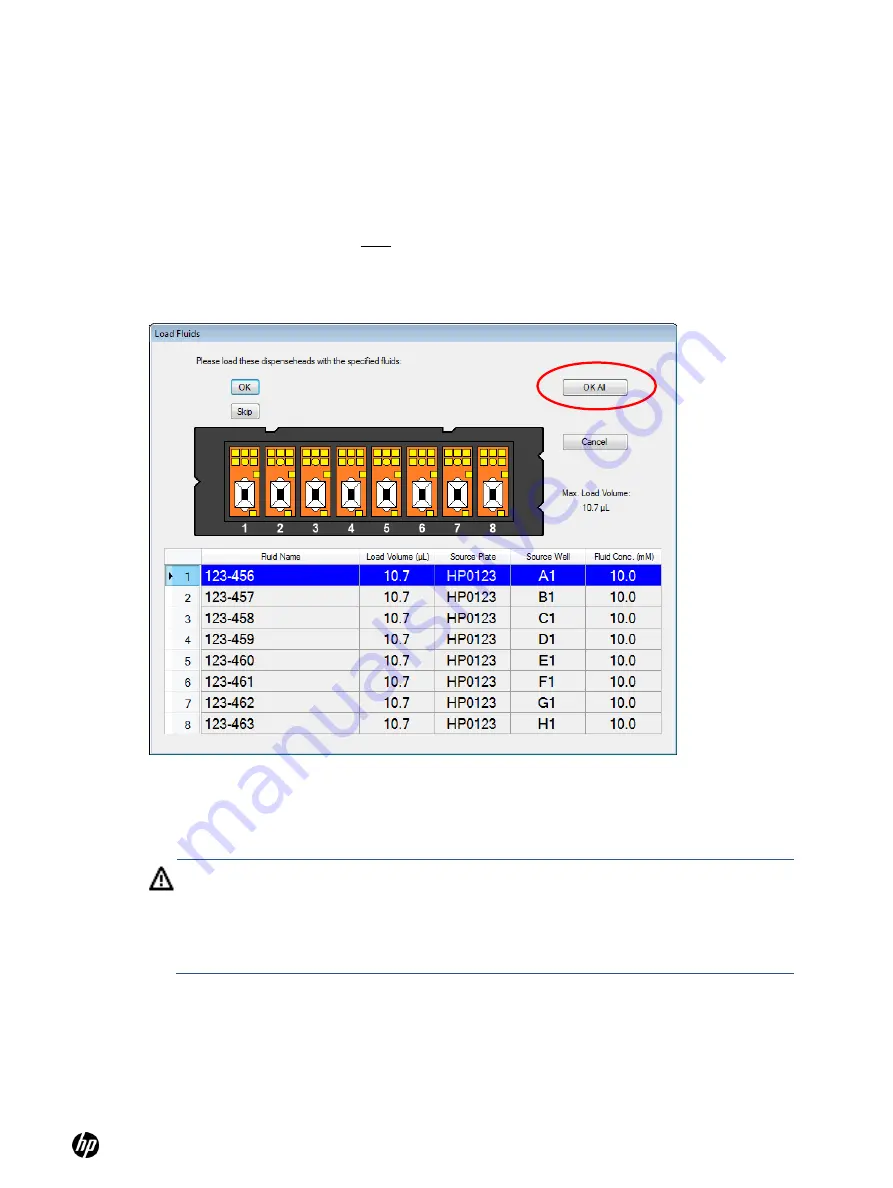
OK All
when all Dispenseheads of the current Cassette are
loaded, as shown in
6.
If loading all Dispenseheads simultaneously with a multichannel pipette or individually prior to
starting the dispense, then after all Dispenseheads of the current Cassette are loaded, click on
OK All
Figure 4-26
Load fluid dialog box showing OK All button
7.
After the fluids in the currently loaded cassette are dispensed into plate 1, then depending
upon the configuration, you will be asked to either load a new cassette or a new plate. Read
the prompt dialog box carefully to determine the next step.
WARNING:
For multiplate configurations, the D300 software first minimizes the use of
dispenseheads, so that fluids which are used on multiple plates are dispensed into all of
those plates as long as the total dispense volume for that fluid does not exceed 10uL. This
dispensehead conservation can result in a non-intuitive plate loading order. Be careful to
load the correct well plate as prompted by the software! Minimizing the number of
dispenseheads used may sometimes result in more plate swaps than expected.
8.
If you are prompted to load the next plate in the configuration, you will see a prompt similar to
, where you can enter or scan a name for the plate. If the plate has been loaded
previously, you will be prompted with the plate name you previously entered or scanned in for
the plate, along with the plate number.


