38
3 Upgrading and Adding Accessories
Upgrading Hardware
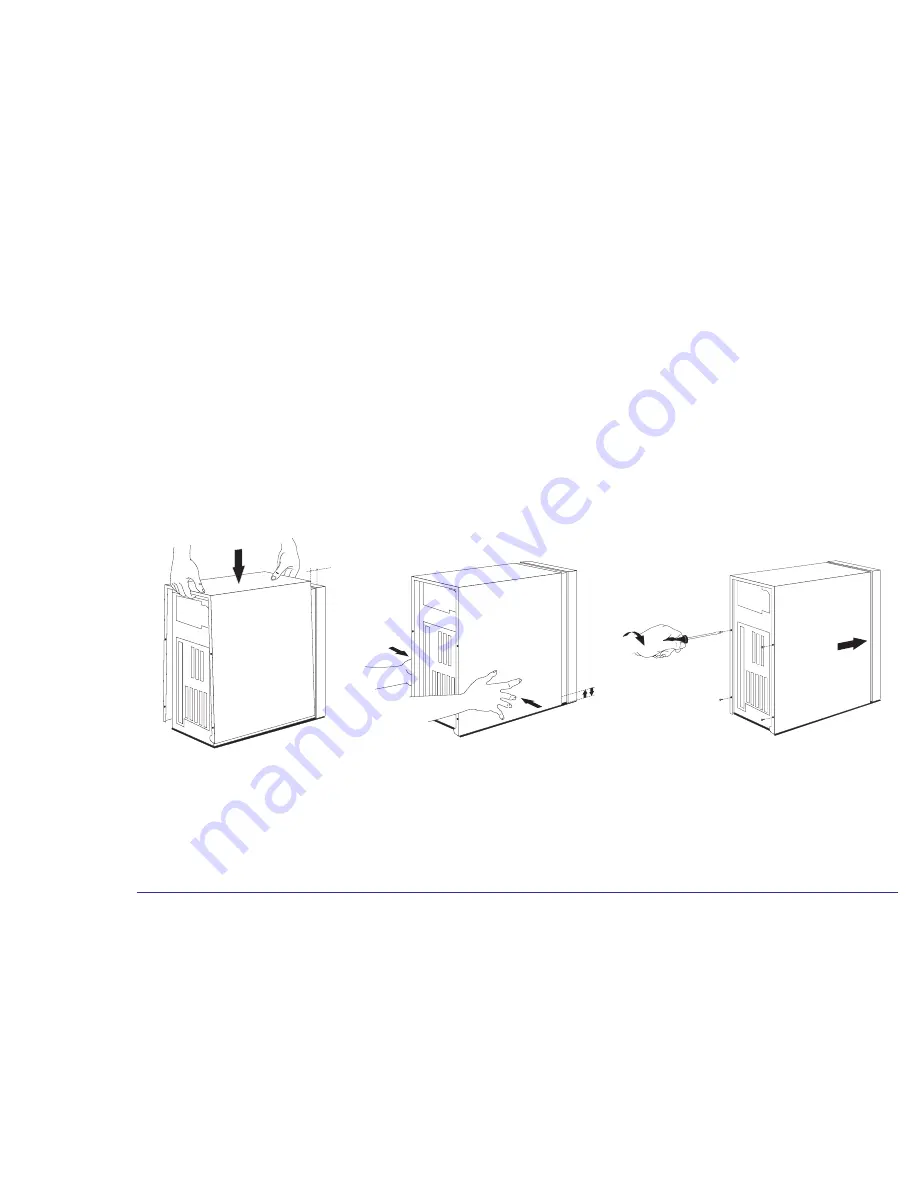
Replacing the Cover
1
Check that you have installed all your accessories and that internal cables are properly connected and safely routed
(for example, check that they will not interfere with the cover when it is replaced).
2
Lower the cover onto the computer. Position the cover so that there is a 1.5 cm gap between the front edge of the cover
and the front bezel.
3
While holding the cover as shown, lift the cover up approximately 1 cm until a ‘pop’ is heard, then lower the cover. Metal
tabs at the bottom of the cover should now be hooked onto the chassis of the computer.
4
Push the cover forward until it meets the front bezel. Secure the cover in place by replacing the four screws on the rear
panel.
5
Reconnect the power supply cords and any telecommunications cables. Turn on the display and computer.
1.5 cm
1 cm
Summary of Contents for Brio 8172
Page 1: ...Online Reference Guide Online Guide Date Spring1998 HP PC ...
Page 8: ...8 Appendix AT Commands Basic AT Commands 68 Modem Response Messages 73 Glossary 77 Index 81 ...
Page 9: ...1 About Your Hardware ...
Page 21: ...2 About Your BIOS ...
Page 32: ...32 2 About Your BIOS How to Recover if Things Go Wrong ...
Page 33: ...3 Upgrading and Adding Accessories ...
Page 66: ...66 3 Upgrading and Adding Accessories Changing the Battery ...
Page 67: ...Appendix AT Commands ...
Page 80: ...Glossary 80 ...
Page 84: ...84 Index ...
Page 85: ......
Page 86: ......


