Aruba 9300-32D Switch Series | Installation and Getting Started Guide
40
The Aruba 9300-32D switch is equipped with six field-replaceable, hot-swappable fan trays. The switch can
tolerate the failure of a single fan tray while maintaining a safe operating temperature. To maintain system
redundancy, a failed fan tray should be replaced as soon as possible. The Fan LED, Global Status LED, and
Fan tray LED will FLASH amber, indicating a fan tray has failed.
n
The Aruba 9300-32D switch is not compatible with fan trays from other Aruba hardware platforms.
n
After removing a fan tray, wait at least five seconds before inserting a replacement fan tray in the same
slot.
n
Replace only one fan tray at a time. Removing more than one fan tray at a time compromises system
cooling, risks damage to the hardware, and can cause the switch to shut down abruptly.
n
If there are less than six fan trays installed, a two minute count down timer is triggered. If six fan trays are
not present before the countdown expires, the switch will automatically power down for five minutes and
then reboot. For this reason, it is not recommended to remove a failed fan tray, until you have the
replacement fan tray prepared.
Ensure that a replacement fan tray has the same airflow as other fan trays installed in the switch.
To replace a fan tray:
1. Identify the fan tray by its status LED. The fan tray LED will be FLASHING amber.
2. Remove the new fan tray from its packaging, being careful to not touch any of the circuitry on the
board.
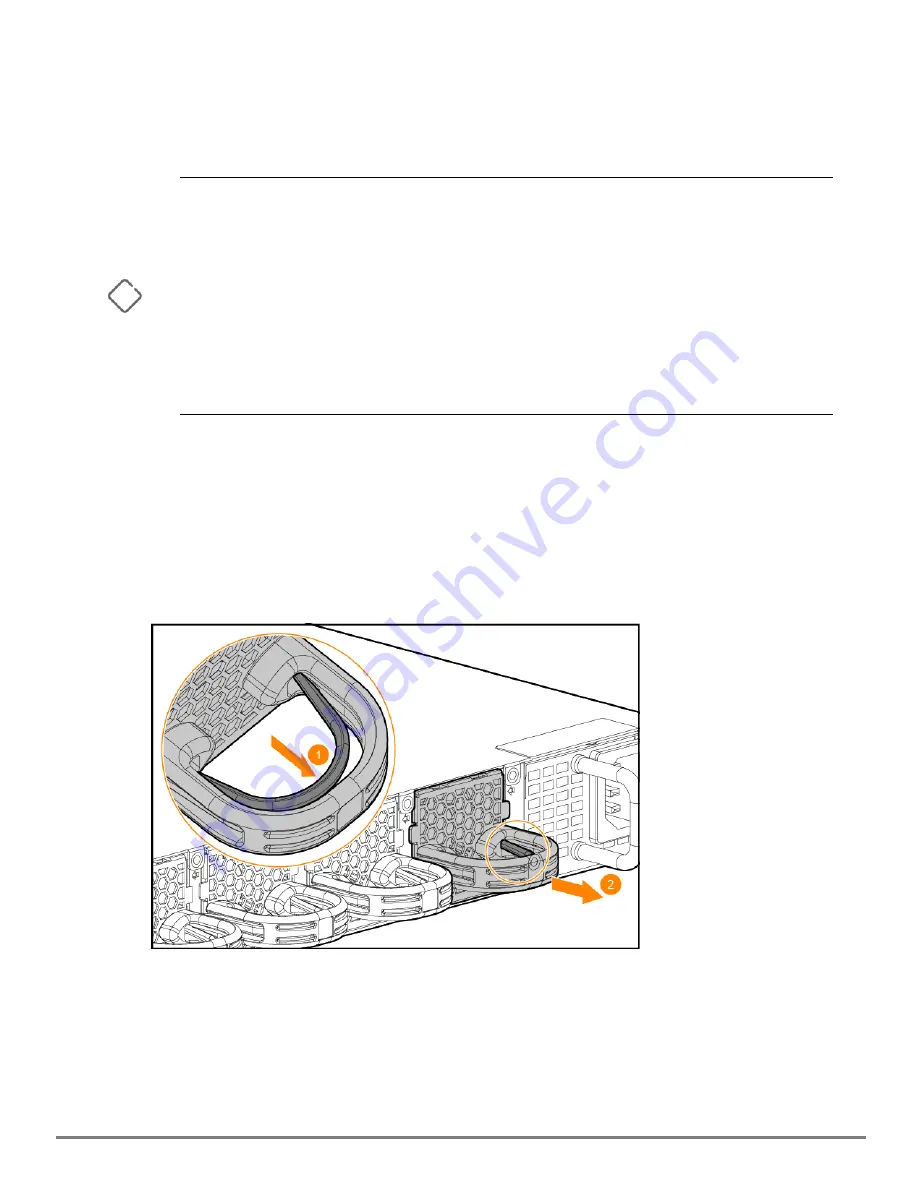
3. Grasping the handle of the fan tray, use the Release Latch to release the locking mechanism and pull
the fan tray straight out to remove it from its slot.
4. Insert the new fan tray fully into the slot so that its face plate is flush with the back face of the switch
and the latch clicks. If the switch is connected to an AC power source, the fan tray should immediately
start running.
Summary of Contents for aruba 9300-32D Series
Page 6: ......
Page 41: ...Replacing Components 41 ...


