


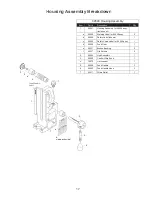
OPERATING INSTRUCTIONS
Always remember that the magnet’s holding power is directly related to the workpiece thickness and surface
condition. Since magnetic attraction diminishes with thinner material or rough surfaces, mechanical clamping
of drill unit to the workpiece should be used when cutting thin material (3/8” or less) or material with uneven
surfaces.
1. Make sure workpiece and bottom of magnet are free of chips, oil, etc.
2. Position drill by sliding it and gently feeding Arbor so that pilot point is touching center of hole to be drilled.
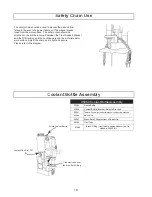
3. Secure unit to workpiece with safety chain.
4. Turn magnet ON by pressing the magnet ON switch.
5. Turn Feed Handle, raising the cutter until the pilot is above the work surface.
6. Make certain that cutter is clear of workpiece and turn motor ON by pressing the motor START switch.
7. Feed Hougen Cutter slowly into workpiece. Only after cutting path is established to a depth of about 1/16”
can full force be applied to feed handles.
8. Ease up on feed pressure
Ease up on feed pressure as cutter starts breaking through.
9. At conclusion of cut, turn motor OFF by pressing motor STOP switch. Turn Feed Handles to raise Arbor
thereby ejecting the slug if it hasn’t already fallen free.
10. Turn magnet OFF by pressing the magnet OFF switch.
11.
Disconnect from power source.
12. If necessary, remove chips from cutter and magnet, preferably wearing leather work gloves and/or with pliers.
Disconnect safety chain and you are ready to move unit to new drilling position.
6
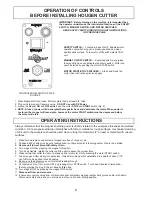
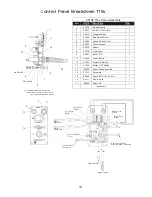
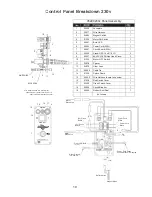
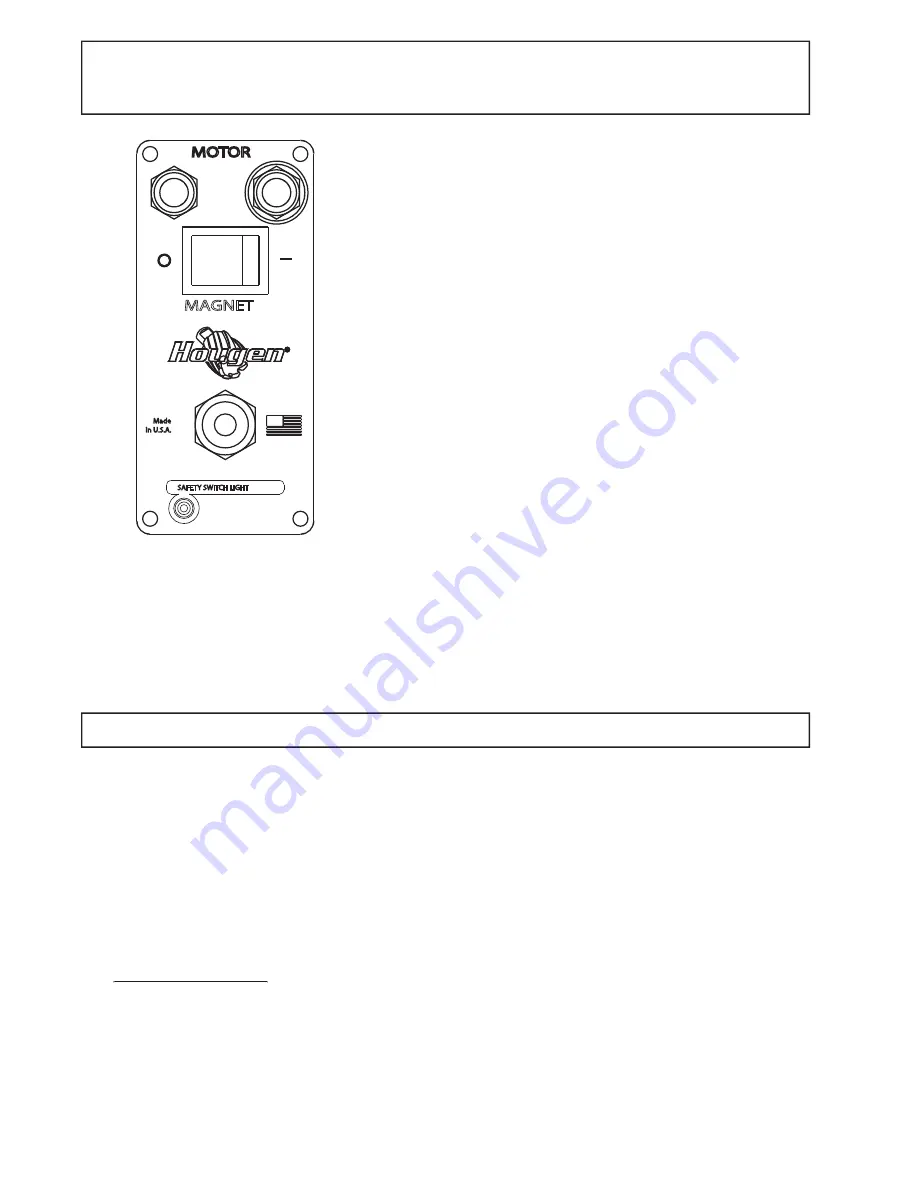
OPERATION OF CONTROLS
BEFORE INSTALLING HOUGEN CUTTER
IMPORTANT: Before turning on the machine, it is important that
the operator understands the interrelated functions of the SAFETY
SWITCH, MAGNET SWITCH, AND MOTOR SWITCHES.
READ SAFETY SWITCH INDICATOR LIGHT INSTRUCTIONS
ON PREVIOUS PAGE.
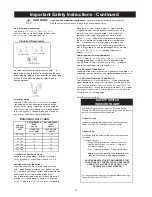
CONTROL PANEL SWITCH PLATE
FIGURE 2
1. Place Magnetic Drill on clean, fl at steel plate that is at least 3/8” thick.
2. Plug unit into proper AC power source.
DO NOT use with DC Power.
3. Locate the Magnet
ON
and
OFF switch
and the motor
STOP
and
START
switch (Fig. 2).
4.
NOTE: A loss of power will de-energize the magnetic base and deactivate the motor. When power is
restored, the magnet will reenergize, however, the motor START switch must be depressed before
the motor will start.
SAFETY SWITCH
— Located in base of drill. Enables motor
operation only when magnet is properly seated on a clean
and fl at work surface. Turns motor off if switch detects lift of
unit.
MAGNET ON/OFF SWITCH
— Energizes and De-energizes
the magnetic base and activates the safety switch. Motor can
now be started by pushing the motor START switch.
MOTOR START/STOP SWITCHES
— Starts and stops the
motor (See instructions previous page).
������
�����


