5
Operating Instructions
1.1
2.2
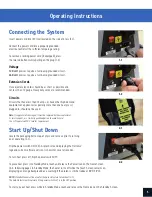
Insert power cord into IEC Inlet located on the side of press (1.1).
Connect the power cord into a properly grounded
electrical outlet with a sufficient amperage rating.
To remove a locking power cord (if equipped), press
the two red buttons while pulling on the plug (1.2).
Voltage
120 volt
presses require a full 6-amp grounded circuit.
240 volt
presses require a full 3-amp grounded circuit.
Extension Cords
If used, extension cords should be as short as possible and
not less than 12 gauge. Heavy duty cords are recommended.
Circuits
Circuits that have less than 10 amps, or have other high demand
equipment or appliances (especially more than one heat press)
plugged in, should not be used.
Note:
If supply cord is damaged, it must be replaced by the manufacturer,
its service agent, or a similarly qualified person to avoid hazard.
Use SJT type rated 300 V cord for replacement.
Connecting the System
Locate the packaging bolt on top of press and remove prior to turning
on or operating (2.1).
Flip the power switch ON (2.2). A splash screen displaying the Hotronix
®
logo and current software version is shown for several seconds.
To turn heat press off, flip the power switch OFF.
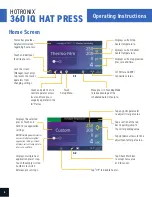
To place heat press into Standby Mode, touch and release the Power icon on the Home Screen
(3.2 - following page). In Standby Mode, the heater turns off while the Touch Screen remains on,
displaying an orange background as a warning if the platen is still hot (above 100°F/38°C).
NOTE:
Standby Mode must be used for the Auto On feature to function (10.1).
The Auto On feature will not work if the power switch (2.2) is in the OFF position.
To start up your heat press while in Standby Mode, touch and release the Home icon on the Standby Screen.
Start Up/Shut Down
1.2
2.1
Summary of Contents for 360 IQ HAT PRESS
Page 1: ...OPERATOR S MANUAL 360 IQ HAT PRESS ...
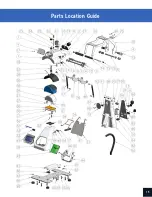
Page 15: ...Parts Location Guide 15 Parts Location Guide ...
Page 16: ......


