background image

14

Fabric

Programme 

Dry Load 

Programme 

Timer Setting 

Type

Weight

Selector Setting

(approx. mins)

Spin

Heat

Iron Dry

Full Dry

Natural

B, C, D & E

2.3kg max.

Long

High

45

60

1.1kg

Long

High

35

50

Synthetic

F, G & H

2kg max.

Short

Low

80

90

0.9kg

Short

Low

45

60

IMPORTANT INFORMATION: A 10 minute ‘Cool Tumble’ phase at the end of each drying

cycle allows fabrics to gently cool down, minimising creasing. 

All fabrics contain a little natural moisture even when ‘dry’, this should not be lost if the

clothes are to remain soft and fluffy. If clothes are subjected to extreme drying they tend to

wrinkle, and consequently need more ironing than usual. As clothes feel damper when

warm, allow for this when removing items before the ‘Cool Tumble’ phase is complete.

Removal of fluff

After you have dried a particularly ‘fluffy’ load or if you have used the appliance as a

dryer only, you MUST, after the dry load has been removed, set your appliance to rinse

and spin. This removes the fluff out of the pipes. 

Note: This appliance does not have a filter. 

WARNINGS

Do not tumble dry

woollens.

If using a dos ing ball 

for wash programme,

remove before using a 

dry programme.

Do not remove laundry 

from the appliance 

before the ‘Cool 

Tumble’ phase, as the 

clothes, drum and door

bowl will be very hot.

Choosing a Dry Programme

DRYING
WEIGHT
LOADS

Two examples of  

typical loads for drying

different types of fabric

COTTON 

1 Bath Towel

4 Shirts

5 Blouses

1 Set of Pyjamas

= 2.3kg

SYNTHETIC

2 Children’s Dresses

2 Shirts

4 Blouses

1 Set of Pyjamas

= 2kg

Items Not Suitable for
Tumble Drying

Garments with the ITCL code -        

DO NOT TUMBLE DRY 

Woollens.

Large bulky items eg. quilts, bedspreads 

pillows etc... expand when dry, preventing 

air flow through the appliance.

Items containing plastic film, foam rubber 

or rubber like materials eg. pillows, 

cushions, PVC rainwear or inflammable 

articles which contain inflammable 

substances eg. towels contaminated with 

hair lacquer.

Fibreglass (eg. some types of curtains).

Items which have been dry cleaned.

Drying Tips

Reduce the drying time of 

handwashed laundry by selecting 

a suitable spin only option from 

programme ‘G’ (see page 13) 

before drying.  

When drying bedspreads, single 

blankets etc... we recommend 

that you remove, shake and 

reload during the cycle to ensure 

faster and more even drying.

Starched articles should be dried 

together to avoid distribution of 

starch onto non-starched items. 

Be careful not to over dry.

Summary of Contents for Ultima WD71

Page 1: ...al For Model WD71 ULTIMA Congratulations on the purchase of your new Ultima Washer Dryer IMPORTANT INFORMATION Please read this instruction book thoroughly before installing and using your appliance for the first time ...

Page 2: ... Earth Blue Neutral Brown Live If you change the plug the colour of wires in the mains lead may not correspond with the colour of the markings identifying terminals in the plug You should therefore wire it as shown Fig 1 Changing the Mains Lead A special lead can be ordered from Hotpoint Service UK 08709 066 066 or Republic of Ireland 1850 302 200 If you have damaged the existing lead or require a...

Page 3: ...spensing Liquid Detergent Dispensing Fabric Conditioner Using a Dosing Ball 18 Cleaning Maintenance Wash 19 Troubleshooting 20 Error Messages 21 Hotpoint After Sales Service 22 Hotpoint Guarantee Guarantee Terms Conditions 23 Key Contacts Back Page Retention of this Instruction Manual Keep this instruction manual in a handy place for reference It contains important details on the safe and proper u...

Page 4: ...ient space is allowed for the appliance The dimensions should be a minimum of 600 mm wide 600 mm deep and 900 mm high Ensure the electrical socket and water taps are easily accessible and that the water supply can be isolated if necessary Follow these 5 steps for a trouble free installation 1 Choose a Location 2 Remove Transit Brackets 3 Connect to the Water Supply 4 Connect to a Drainage System 5...

Page 5: ...ay be charged for a service call if a problem with your appliance is caused by incorrect installation or misuse 2 Remove Transit Brackets Your appliance is fitted with internal transit brackets Fig 1 which prevents damage to the appliance during transit Remove parts Fig 2 following the instructions below Note It is normal for the door seal to look creased it will not affect its use Front Transit B...

Page 6: ...et valve marked H Fig 2 and angled end of blue hose to white plastic inlet valve marked C at the back of the appliance 5 Hand tighten connectors sufficiently to ensure water does not leak from the hose connections 6 Turn on water supply taps and check for leaks from the connectors In the event of a leak turn off supply tap remove connector and check sealing washer is in place Refit connector and t...

Page 7: ...is must only be done when the machine is upright Release locking rings on the two front feet Screw feet in or out until appliance is standing firm and level Ensure all feet are in firm contact with the floor and the machine is not leaning forward Tighten the locking rings on the front feet to the underside of the cabinet Note Your appliance may become noisy or move about the floor if it has not be...

Page 8: ...ime Delay Button 4 Cancel Button 5 Optional Wash Dry Feature Buttons 6 Wash Programme Buttons 7 Door Handle Release Button 8 Detergent Fabric Conditioner Drawer 9 Adjustable Feet Back 10 Rating Plate 11 Hot Water Inlet Point and supplied Hose Red or Grey 12 Cold Water Inlet Point and supplied Hose Blue 13 Mains Cable 14 Drainage Hose 15 Retaining Flaps 16 Hooked End Support 8 9 1 10 11 12 ...

Page 9: ... Care Takes care of your laundry by monitoring your machine s performance Prevents your machine spinning with an uneven load and reports any specific problems on the Infobubble display Temperature Sensed Fill Makes the best use of the existing hot water supply saving energy time and money Auto Creasecare Reduces creasing on any wash programme by gradually reducing the water temperature towards the...

Page 10: ...ges 15 16 you will hear a beep and the Infobubble will display the selection Select wash programme page 12 you will hear a beep and the Infobubble will display the programme information 5 4 6 7 Press START the door will lock and the symbol will appear in the Infobubble throughout the wash dry programme 1 2 minutes after completion of the wash programme the symbol will disappear and the door can be...

Page 11: ...n 2 3 WARNINGS If your appliance is not permanently plumbed in turn on the cold water supply to the appliance and hook the drain hose over the sink to enable the condensing action to work The dryer is intended for use only where water is used for the cleaning process Be careful not to touch the drum at the top as this area gets hot during drying On no account should liquid fabric conditioner be ad...

Page 12: ...0 140 1200rpm without special finishes Colourfast cotton linen or viscose without special finishes 60 4 5kg 120 140 1200rpm Non colourfast cotton linen 40 4 5kg 70 80 1200rpm viscose Coloured nylon polyester acrylic cotton mixtures cotton or viscose with special finishes 50 3kg 60 70 900rpm eg drip dry coloured polyester cotton mixtures Acrylics acetates tri acetate blends of these fabrics with 40...

Page 13: ...n 1000 Spin for hand washed No Options woollens or as extra spin for programme F x 8 Slow Spin 800 Spin for hand washed delicates as an extra spin for programmes D E G x 9 Note Returns Infobubble display to Silks 30 C Gentle Wash Rinse Spin Options for Programme G Washcare Tips Before washing laundry Pre treat stains Close zips tie belts strings etc and press studs to prevent tangling Remove paper...

Page 14: ...mme remove before using a dry programme Do not remove laundry from the appliance before the Cool Tumble phase as the clothes drum and door bowl will be very hot Choosing a Dry Programme DRYING WEIGHT LOADS Two examples of typical loads for drying different types of fabric COTTON 1 Bath Towel 4 Shirts 5 Blouses 1 Set of Pyjamas 2 3kg SYNTHETIC 2 Children s Dresses 2 Shirts 4 Blouses 1 Set of Pyjama...

Page 15: ...se water Note To spin press the Rinse Hold button again the Infobubble display will remind you to do this or select the buzzer x 2 Fabric Care Protects delicates with a gentle wash automatic rinse hold and 800rpm spin x 3 Cancel Bioprofile Time Saver Press Button Action Infobubble Display x 1 Bioprofile Increases water temperature at stages to ensure maximum wash performance from your biological d...

Page 16: ...me Delay Press Button Action Infobubble Display x 1 Hold Buzzer Lets you know when the programme has finished or when Rinse Hold is activated Time Delay Gives you the option to delay your wash programme from 1 to 18 hours Note When the button is released the programme will start automatically and the Infobubble will display Starting Programme Variable Rinse Not available with programme F Press But...

Page 17: ...d water than in soft water areas to obtain the same wash results Note Hotpoint recommend dispensing detergent from the drawer to achieve the best wash results Index 1 Drawer Latch 2 Button 3 Main Wash Indicator position for Powder 4 Liquid or powder detergent compartment pre set to dispense powder only 5 Prewash detergent 6 Fabric conditioner compartment 17 IMPORTANT INFORMATION The Main Wash Indi...

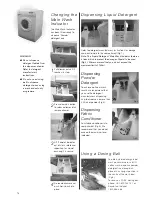
Page 18: ...for dosage and pour liquid into the compartment Fig 1 Note The Liquid Detergent Main Wash Indicator features 3 lines which represent the dosage of liquid to be used Fig 2 We recommend that you do not exceed the maximum limit of 150ml Using a Dosing Ball Changing the Main Wash Indicator Pull drawer out until it reaches its stop Press down on button to release drawer latch remove drawer Lift Powder ...

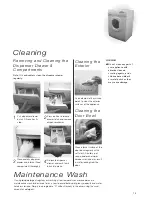
Page 19: ...lace WARNING Do not clean any part of your appliance with abrasive cleaners scouring agents acids chlorine based bleach or metal polish as they may cause damage Pull dispenser drawer out until it reaches its stop Press button to release drawer latch and remove dispenser drawer Clean and dry dispenser drawer and internal fixed compartment thoroughly 1 2 3 4 Cleaning Maintenance Wash If using liquid...

Page 20: ...ing to know your Appliance pages 8 9 Approximately 1 2 minutes after completion of a programme the symbol will disappear from the Infobubble display and the door can be opened The door release button is stuck Switch OFF the mains On Off button wait 1 2 minutes and apply light pressure to the door to release The dispenser drawer will not close properly Is the drawer clogged with detergent See Clean...

Page 21: ...mended minimum height and that it is not blocked see Connect to a Drainage System on page 7 If it still not working call for a Service Engineer Extremely high water level Disconnect or turn off the water supply and ensure that the water level does not rise anymore Call for a Service Engineer Door not closed properly see Interlocking Door System on page 9 A motor drive problem has Try running the p...

Page 22: ...of any parts necessary Kitchen Cover An annual payment covers repairs for all your Hotpoint appliances which are less than ten years old Additional Hotpoint appliances purchased after you have joined Hotpoint Kitchen Cover are automatically included during the annual period of cover without further charge Easy Payment Methods We offer a number of payment methods cheque credit card switch cash or b...

Page 23: ... adjacent units when carrying out repairs service work but in locations where the Engineer advises you that it will be impossible to move appliances without risk of damage he will only proceed with your approval that no liability is accepted Guarantee Terms Conditions Your Guarantee is only applicable in the United Kingdom or Republic of Ireland and is subject to provision s that your appliance Ha...

Page 24: ...Order Hotline UK 08709 077 077 Republic of Ireland 01 842 6836 Extended Warranty To join UK 08709 088 088 Republic of Ireland 1850 502 200 For further product information 08701 50 60 70 All Hotpoint Services are offered as an extra benefit and do not affect your statutory rights General Domestic Appliances Limited Morley Way Peterborough PE2 9JB Printed by SIMLEX FOUR ASHES WOLVERHAMPTON Part No 0...

Reviews: