background image

How to change color panels

If you are redecorating, you can

Note: Other color panels are

change your dishwasher’s front

available for your dishwasher.

panels to match or blend with your

Check the color you want on the

new colors.

order form below and mail it to us.

The panels are held in place by the

Wood panel trim kit GPF 40

door trim and the trim on the 

contains trim and instructions for

below the door. Each side of 
panel is a different color. Or you
can paint a panel with the color of
your own choice.

adding a decorative wood door
panel and lower access panel to
match kitchen cabinets. Use the
order form below to order this kit.

Do not operate the dishwasher
while changing panels or when
lower access panel is removed.

How to change the door panel:

1. Take out trim screws on either

side of the dishwasher door.
Remove the side trim.

2. Slide the door panel out.
(Careful—edges may be sharp.)

3. Turn the door panel around and
put the color you want in front.

4. Replace the door panel, side
trim 

 screws.

How to change the lower panel:

1. Remove panel attachment screws

2. Remove the entire panel.

3. Take out screws and remove the
top trim.

4. Slide the door panel out.

5. Turn the panel around 

 put

the 

 you want in front.

6. Replace the lower panel, top
trim and screws.

7. Replace the entire panel and
attachment screws.

15


ORDER FORM

Use this form to order, without charge, 

your choice of

color panel not supplied with your dishwasher 

or

wood panel trim kit.

Please mark 

 one box.

 White/Almond


 GPF 


 GPF 

Kit GPF 40


FOLD HERE

Name:

Address:

City:

State:

Zip Code:

Model No.:

Serial No.:

Date Purchased:

Summary of Contents for HDA969

Page 1: ...19 Safety Instructions 3 Cycle Features 4 5 User Maintenance Instructions 11 Detergent Detergent Guide 6 7 Warranty Back Cover Dispenser CUPS 7 Water Temperature 6 Energy Saving Tips 2 Winter Storage...

Page 2: ...imized if you follow these suggestions Operate dishwasher only when it s full Let the dishes accumulate in dishwasher When you put in only a partial load use the RINSE HOLD cycle to rinse off heavy so...

Page 3: ...the risk of cut type injuries Do not touch the heating element during or immediately after use Do not operate your dishwasher unless all enclosure panels are properly in place Do not tamper with cont...

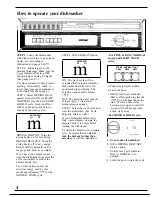
Page 4: ...proximately 10 o for the NORMAL WASH cycle STEP 4 WATER HEAT Option WATER HEAT ON OFF m ON The wash cycle will be extended for 9 minutes while the dishwasher heats the water for good washing and dryin...

Page 5: ...ou II hear occasional c1 icking During the drying period sounds The motor stops Soft food disposer shredding Water vapor comes through the action vent by the door latch during Drain valve opening to p...

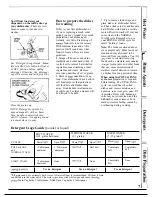
Page 6: ...ecommended Rinse agents come in either liquid or solid form Your dishwasher s dispenser uses the liquid form How to fill the rinse agent dispenser Unscrew the cap Add the liquid rinse agent until it j...

Page 7: ...fore soil has a chance to dry and become hard Dishes with dried on soil are more difficult to wash and may not come clean in the NORMAL WASH cycle Remember to use your RINSE HOLD cycle for small holdi...

Page 8: ...water out over the dishes to wash the move easily Don t let the glasses touch each other items in the upper rack A spray arm in the top washes down also Make sure to place tall items to the outside s...

Page 9: ...nd racks along the edge lower rack Put flatware in the removable basket with handles up to protect your hands Mix knives forks and spoons so they Take out anything that may fall or extend through the...

Page 10: ...tely Salty or acid foods can stain if left on Rinse if not washing immediately Salty or acid foods can stain if left on Dry detergent can cause diff icult to remove black spots Place in back section o...

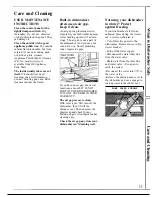
Page 11: ...powder Scouring pads and harsh cleaners can mar the finish If you have an air gap check it at least once a month IT IS NOT PART OF YOUR DISHWASHER IT IS NOT COVERED IN YOUR WARRANTY The air gap is eas...

Page 12: ...dishwasher Plugged air gap See page 11 Improper rack loading See pages 8 and 9 41uminum utensils often leave marks when they rub against dishes Remove marks with a mild abrasive cleanser Water may no...

Page 13: ...from the dishwasher 2 Do not add detergent 3 Select POTS PANS cycle 4 Start the dishwasher and allow to run for 15 to 20 minutes The dishwasher will now be in the main wash 5 Then open the door and p...

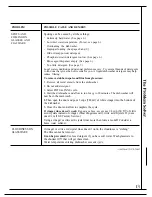
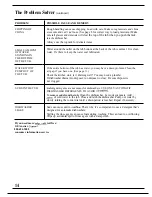
Page 14: ...blem Clean the air gap if you have one See page 11 Check the kitchen sink Is it draining well You may need a plumber If dishwasher drains into disposer run disposer to clear Be sure disposer is not cl...

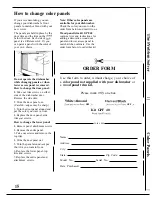
Page 15: ...hange the door panel 1 Take out trim screws on either side of the dishwasher door Remove the side trim 2 Slide the door panel out Careful edges may be sharp 3 Turn the door panel around and put the co...

Page 16: ...1 1 1 1 1 I 1 1 1 I 1 1 1 I 1 I 1 1 1 1 1 1 1 I I 1 1 1 1 1 1 1 t 1 1 1 1 Nanle Address City State Zip 1 I 1 PLACE STAMP HERE 1 1 1 1 1 1 8 Hotpoint c o Dri View Mfg 4706 Allmond Ave Louisville KY 40...

Page 17: ...Notes 17...

Page 18: ...Notes 18...

Page 19: ...their on appliances can have neecled parts or accessories sent direcdy to their home free of shipping charge Our parts system provides access to over 47 000 enuine Renewal Parts and afl are filly war...

Page 20: ...FACTORY SERVICE or HOTPOINT CUSTOMER CARE SERVICE WHAT IS NOT COVERED Service trips to your home to Replacement of house fuses or teach you how to use the product resetting of circuit breakers Read yo...

Reviews: