background image

HOTPOINT DISHWASHER - Instructions for installation and use

D

ISHWASHER

If the power

socket to which

the appliance is

connected is not

compatible with

the plug, replace

it with a suitable

plug rather than

using adapters or

multiple plugs as

these could cause

overheating or

burns.

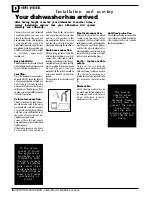
Installation and moving

After having bought or moved your dishwasher to another home, a

correct installation ensures that your dishwasher will operate

smoothly and efficiently.

period of time, let the water run to

make sure that the water is clear

and free of impurities. If this

precaution is not taken, there is a

risk that the water inlet can get

blocked and damage the appliance.

Drain hose connection.

Fit the drain pipe into a drain line

with a minimum diameter of 4 cm

or place it over the sink. Avoid re-

stricting or bending it. Use the spe-

cial plastic elbow provided (see fig-

ure) to position it in the best possi-

ble way. The part of the pipe

marked with the letter A should be

between 40 and 100 cm above the

ground.

The pipe should not be immersed

in water.

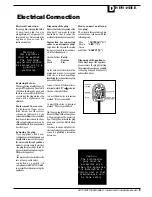
Electrical connection.

First of all, check that the mains

voltage and frequency values

correspond to those stated on the

rating plate located on the stainless

steel inner door of the appliance

and that the electrical system to

which the dishwasher is connected

is sized for the maximum current

indicated on said rating plate.

Earth: indispensable

safety.

Only now can you plug the

appliance into a socket provided

with an efficient earth connection

(the system's earthing is a

guarantee of safety provided for by

law, make sure your system has

it).

Mains cable.

Check the mains cable wire on a

regular basis; if it is damaged, we

recommend you have it replaced

by an authorised technical

Assistance service centre.

Choose where you want to install

your dishwasher, you can even

place it so that its sides or back

panel are side by side with furniture

or up against the wall. The

dishwasher is provided with water

supply and drain hoses, which can

be directed towards the left or right

to facilitate appropriate

installation.

Easy to build-in

This dishwasher model can be built

under a single worktop (please read

the relevant instruction sheet).

Levelling.

Once the appliance is positioned,

adjust the feet by screwing them in

or out depending on how high you

want it and to level it so that it is

horizontal. Make sure that it is not

inclined more than 2 degrees. If the

appliance is level, it will help ensure

its correct operation.

Cold water connection.

This electric household appliance

should be connected to the water

mains using the cold water supply

hose provided with the appliance

only. Do not use a different hose. In

the event of replacements, use

original spare parts only.

Connect the cold water supply

hose making sure that it is fastened

tightly in place.

If the water pipes are new or have

not been used for an extended

Your dishwasher has arrived

A

The special

plastic elbow

should be

fastened firmly

onto the wall to

prevent the drain

hose from

moving and

allowing water to

spill outside the

drain.

Anti-flood protection

Your dishwasher is provided with a

special system which blocks the

water supply in the event of leaks

inside the appliance.

Summary of Contents for DC 28

Page 1: ...DC 28 Instruction for Installation and Use D I S H W A S H E R To the User You must read the instruction prior to using the appliance and then retain them for future reference...

Page 2: ...ageswillhelpyouthroughallthewashphases 5 Salt an important ally p 7 Usingtherightsaltandintherightquantitywillhelpyoumaintainyour dishwasherintopcondition towashbetterandtoavoidpossibledamage causedby...

Page 3: ...r dishwasher together I Bottom spray arm J Salt container cap K Washing filter L Detergent and rinse aid dispenser Technical Characteristics Learn to get to know the parts which make up your dishwashe...

Page 4: ...isthe onewithsideinserts theninsert theteaspoonsonebyoneintothe slots seefigureA Itisbestifyouplacelongerutensils horizontallyatthefrontoftheupper rack Afterloadingthedishes remember to check that the...

Page 5: ...A thuscuttingofftheelec tricitysupply Turnoffthewatertap Waitafewminutesbeforeunload ingthedishes theyareveryhot If you wait a little while they dry betterthankstothesteam Emptythelowerrackfirst There...

Page 6: ...itcloses Only use specific dishwasher detergents Pour the detergent into the dispenser on the inside of the door Before the wash cycle starts Useful tips You can choose from six different positions It...

Page 7: ...ZLWK FROG ZDWHU 3UH ZDVK ZLWK KRW ZDWHU DW WHQGHG ZDVK DW 5LQVH ZLWK FROG ZDWHU 5LQVH ZLWK KRW ZDWHU DW U LQJ JU 1RUPDO TXD6HQVRU 6 VWHP 1RUPDOO GLUW SDQV DQG GLVKHV 6WDQGDUG GDLO F FOH 3UH ZDVKHV ZLW...

Page 8: ...Your dishwasher is fitted with a water softener which uses special salt to get rid of limescale in the water Using your electric household appliances wisely helps you make savings and is good for the...

Page 9: ...entearthconnection the system s earthing is a guaranteeofsafetyprovidedforby law makesureyoursystemhas it Mains cable Checkthemainscablewireona regularbasis ifitisdamaged we recommendyouhaveitreplaced...

Page 10: ...t cannot be accidentallyinsertedintoasocket Instruction for connecting cable to an altenative plug Important thewiresinthemains leadarecolouredinaccordance withthefollowingcode Green Yellow Earth Blue...

Page 11: ...water in your home beencutoff Is the pressure of the water supplysufficient Isthehosebent Isthefilteronthewatersupply hoseblocked Isthedishwasherdooropen The dishes are not clean Haveyouputtherightam...

Page 12: ...er arms Keep your dishwasher in shape Respecting these few rules ensures you will always have a reliable work companion by your side Unplug the appliance Beforecarryingoutanycleaning ormaintenanceonth...

Page 13: ...microwaves selected integrated appliances and cooker hoods which have a one year guarantee provided that they are fitted by a Hotpoint engineer Guarantee terms and conditions Your guarantee is only a...

Page 14: ...trained engineers All repairs include a parts and labour guarantee for 12 months from the date of the repair If you require any information or have any questions about your appliance our operators are...

Page 15: ...nformation Desk UK 08709 066 066 Open 8 to 8 Mon Fri 8 to 6 Sat 10 to 4 Sun Bank Holidays www theservicecentre co uk Republic of Ireland 1850 302 200 Note Our operators will require the following info...

Page 16: ...11 2002 195036342 00 Xerox Business Services DocuTech...

Reviews: