background image

22

GB

PLEASE PHONE US TO REGISTER YOUR APPLIANCE  AND ACTIVATE YOUR PARTS GUARANTEE ON 08448 24 24 24

Care and Cleaning

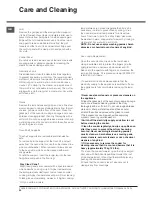
Grill
Remove the grill pan and the wire grid food support, 
it is best to wash these items immediately after use to 
prevent stains from being burnt on when used again. 
Wipe out the Grill compartment, use a fine steel wool 
soap pad to remove stubborn stains from the grill 
runners and the floor of the compartment. Wipe over 
the control panel with a damp cloth and polish with a 
dry cloth.

Control Panel
Do not use cream cleaners, oven cleaners or aerosols, 
scouring pads or abrasive powder for cleaning the 
plastic knobs as damage will occur.

Decorative Trims
It is advisable to clean the decorative trims regularly 
to prevent any build up of soiling. The recommended 
method of cleaning is to wipe over the trims with a soft 
cloth wrung out in warm water or mild non-abrasive 
cleaner. (If in doubt try the cleaner on a small area of 
trim which is not noticeable in normal use). Then, after 
wiping with a cloth wrung out in clear water, dry with a 
soft clean cloth.

Ovens
Remove the rod shelves and grill pan. Use a fine steel 
wool soap pad to remove stubborn stains from the rod 
shelves, grill pan and the floor of the oven. Clean the 
glass part of the oven door using a sponge and a non-
abrasive cleaning product, then dry thoroughly with a 
soft cloth. Do not use rough abrasive material or sharp 
metal scrapers as these could scratch the surface and 
cause the glass to crack.

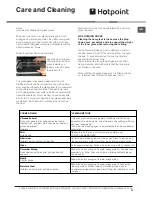
Oven Shelf  Supports

The shelf supports are removable and dishwasher 
safe. 
To remove hold the support at the front, lift  and pull 
away from the oven side, this can then be cleaned in a 
sink or a dishwasher. When removed it allows access 
to the oven side, which can be cleaned with warm 
soapy water.
To refit the support, insert the longer leg into the rear 
fixing hole and push in the front leg.

‚Stay Clean’ Panel*

‚Stay Clean’ panels are covered with a special enamel 
which absorbs cooking soils. At higher temperatures 
the soiling is slowly destroyed. In most cases normal 
cooking at higher temperatures will permit this cleaning 
to take place automatically. However, if higher cooking 

temperatures are not used regularly then it may be 
necessary, in order to prevent heavy soiling, to run 
the oven at maximum temperature for at least two 
hours, from time to time. The ‚Stay Clean’ panel can 
be washed in warm soapy water followed by rinsing in 
clear water. Dry well with a soft cloth.

NOTE: Do not use enzyme washing powder, harsh 
abrasives or chemical oven cleaners of any kind.

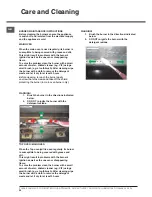
Oven Lamp Replacement

Open the oven door and remove the rod shelves. 
Using a suitable cloth to protect the fingers grip the 
light glass dome, unscrew anti-clockwise and lift. 
Reach into the aperture with fingers, and unscrew the 
lamp anticlockwise. Fit replacement lamp (25W 300°C 
rated SES), refit dome.

! To avoid electric shock please ensure that the 
electricity supply to the appliance is switched off and 
the appliance is fully cold, before removing the lamp 
lens. 

! Never use steam cleaners or pressure cleaners on 
the appliance.
!


Clean the glass part of the oven door using a sponge 

and a non-abrasive cleaning product, then dry 
thoroughly with a soft cloth. Do not use rough abrasive 
material or sharp metal scrapers as these could 
scratch the surface and cause the glass to crack.

!


The accessories can be washed like everyday 

crockery (even in your dishwasher).

! Switch off the electricity supply and allow to cool 
before cleaning the cooker.
! Clean the cooker regularly and wipe up spills soon 
after they occur to prevent them from becoming 
burnt on. Never use biological washing powder, 
caustic cleaners, harsh abrasives, scouring pads, 
steam cleaners, aerosol cleaners or oven chemical 
cleaners of any kind.
! If it is necessary to remove the cooker for 
cleaning, ensure that it is cool and beware that it is 
heavy (approximately 70 kg 155 lbs).
!

 To move the cooker forward, open the top oven/grill 

door and with both hands positioned under the roof 
of the compartment, lift and pull forward. Replace by 
pushing the cooker backwards.

!

 Check that the cooker is level. Take care not to 

damage any floor coverings.

*Only on certain models

Summary of Contents for 60HGP

Page 1: ...4 Main Oven 15 Main Oven Cooking Charts 16 17 Slow Cooking 18 Top Oven 19 Top Oven Cooking Charts 20 21 Care and Cleaning 22 24 Something Wrong with your cooker 25 Disposal of the appliance 26 Guarant...

Page 2: ...e emitted this will cease after a period of use When first using the cooker ensure that the room is well ventilated e g open a window or use an extractor fan and that persons who may be sensitive to t...

Page 3: ...iately above or next to the cooker NEVER fill a deep fat frying pan more than 1 3 full of oil and never use a lid DO NOT LEAVE UNATTENDED WHILE COOKING NEVER place flammable or plastic items on or nea...

Page 4: ...ANCE AND THE FLOOR VERY HOT SURFACES YOU MUST KEEP THE OVEN AND GRILL CAVITIES CLEAN FOOD OR GREASE ON THESE SURFACES COULD CAUSE SMOKE AND POSSIBLY EVEN BURN ATTENTION WHEN USING THE MAIN OVEN YOU MU...

Page 5: ...interest and that of safety to ensure compliance with the law In the UK CORGI registered installers work to safe standards of practice The cooker must also be installed in accordance with BS 6172 Fai...

Page 6: ...ing a bath or shower The cooker must not be installed in a bed sitting room of less than 20m3 When adjusted for use on Butane G30 or Propane G31 the cooker must not be installed in a room or internal...

Page 7: ...hand side of the burner and gently slide the burner off the injector 6 Using a 7mm socket replace the grill injector as appropriate see table on previous page 7 Re assemble the burner and baffle 8 In...

Page 8: ...s follows The wire which is coloured green and yellow must be connected to the terminal in the plug which is marked with the letter E or by the earth symbol or coloured green or green and yellow The w...

Page 9: ...door closed for 10 minutes and check that when the control is turned to mark 1 that the flame reduces 4 Check that with the top oven set to mark 8 the burner ignites and that the flames remain when th...

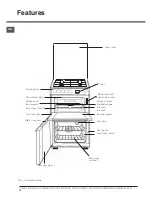
Page 10: ...ndle fixed detachable Top oven rod shelf Inner door glass Oven light Door Switch Stay Clean liners Main oven rod shelf Model number Serial number label Inner door glass Main Oven door Top Oven door St...

Page 11: ...again with the symbol Electronic Ignition for the Gas Hob This device operates when a slight pressure is applied to the button marked with symbol To light a specific burner just press the button while...

Page 12: ...Programming cooking A cooking mode must be selected before programming can take place Programming the cooking duration 1 Press the button several times until the icon and the three digits on the DISPL...

Page 13: ...silvery deposit may appear on the top edge of the pan support fingers See Care and Cleaning section for cleaning information SAFETY REQUIREMENTS FOR DEEP FAT FRYING 1 Never fill chip pans more than on...

Page 14: ...eleased repeat the procedure ensuring the control knob is fully depressed and allowing more time for the safety device to operate For the models with the electronic ignition button press the button an...

Page 15: ...to light the burner again Never place dishes over the burner An odour may be noticed when first using the oven this should cease after a short period of use RELIGHTING THE BURNER In the event of the...

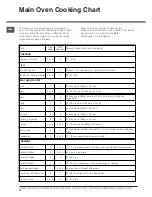
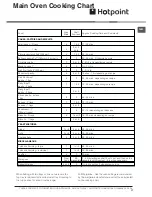
Page 16: ...5 3 25 30 mins MEAT AND POULTRY Veal 5 4 25 mins per lb 450g 25 mins Beef 4 or 5 4 25 30 mins per lb 450g 25 mins Ham 5 4 40 mins per lb 450g covered in foil 40 mins per lb 450g uncovered Lamb 5 4 30...

Page 17: ...3 1 1 hrs Rich Fruit cake 9 230mm 2 3 3 3 hrs Shortcrust pastry 6 2 or 3 15 mins 1 hr depending on recipe Rich Shortcrust pastry 1 tray 5 2 20 40 mins depending on recipe Flaky puff pastry 2 trays 7 1...

Page 18: ...rack over the meat tin to allow good air circulation 5 A meat thermometer should be used when cooking pork joints and poultry The internal temperature of the food should reach at least 88 C 6 This met...

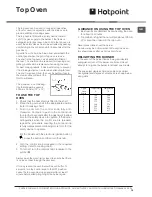
Page 19: ...ds after the gas has lit to allow time for the safety device to operate If the burner extinguishes when the control knob is released repeat the procedure ensuring the control knob is fully depressed a...

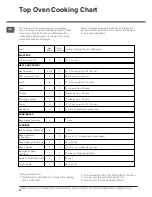
Page 20: ...Mark 8 first before turning back to the required Gas Mark Food Gas Mark Shelf Positions Approx Cooking Time and Comments STARTERS Oily and white fish 5 2 20 30 mins MEAT AND POULTRY Beef medium 4 or...

Page 21: ...mas cake 1 x 205mm 8 2 2 or 3 4 5 hrs depending on recipe Madeira cake 1 x 180mm 7 4 2 1 hr Rich Fruit cake 1 x 180mm 7 2 2 or 3 2 2 hrs Gingerbread 3 2 1 1 hrs Scones 16 per tray 7 2 12 15 mins Short...

Page 22: ...her temperatures the soiling is slowly destroyed In most cases normal cooking at higher temperatures will permit this cleaning to take place automatically However if higher cooking temperatures are no...

Page 23: ...by carefully unhooking the corner clips Take care that the rating label edges are not lifted during cleaning and furthermore that the lettering is not blurred or removed When refitting the glass make...

Page 24: ...gent waste and let it dry for at least 2 hours WARNING 1 Brush the burner in the directions indicated below 2 DO NOT re ignite the burner with the detergent residue TOP OVEN MAIN OVEN When the Top ove...

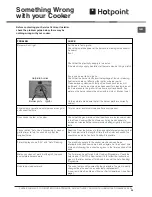
Page 25: ...first time This is normal and should cease after a short period Oven cooks too fast or too slow Check that the gas mark and shelf positions are as recommended in the Oven Cooking Charts However it ma...

Page 26: ...of your product Disposal of old electrical appliances The European Directive 2002 96 EC on Waste Electrical and Electronic Equipment WEEE requires that old household electrical appliances must not be...

Page 27: ...resulting from transportation improper use neglect or interference or as a result of improper installation Replacement of any consumable item or accessory These include but are not limited to plugs c...

Page 28: ...pply a full range of genuine replacement parts as well as accessory products that protect and hygienically clean your appliance to keep it looking good and functioning efficiently throughout its life...

Reviews: