Hotpoint Ariston C3V N17 RU/HA Operating Instructions Manual Download Page 21

GB

21

Switching the appliance off

Disconnect your appliance from the electricity supply
before carrying out any work on it.

!

 Never use steam cleaners or pressure cleaners on the

appliance.

Cleaning the oven

• The stainless steel or enamel-coated external parts

and the rubber seals may be cleaned using a sponge
that has been soaked in lukewarm water and neutral
soap. Use specialised products for the removal of
stubborn stains. After cleaning, rinse and dry
thoroughly. Do not use abrasive powders or corrosive
substances.

• The inside of the oven should ideally be cleaned after

each use, while it is still lukewarm. Use hot water and
detergent, then rinse well and dry with a soft cloth. Do
not use abrasive products.

Clean the glass part of the oven door using a sponge

and a non-abrasive cleaning product, then dry
thoroughly with a soft cloth. Do not use rough
abrasive material or sharp metal scrapers as these
could scratch the surface and cause the glass to
crack.

• The accessories can be washed like everyday

crockery, and are even dishwasher safe.

• Dirt and grease should be removed from the control

panel using a non-abrasive sponge or a soft cloth.

Inspecting the oven seals

Check the door seals around the oven regularly. If the
seals are damaged, please contact your nearest After-
sales Service Centre. We recommend that the oven is
not used until the seals have been replaced.

Replacing the oven light bulb

1. After disconnecting the oven from the
electricity mains, remove the glass lid
covering the lamp socket (

see figure).

2. Remove the light bulb and replace
it with a similar one: voltage 230 V,
wattage 25 W, cap E 14.
3. Replace the lid and reconnect the
oven to the electricity supply.

Cleaning the glass ceramic hob

Cleaning the glass ceramic hob

Cleaning the glass ceramic hob

Cleaning the glass ceramic hob

Cleaning the glass ceramic hob

!

 Do not use abrasive or corrosive detergents (for

example, products in spray cans for cleaning barbecues
and ovens), stain removers, anti-rust products, powder
detergents or sponges with abrasive surfaces: these
may scratch the surface beyond repair.

• It is usually sufficient simply to wash the hob

using a damp sponge and dry it with absorbent
kitchen roll.

• If the hob is particularly dirty, rub it with a special

glass ceramic cleaning product, then rinse well
and dry thoroughly.

• To remove more stubborn dirt, use a suitable

scraper (this is not supplied with the appliance).
Remove spills as soon as possible, without
waiting for the appliance to cool, to avoid
residues forming crusty deposits. You can obtain
excellent results by using a rustproof steel wire
sponge - specifically designed for glass ceramic
surfaces - soaked in soapy water.

• If plastic or sugary substances have accidentally

been melted on the hob, remove them
immediately with the scraper, while the surface is
still hot.

• Once it is clean, the hob may be treated with a

special protective maintenance product: the
invisible film left by this product protects the
surface from drips during cooking. This
maintenance should be carried out while the
appliance is warm (not hot) or cold.

• Always remember to rinse the appliance well with

clean water and dry it thoroughly: residues can
become encrusted during subsequent cooking
processes.

G

lass

 c

erami

c h

o

b

c

leaners

Av

aila

b

le

 f

rom

W

indow


scraper

 R

a

z

or


blade

scrapers

DIY S

tores

R

eplacement


blades

DIY S

tores,

supermarkets,

chemists

CO

LL

O


luneta

H

O

B BRITE

H

ob


Clean

SWISS

C

LEANER

B

oots,


Co

-

op


stores,

department


stores,

 R

egional

E

lectricit

Compan

shops,

supermarkets

Cleaning stainless steel

Stainless steel can be marked by hard water that has
been left on the surface for a long time, or by aggressive
detergents that contain phosphorus. We recommend
that the steel surfaces are rinsed well then dried
thoroughly.

Assistance

Please have the following information handy:
• The appliance model (Mod.).
• The serial number (S/N).
This information can be found on the data plate
located on the appliance and/or on the packaging.

Care and maintenance

Summary of Contents for C3V N17 RU/HA

Page 1: ...еклокерамическая варочная панель 8 Включение и выключение нагревательных зон Нагревательные зоны Предосторожности и рекомендации 9 Общие требования к безопасности Утилизация Экономия электроэнергии и охрана окружающеи среды Техническое обслуживание и уход 10 Отключение электропитания Чистка духового шкафа Замена лампочки в духовом шкафу Чистка стеклокерамическои варочнои панели Техническое обслужи...

Page 2: ... должны находиться позади плиты или на расстоянии менее 200 мм от ее бо ковых сторон Вытяжки устанавливаются согласно их инструкци ям по установке Выравнивание Плитаснабжена регулируемыми ножками которые служат для ее выравнивания При необхо димости ножки вкручиваются в отверстия по углам основания плиты см рис Плита комплектуется надстав ными опорами которые уста навливаются в отверстия под основ...

Page 3: ...есу до 01 01 2011 Россия 129223 Москва Проспект Мира ВВЦ пав 46 с 01 01 2011 Россия 127018 Москва ул Двинцев дом 12 корп 1 Электрическая плита Подсоединение питающего кабеля к сети Оснастите питающий кабель стандартной вилкой соответствующей нагрузке указанной в табличке технических данных оборудования см справа Оборудование может напрямую подключаться к сети В этом случае должен быть установлен м...

Page 4: ...ÐÀÌÌÛ Èíäèêàòîð ÒÅÐÌÎÑÒÀÒÀ Внешний вид Панель управления Решетка духовки 5 4 3 2 1 Регулируемые ножки Регулируемые ножки Позиции уровни духовки Направляющие для решетки противня поддона Стеклокерамическая поверхность Противень поддон Описание оборудования Только для некоторых модификаций моделей Панель управления ...

Page 5: ... от 0 Освещение остается включенным пока работает ду ховка При выборе рукояткой позиции освещение будет включено без активирования нагревательных элементов Программы приготовления Для всех программ можно задать температуру от 50 C и MAX кроме программы ГРИЛЬ для которои рекомендуется установить только режим МАХ a a a a a Программа СТАТИЧЕСКАЯ ДУХОВКА Включаются два нагревательных элемента нижнии и...

Page 6: ...оцарелла Мы заботимся о своих покупателях и стараемся сделать сервисное обслуживание наиболее качественным Мы постоянно совершенствуем наши продукты чтобы сделать Ваше общение с техникой простым и приятным Уход за техникой Продлите срок эксплуатации и снизьте вероятность поломки техники Воспользуйтесь профессиональными средствами для ухода за техникой от Indesit Professional для наиболее простого ...

Page 7: ...5 15 10 10 10 10 10 200 200 200 180 200 180 180 180 180 180 180 180 220 180 180 180 160 170 45 50 30 35 30 35 60 70 80 90 90 100 70 80 70 80 70 80 30 40 30 35 25 30 15 20 10 15 25 30 30 35 25 30 25 30 Нижний нагревательный элемент Подрумянивание блюд в конце приготовления Верхний нагревательный элемент Морская камбала и каракатица Шашлык из кальмаров и креветок Филе трески Запеченные овощи 1 1 1 1...

Page 8: ...ости Вращайте соответствующую рукоятку по часовой стрелке к позициям от 1 до 6 Позиция рукоятки Обычная или быстрая конфорка 0 Выключено 1 Приготовление овощей рыбы 2 Варка картофеля на пару супов гороха фасоли 3 Тушение больших объемов пищи приготовление мясных бульонов с овощами 4 Жарка умеренный нагрев 5 Жарка нагрев выше среднего 6 Для быстрой поджарки и кипячения Практические советы по исполь...

Page 9: ...удование от электросети не тяните за питающий кабель чтобы вынуть вилку из розетки беритесь за вилку Перед любыми работами по чистке и обслуживанию оборудования обязательно отключите его от электро сети вынув вилку из розетки В случае неисправности ни при каких обстоятельствах не пытайтесь починить оборудование самостоятельно Ремонт выполненный неквалифицированными лица ми может безвозвратно повре...

Page 10: ...е средства порошки или абразивные губки они могут безвозвратно повредить поцарапать поверхность Обычно достаточно просто протереть рабочую поверхность влажной губкой и вытереть бумажным кухонным полотенцем Если рабочая поверхность сильно загрязнена используйте специальные средства для чистки стеклокерамики затем хорошо ополосните и вы трите насухо Для устранения сильных загрязнений исполь зуйте сп...

Page 11: ...а расположенного под штрих кодом S N XXXXXXXXX XXXXXXXXXXX следующим образом 1 я цифра в S N соответствует последней цифре года 2 я и 3 я цифры в S N порядковому номеру месяца года 4 я и 5 я цифры в S N числу определенного месяца и года Производитель оставляет за собой право без предупреждения вносить изменения в конструкцию и комп лектацию не ухудшающие эффективность работы оборудования Некоторые...

Page 12: ...advice Oven cooking advice table Using the glass ceramic hob 19 Switching the cooking zones on and off Cooking zones Precautions and tips 20 General safety Disposal Respecting and conserving the environment Care and maintenance 21 Switching the appliance off Cleaning the oven Replacing the oven light bulb Cleaning the glass ceramic hob Assistance Operating Instructions English 12 РУССКИЙ 1 RS GB C...

Page 13: ...ccording to the instructions listed in the relevant operating manual Levelling If it is necessary to level the appliance screw the adjustable feet into the places provided on each corner of the base of the cooker see figure The legs provided with the appliance fit into the slots on the underside of the base of the cooker Electrical connections Fitting the power supply cable The cable should be sui...

Page 14: ...e socket is compatible with the plug of the appliance If the socket is incompatible with the plug ask an authorised technician to replace it Do not use extension cords or multiple sockets Once the appliance has been installed the power supply cable and the electrical socket must be easily accessible The cable must not be bent or compressed The cable must be checked regularly and replaced by author...

Page 15: ...UIDE RAILS for the sliding racks position 3 position 2 position 1 Glass ceramic hob Adjustable foot Adjustable foot position 5 position 4 TIMER knob THERMOSTAT knob ACTIVE HOTPLATE indicator light ELECTRIC HOTPLATE control knobs SELECTOR knob THERMOSTAT indicator light Only available in certain models ...

Page 16: ...ossible to Change the cooking mode by turning the SELECTOR knob Change the temperature by turning the THERMOSTAT knob Set the total cooking time and the cooking end time see below Stop cooking by turning the SELECTOR knob to the 0 position Never put objects directly on the bottom of the oven this will avoid the enamel coating being damaged Only use position 1 in the oven when cooking with the roti...

Page 17: ...L mode The top heating element is activated The grill is also highly recommended for dishes that require a high surface temperature beef steaks veal rib steak fillets hamburgers etc The GRILL and DOUBLE GRILL cooking modes must be performed with the oven door shut Timer To activate the Timer proceed as follows 1 Turn the TIMER knob in a clockwise direction 4 for almost one complete revolution to s...

Page 18: ... 1 8 2 2 1 1 8 1 1 1 5 1 1 0 5 1 1 1 0 5 1 2 3 3 2 3 3 3 3 3 2 2 2 2 3 3 3 3 3 5 5 5 10 10 10 10 10 10 5 5 5 15 10 10 10 10 10 200 200 200 180 200 180 180 180 180 180 180 180 220 180 180 180 160 170 45 50 30 35 30 35 60 70 80 90 90 100 70 80 70 80 70 80 30 40 30 35 25 30 15 20 10 15 25 30 30 35 25 30 25 30 Oven bottom Perfecting cooking Grill Sole and cuttlefish Squid and prawn kebabs Cod fillet G...

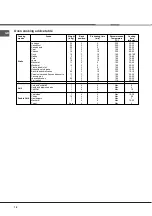
Page 19: ...erties to gas burners they are easy to control and reach set temperatures quickly allowing you to actually see the power they are providing Turn the corresponding knob in a clockwise direction to a position between 1 and 6 Practical advice on using the hob Use pans with a thick flat base to ensure that they adhere perfectly to the cooking zone Always use pans with a diameter that is large enough t...

Page 20: ...y it could catch fire Always make sure the knobs are in the position when the appliance is not in use When unplugging the appliance always pull the plug from the mains socket do not pull on the cable Never perform any cleaning or maintenance work without having disconnected the appliance from the electricity mains If the appliance breaks down under no circumstances should you attempt to repair the...

Page 21: ...or example products in spray cans for cleaning barbecues and ovens stain removers anti rust products powder detergents or sponges with abrasive surfaces these may scratch the surface beyond repair It is usually sufficient simply to wash the hob using a damp sponge and dry it with absorbent kitchen roll If the hob is particularly dirty rub it with a special glass ceramic cleaning product then rinse...

Page 22: ...22 GB ...

Page 23: ...GB 23 ...

Page 24: ...24 GB 01 2012 195085195 03 XEROX FABRIANO ...

Reviews: