40
2. Condensate Drain
Clean the condensate drain as often as necessary to maintain proper flow. Follow the
steps below.
1) Unplug the appliance from the electrical outlet.
WARNING!
To reduce the risk of
electric shock, do not touch the plug with damp hands.
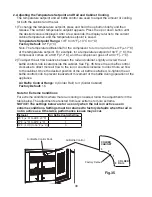
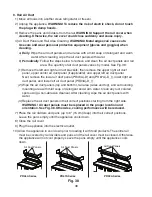
2) Remove the screw securing the front panel, then pull and lift the front panel out slightly
to remove it. See Fig. 40.
NOTICE!
Be careful not to pull out the front panel too
far because there are power wires and thermistor wires attached to the control
module in the front panel.
3) Without pulling on the wires, set the panel to the side.
4) Remove the screws securing the side panel, then slide the panel forward and down
slightly and remove.
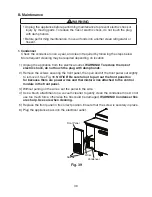
5) Remove the cable tie and condensate drain hose. See Fig. 41.
NOTICE!
Before
removing the condensate drain hose, place a pan underneath the condensate
drain pipe to catch any water.
6) Remove the drain boot from the condensate drain pipe.
7) Clean the condensate drain hose, drain boot, and condensate drain pipe.
8) Replace the removed parts in their correct positions.
NOTICE!
Be sure the condensate
drain hose is secured with a cable tie and is positioned correctly into the
condensate pan.
9) Replace the side panel and front panel in their correct positions. Ensure the screws are
securely in place.
10) Plug the appliance back into the electrical outlet.
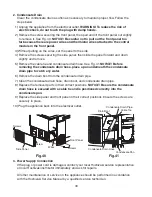
3. Power Supply Connection
If the plug or power cord is damaged, contact your local Hoshizaki service representative
or local Hoshizaki distributor immediately and ask for repairs.
All other maintenance or service on the appliance should be performed in accordance
with the Hoshizaki Service Manual by a qualified service technician.
Screws
Screws
Screw
Front Panel
Wires
Side Panel
Fig. 40
Fig. 41
Drain Boot
Condensate Drain Pipe
Cable Tie
Condensate Drain Hose
Condensate Pan

