12
HORREX MONTAGEHANDLEIDING
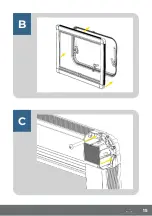
B:
Place the product, with the blackout cassette at the bottom,
against the wall. When Z-clips have been used, make sure that
the profile falls around the clips well. If no Z-clips were used,
align the product neatly on the window.
C:
Fasten the UCS against the wall with one screw per corner.
There are two possible screw holes per corner piece. Choose
the hole that is easiest to reach. Use the supplied screws for
this.
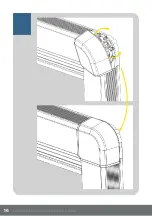
D:
Click the corner caps on every corner piece.
5.3 Use
The blackout and mesh pull bar of the UCS is stepless adjustable in
height. The pull bars can be moved up and down with one hand.
The blackout pull bar and the mesh pull bar can be clicked together
for extra closure.
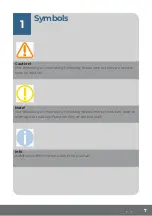
Note!
Make sure the UCS is not closed for a long time as this
will cause the material to slacken. If a vehicle is standing
still for a long time, make sure that the material is raised
slightly on both sides but is not clicked together. This
ensures that the blind is ventilated on both sides (to
prevent mold).
Caution!
Risk of damage due to heat build-up between the UCS
and the window panel. If the sun is shining strongly,
close the eclipse material to a maximum height of two
thirds.
Summary of Contents for UCS curved
Page 1: ...Montagehandleiding UCS curved Installation Manual...
Page 2: ...4 HORREX MONTAGEHANDLEIDING...
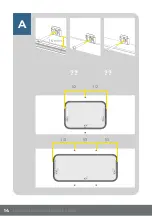
Page 12: ...14 HORREX MONTAGEHANDLEIDING A 16 mm 1 2 1 2 1 3 1 3 1 3...
Page 13: ...15 B C...
Page 14: ...16 HORREX MONTAGEHANDLEIDING...
Page 17: ...19...
Page 18: ...20 HORREX MONTAGEHANDLEIDING...
Page 19: ...21...


