background image

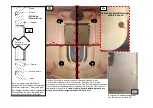
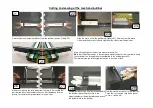
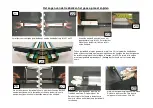
Cut through
Side view 

Z-Profile

Metal clamp

Rubber

Rubber

wall

wall

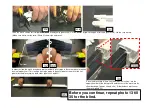
62

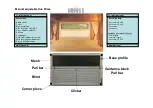
Mind the cord 
when fixing the 
Duo Plissé!

63a

63

64

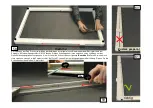
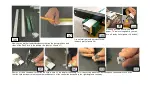
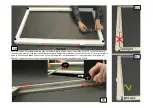
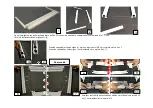
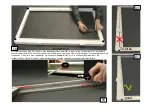
For Duo Plissees larger than 1300mm
a Z-profile and a metal clamp are included 
to prevent the base profile from bending, 
attach these right in the middle above and 
under the window rubber

(OPTION from
width 1300mm)

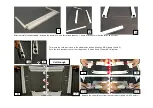
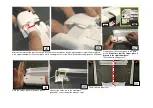
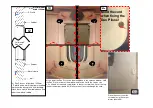
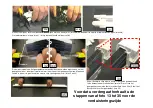
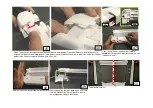
At this point the Duo Plisse can be mounted on to the caravan window. Hold 
the Duo Plissé in front of the window and fasten it with the screws size 
3,0 x 30 and a crosshead screwdriver to the correct position, first at the top, 
then at the bottom (photo 63). Make sure not to screw through the cord.

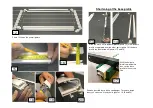
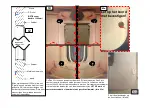
Place the covers over the 
screw holes in the corner 
pieces (photo 64). 

Summary of Contents for Duo Plisse

Page 1: ...hraubendreher Schere Schleifpapier Eisens ge als Option lieferbar Gehrladen als Option lieferbar Akkubohrmaschine info horrex nl www horrex nl Montagebeutel 8x Schraube 3 5 x 6 5 4x Schraube 3 0 x 30...

Page 2: ...re nicht gekreuzt sind L sen Sie die Schnurspanner an den Seiten mit einem Inbusschl ssel M2 5 siehe Foto 4 und 5 Schieben Sie die Schnurspanner aus den Seiten Eine Gesamtdarstellung sehen Sie auf Fot...

Page 3: ...der gew nschten L nge abzeichnen Foto 15 16 16 17 S gen Sie das Basisprofil mit einer Eisens ge im Gehrladen auf die richtige L nge Foto 17 18 19 20 Nachdem Sie das Basisprofil auf die richtige L nge...

Page 4: ...elung verlaufen in der Mitte bleiben Foto 25 Die gesamte abzus gende L nge muss durch 2 geteilt werden Beachten Sie dass die Schnur nicht in die S ge ger t 25 26 27 28 Nach dem K rzen der Zugleiste k...

Page 5: ...mit Sie die Gazepaket wieder in das Basisprofil und sp ter in das Eckst ck schieben k nnen Bringen sie einen Schnitt mit einer L nge von ungef hr 2 cm in der ersten Falte hinter dem schwarzen Streifen...

Page 6: ...ge ges gt haben schleifen Sie die Grate mit einem Schleifpapier glatt grobe Grate k nnen Sie mit einem Stanley Messer entfernen Foto 39 und 40 Auf den Fotos 41 bis 44 ist dargestellt wie die Schnur ge...

Page 7: ...den Rest des Pakets in der unteren Kammer Foto 45 und 46 Schieben Sie das Eckst ck dann auf das Basisprofil Achten Sie darauf dass das Eckst ck in die richtigen Kammern eingesetzt wird Foto 46a b und...

Page 8: ...Foto 53 Sorgen Sie daf r dass die Eckst cke gut anschlie en Foto 54 Nachdem die Eckst cke angebracht sind k nnen Sie den Duo Pliss umdrehen um die Eckst cke auf der R ckseite festzuschrauben Dr cken S...

Page 9: ...te Mit einem Spundschl ssel M2 5 k nnen Sie den Schnurspanner l sen und nach vorne schieben um das Gaze Verdunkelungspaket zu spannen Sie m ssen alle 4 Schnurspanner spannen Beachten Sie Foto 60 wenn...

Page 10: ...ON ab 1300 mm Breite Bringen Sie die Abdeckkappen auf den Eckst cken an Foto 64 Das Duo Pliss Rollo kann jetzt montiert werden Halten Sie das Duo Pliss Rollo dazu vor das Fenster und schrauben Sie es...

Page 11: ...ss head screwdriver Scissors Sand paper metal saw optional delivered Mitre box optional delivered Battery drilling machine info horrex nl www horrex nl Assembly bag 8x screw 3 5 x 6 5 4x screw 3 0 x 3...

Page 12: ...re that the cords do not cross Turn loose the cord tensioners in the side profiles with an Allen key M2 5 photo s 4 and 5 Push the cord tensioners out of the side profiles Photo s 6 and 7 show the ful...

Page 13: ...rom the other parts photo 14 the base profile can be marked off photo s 15 and 16 16 17 With the help of a metal saw and mitre box cut the base profile to the correct size 18 19 20 Remove possible bur...

Page 14: ...keep the cords that run through the mesh and blind in the middle photo 25 Therefore divide the total length that needs to be sawn of by 2 25 26 27 28 Make sure to keep the cord away from the saw After...

Page 15: ...le and at a later stage in the corner piece make an incision about 2 cm This incision has to be made in the outer pleat of the mesh the first pleat after the black strip on both sides photo s 32 and 3...

Page 16: ...e base profile photo 38 Remove possible burrs with a sand paper To remove rough burrs you can use a Stanley knife photo s 39 and 40 Photo s 41 till 44 show how to shorten the cord in case it s too lon...

Page 17: ...orner piece while keeping the rest of the mesh blind underneath photo s 45 and 46 Now connect the corner piece to the base profile Make sure that the corner piece is placed in the right chambers Photo...

Page 18: ...re not jammed stuck inside the corner pieces photo 53 and that the corner pieces are well connected photo 54 Turn around the Duo Plisse and screw down the corner pieces on the back side Press the prof...

Page 19: ...n the cord tensioner and push the cord tensioner forward in order to bring the mesh blind to the correct tension All 4 cord tensioners need to be tensioned Note If the tension is too high the pull bar...

Page 20: ...h these right in the middle above and under the window rubber OPTION from width 1300mm At this point the Duo Plisse can be mounted on to the caravan window Hold the Duo Pliss in front of the window an...

Page 21: ...raaier Schaar Schuurpapier IJzerzaag optioneel geleverd Verstekbakje optioneel geleverd Accuboormachine info horrex nl www horrex nl Montagezakje 8x schroef 3 5 x 6 5 4x schroef 3 0 x 30 2x klemmetje...

Page 22: ...de koorden niet gekruist zijn Draai de spanblokjes van de zijden los met een inbussleutel M2 5 als vermeld op foto 4 en 5 Schuif de spanblokjes uit de zijden het totaalbeeld ziet u op foto 6 en 7 6 7...

Page 23: ...t basisprofiel gaan aftekenen op de gewenste maat foto 15 en 16 16 17 Zaag het basisprofiel met een ijzerzaagje op maat in een verstekbakje foto 17 18 19 20 Nadat u het basisprofiel op maat gezaagd he...

Page 24: ...istering lopen in het midden te houden foto 25 De totale af te zagen maat moet gedeeld worden door 2 Let op dat het koord niet tussen de zaag komt 25 26 27 28 Na het inkorten van de trekbalk kunt u he...

Page 25: ...neden om het gaaspakket weer in het basisprofiel en later in het hoekstuk te kunnen schuiven Maak een snede in de eerste plooi achter de zwarte strip van ongeveer 2cm foto 32 en 33 Trekbalk Schuif de...

Page 26: ...op maat gezaagd heeft schuurt u de bramen af met een schuurpapiertje en de grove bramen kunt u met een stanleymesje verwijderen foto 39 en 40 De foto s 41 t m 44 laten zien hoe het koord in te korten...

Page 27: ...et hoekstuk te plaatsten en de rest van het pakket in de kamer eronder te houden foto 45 en 46 Schuif nu het hoekstuk op het basisprofiel let op dat het hoekstuk in de juiste kamers valt foto 46a b en...

Page 28: ...3 Zorg dat de hoekstukken goed aansluiten foto 54 Wanneer de hoekstukken geplaatst zijn kunt u de Duo Pliss omdraaien om de hoekstukken aan de achterzijde vast te schroeven Duw de basisprofielen goed...

Page 29: ...n de trekbalk Met een inbussleutel M2 5 kunt u het spanblokje losdraaien en naar voren schuiven om het gaas verduisteringspakket op te spannen U dient alle 4 de spanblokjes op te spannen Let op foto 6...

Page 30: ...bevestigen in het midden boven en onder het raamrubber OPTIE vanaf breedte 1300mm De Duo Pliss kan nu gemonteerd worden Dit doet u door de Duo Pliss voor het raam te houden en op de juiste positie vas...

Reviews: