EN
8
SUPER BAJA REY
®
DESERT TRUCK: 1:6 4WD RTR, AVC • INSTRUCTION MANUAL
SPECIFICATIONS
Type
Sensorless
Constant/Peak
160A/1050A
Resistance
0.0002Ohm
Function
Forward with Brake, Forward/Reverse with Brake
Operation
Proportional forward, proportional reverse with braking
Input Voltage
3–8s LiPo
BEC Output
6V/8.4V, 6A
Overload Protection
Motor Lock-up protection, Low-voltage cutoff protection,
Thermal protection, Overload protection and fail safe (throttle
signal loss protection)
Dimensions (LxWxH)
70mm x 65mm x 45.5mm
Weight
288g
ESC LED STATUS
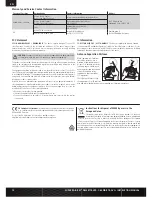
• No ESC LEDs will glow when there is no throttle input from the transmitter.
• The red ESC LED glows when there is any throttle input from the transmitter.
AUDIBLE WARNING TONES
1. Input Voltage:
The ESC checks the in put voltage when it is powered ON. If a voltage
problem is detected, the ESC continuously sounds 2 beeps with a 1 second pause
(xx-xx-xx). Power OFF the ESC and ensure the connections are secure and that
the battery power is not too low for safe operation.
2. Radio Connection:
The ESC checks radio signal input when it is powered ON.
If a problem is detected, the ESC continuously sounds 1 beep with a 2 second pause
(x--x--x). Power OFF the ESC and ensure the radio system is operating correctly.
ESC FUNCTIONS
ESC CALIBRATION PROCEDURE
Ensure proper ESC function by calibrating the ESC to your transmitter inputs.
1. Power OFF the ESC.
2. Ensure your transmitter is powered ON, the throttle is not reversed, the
throttle trim is neutral and the throttle travel range is at 100%. Disable
any special functions such as ABS, etc.
3. Press the SET button while powering ON the ESC. Release the button as soon as the red
LED starts to flash.
4. Calibrate the throttle points by pressing the SET button once after each step.
- Neutral (1 flash)—leave the throttle at rest, untouched
- Full throttle (2 flashes)—pull the throttle fully back
- Full brake/reverse (3 flashes)—push the throttle fully forward
5. The motor will run 3 seconds after the last step is completed.
Tip:
If the motor turns in the wrong direction, reverse the connection of any 2 outside
motor wires. The center wire must remain in the center and cannot be moved to another
motor tab.
ESC PROGRAMMING PROCEDURE
1. Connect a fully charged battery to the ESC.
2. Power ON the ESC using the ESC switch.
3. Hold the SET button for 1 second until the GREEN LED blinks, then release the SET button
to enter programming mode.
4. Press and release the SET button as needed to get to the desired menu option (the GREEN
LED will blink corresponding to the menu item number). Programming menu items 1
through 6 are accessible using the SET button on the ESC.
5. When at the desired menu item, hold the SET button for 3 seconds until the RED LED blinks.
6. Press the SET button to move among the settings based on how many times the RED LED
blinks (Refer to the table for more information).
7. Save the setting by holding the SET button for 3 seconds.
8. Power OFF the ESC switch and repeat the instructions above to change other settings.
DESCRIPTIONS
1. Running Mode
-
Forward Only with Brake
Intended for competition use, this mode allows only forward and brake controls.
-
Forward/Reverse with Brake
This mode is the basic all-around mode, allowing forward, reverse and brake controls.
To engage reverse while moving forward, apply the brake until the vehicle has come to
a complete stop, release brake, then apply the brake again. While braking or in reverse,
engaging the throttle will result in the vehicle immediately accelerating forward.
2. Li-Po Cells
The default setting is
Auto Calc
, which will automatically select the detetected number
of cells. Select value 2–5 to manually select a cell count from 3–8 cells.
3. Low Voltage Cutoff
This function helps to prevent battery over-discharge. The ESC continuously monitors the
battery’s voltage. If the voltage falls below the voltage threshold for 2 seconds, the output
power shuts off and the red LED flashes twice repeatedly.
The cutoff threshold calculation is based on individual Li-Po cell voltage. For Ni-MH batteries,
if the voltage battery pack is higher than 9.0V, it will be treated as a 3-cell Li-Po battery
pack; if it is lower than 9.0V, it will be treated as a 2-cell Li-Po battery pack. Example: for a
8.0V Ni-MH battery pack used with a 2.6V/cell threshold, it will be treated as a 2-cell Li-Po
battery pack and the low-voltage cut-off threshold will be 5.2V (2.6x2=5.2).
4. Bec Voltage
Select either 6 or 8.4 V to run the receiver and servos.
5. Max Brake Force
Adjusts the maximum braking force. A higher value provides stronger braking, but can
also cause the wheels to lock, resulting in loss of control of the car.
6. Max Reverse Force
This parameter adjusts the maximum power when travelling in reverse.
7. Start Mode (Punch)
Sets the initial throttle punch when the car accelerates. Level 1 gives a very soft initial
acceleration and level 5 gives a stronger initial acceleration.
8. Timing
Allows for timing value selection according to your motor. Generally, higher timing value
brings out higher power output, but the efficiency of the system will be slightly lower with
possible increases in motor and ESC running temperatures.
EN
EN
The black-shaded setting is the factory default.
PROGRAMMABLE ITEMS
PROGRAMMABLE VALUE
1
2
3
4
5
6
7
8
9
1 Running Mode
Forward with Brake
Forward/ Reverse with Brake
2 Li-Po Cells
Auto Calc.
3s
4s
6s
8s
3 Low Voltage Cutoff
Auto (Low)
Auto (Intermediate)
Auto (High)
4 BEC Voltage
6.0V
8.4V
5 Max Brake Force
25%
50%
75%
100%
Disable
6 Max Reverse Force
25%
50%
7 Start Mode/Punch
Level 1
Level 2
Level 3
Level 4
Level 5
8 Timing
0°
3.75°
7.5°
11.25°
15°
8
SUPER BAJA REY
®
DESERT TRUCK: 1:6 4WD RTR, AVC • INSTRUCTION MANUAL


