2
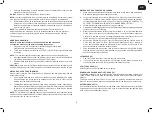
MICRO-FIBER MOP PAD [3]
1. Attach the Mop Pad to the Mop Head using the velcro side.
CARPET GLIDER [3]
1. To attach carpet glider, place glider on floor align mop head and push downwards,
remember to attach the Mop Pad before installing the Carpet Glider.
JET NOZZLE [4]
1. Align Jet Nozzle with Steam Nozzle as shown.
2. Slide Jet Nozzle into Steam Nozzle, until release button snaps through hole.
3. To remove Jet Nozzle, press firmly on release button while simultaneously pulling
Jet Nozzle away from Steam Nozzle.
UTILITY HEAD AND SMALL CLOTH [5]
1. Align Utility Head with Steam Nozzle as shown.
2. Slide Utility Head into Steam Nozzle, pushing firmly until attached.
3. Stretch Small Cloth over Utility Head as shown.
4. Connect Utility Head to Steam Nozzle as usual after covering the Small Cloth.
5. To remove Utility Head, simply grasp it and pull it away from Steam Nozzle.
WINDOW SqUEEGEE [6]
1. Note tabs on window squeegee, which fit into slots on top of Utility Head.
2. Insert front squeegee tab into front utility head slot .
3. Tilt squeegee back as shown and press firmly until rear tab fits into rear Utility Head
slot. Squeegee should snap securely into place.
NOTE:
While using as handheld steam cleaner, it is more convenient if used with the
Extension Hose. Please refer to the further detail.
[13]
UTILITY BRUSH: NYLON, BRASS AND SOFT BRISTLE BRUSHES [7]
Align Utility Brush with tip of Jet Nozzle as shown, and press it firmly on as far is it will go.
Rotate Utility Brush as shown and screw it onto Jet Nozzle – continue until it is secured
tightly in place.
USING YOUR CLEANER
BEFORE YOU BEGIN CLEANING
IMPORTANT: Always unplug the cleaner when adding water or changing a textile pad.
NOTE: Wash the textile pad prior to use to remove any lint.
FILLING WATER TANK [8]
1. Make sure Steam Control Dial is set to “OFF” position.
2.
Rotate Water Tank Cap one quarter turn in “Unlock” direction (anti-clockwise) indicated
by illustration on Cap, and remove.
GB
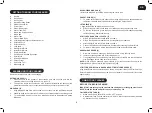
GETTING TO KNOW YOUR CLEANER
A. Handle
B. Hook Upper
C. Hook Lower
D. Handle Release Button
E. Steam Control Dial
F.
Power Light
G.
Steam Ready Light
H. Water Tank Cap
I.
Mop Head Release Button
J.
Mop Head
K. Water Tank
L.
Cleaner Main Body
M.
Lock(Adjust the length of Extension Pole)
N. Extension Pole
O. Extension Hose
P. Jet Nozzle
Q. Brass Bristle Brush
R. Nylon Bristle Brush
S. Soft Bristle Brush
T.
Utility Head & Window Squeegee
U. Small Cloth
V.
Micro-fiber Mop Pad
W.
Carpet Glider
X. De-scaling Tool
Y.
Measuring Jug
ASSEMBLING YOUR CLEANER
Remove all components from the packaging.
EXTENSION POLE
[1]
1. Press the knob on the bottom of the extension pole and push the pole into the
cleaner main body ensuring the knob is in the hole.
2.
To adjust the length of the extension pole, rotate anti-clockwise the section of the
pole with the handle, move to required position and then turn clockwise to lock.
MOP HEAD [2]
1. Ali
gn Mop Head with main unit as shown, so that neck is in line with Steam Nozzle.
2.
Slide Mop Head neck into
the cleaner main body , until release button snaps through hole.
3.
To remove Mop Head, press firmly on release button while simultaneously pulling
Mop
Head.


