background image

30

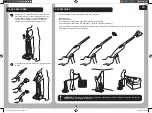
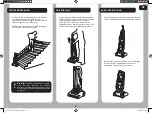
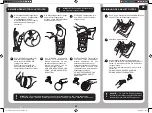
PULIZIA DELLE SCALE

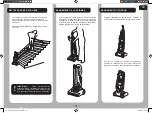
POSIZIONE DI PARCHEGGIO 

DELL'IMPUGNATURA

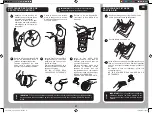
STAZIONAMENTO DEL CAVO

Durante la pulizia delle scale, è pericoloso collocare 

l'aspirapolvere in una posizione più elevata rispetto 

a quella in cui ci si trova. Posizionare l'aspirapolvere 

contro il gradino più basso di fronte alle scale.

Collocare SEMPRE l'aspirapolvere in un punto 

situato più in basso di quello in cui si lavora. 

Per riporre l'aspirapolvere in modo più efficace, 

rimuovere l'impugnatura dal corpo principale premendo 

il pulsante di sgancio dell'explorer lance. Separare 

l'explorer lance dall'impugnatura e ripristinare 

quest'ultima nella posizione originale sull'aspirapolvere. 

Posizionare l'impugnatura sul lato dell'aspirapolvere.

Spegnere l'aspirapolvere ed estrarre la spina. 

Avvolgere il cavo di alimentazione intorno ai ganci 

appositi. 

Quando l'impugnatura si trova nella posizione di 

stazionamento, avvolgere il cavo di alimentazione 

intorno al gancio apposito e alla maniglia di trasporto.

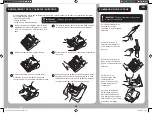
!

IMPORTANTE!

  È  necessario  prestare  la 

massima  attenzione  quando  si  utilizza  il 

tubo flessibile sulle scale. Se il tubo dovesse 

ostruirsi,  potrebbe  esercitare  una  notevole 

forza di attrazione verso l'aspirapolvere.

IT

Freerounder_EN_FR_IT_DE_Draft2.indd   30

03/09/2008   17:35:40

Summary of Contents for Freerounder

Page 1: ......

Page 2: ... ll be ready to make the most of the special features only the new Hoover Freerounder can offer This appliance is double insulated and must not earthed The plug is fitted with a 13 amp fuse IMPORTANT The wires in the mains lead are coloured in accordance with the following code Blue NEUTRAL Brown LIVE IMPORTANT SAFETY REMINDERS spray near cleaner SUPPLY CORD DO NOT run over the supply cord when us...

Page 3: ...E RELEASE BUTTON ON OFF BUTTON EXPLORER LANCE HANDLE PARK DUSTING BRUSH CARPET CARE CONTROL SELECTOR FOOT HOSE 2 POSITION LOCK PEDAL UPPER CORD HOOK CARRY HANDLE LONG STRETCH HOSE BIN RELEASE BUTTONS PET HAIR REMOVER TURBO BRUSH PRE MOTOR FILTERS ACCESS BUTTON ONE TOUCH BIN EMPTY BUTTON LOWER CORD HOOK EXHAUST FILTER GETTING TO KNOW YOUR CLEANER DUST BIN CLIPS DUST BIN ALLERGEN REMOVER TURBO BRUSH...

Page 4: ...rush Allergen Remover Turbo Brush Allergy Defender Granules Certain Models only 1 Fit the pet hair remover turbo brush into the dust bin below the carry handle 4 4 Connect the explorer lance to the handle 2 Assemble the dusting brush onto the rear of the handle 5 Fit the foot hose into the hood Fit the explorer lance and handle onto the main body of the cleaner Ensuring the end of the lance slides...

Page 5: ...ng IMPORTANT When cleaning hard floors such as vinyl or linoleum move the selector knob to the HARD floor position Failure to do so may cause damage to the floor surface CLEANER LOCK RELEASE The cleaner can be adjusted to 3 different positions Upright For storage and when using tools Position 1 For general cleaning on carpets and flooring Position 2 For reaching under furniture and some maintenanc...

Page 6: ...nly All accessories can fit directly onto the handle of the product or onto the explorer lance tool Combine accessories depending on use EXPLORER LANCE 1 2 Press the lance release button and pull the explorer lance together with the handle from the main body of the cleaner It will immediately be ready for over head cleaning and hard to reach areas e g behind radiators etc If desired it is possible...

Page 7: ...nce from the handle and return to its original position on the cleaner Park the handle on the side of the cleaner Turn the cleaner off and remove the plug Wind the power cord around the cord storage hooks When the handle is in the handle park position wind the power cord around the lower cord storage hook and the carry handle IMPORTANT Extra care must be taken when using the hose on the stairs If ...

Page 8: ...per section containing the separation unit from the lower section Press the bin release buttons and remove the dustbin from the cleaner Reassemble the bin upper section Push clips back to fully close the bin then refit the dustbin to the cleaner Use a cloth or the dusting brush to remove excessive dust from the separation unit s surface Place the bin on a flat surface and release the clips from ei...

Page 9: ...tab provided Gently tap both filters against the side of a bin to release excess dust Wash the GREY foam filter thoroughly under hand warm water until the water runs clean Remove excess water by shaking and leave to dry for 24 hours DO NOT USE HOT WATER OR DETERGENTS 4 Wash the BLUE HEPA filter thoroughly from the inside under hand warm water until the water runs clean Remove excess water by shaki...

Page 10: ...elt Loop the new belt around the motor and brush assembly Hold the brush assembly and stretch the belt until the brush can be slotted back into the cleaner housing Rotate the brush to ensure movement of the belt Refit the hood ensuring the lugs along the front are located in the slots on the front edge of the baseplate Secure the hood with 5 retaining screws Refit the carpet care control knob 1 2 ...

Page 11: ...By ensuring this product is disposed of correctly you will help prevent potential negative consequences for the environment and human health which could otherwise be caused by inappropriate waste handling of this product The symbol on the product indicates that this product may not be treated as houshold waste Instead it shall be handed over to the appliance collection point for recycling of elect...

Page 12: ...ly to the cleaner Check with another electrical product 2 Is the dust container full or choked with fine dust To empty the dust container see instructions on P9 3 Is the hose blocked To clear a blockage see instructions on P11 4 Is there a blockage in the cleaner base To clear a blockage see the instruction on P11 5 Are the filters blocked To clean filters see the instruction on P10 6 Is the nozzl...

Page 13: ...t ce manuel Vous pourrez alors profiter au maximum des fonctions spéciales que le nouvel Hoover Freerounder peut vous offrir Cet appareil est doublement isolé et ne doit pas être mis à la terre La prise est dotée d un fusible de 13 A Unique au R U IMPORTANT Les fils du cordon d alimentation sont colorés selon le code suivant Bleu NEUTRE Marron PHASE REMARQUES IMPORTANTES CONCERNANT LA SECURITE Les...

Page 14: ... PARKING de la poignée AMOVIBLE BROSSE A MEUBLES CURSEUR DE REGLAGE de la hauter de la brosse TUYAU INFERIEUR PEDALE DE VERROUILLAGE 2 POSITIONS crochet de rangement du cordon d alimentation POIGNEE DE TRANSPORT LONG TUYAU EXTENSIBLE BOUTONS DE DÉTACHER DU BAC TURBOBROSSE POUR LES POILS D ANIMAUX DOMESTIQUES BOUTON D ACCES AUX FILTRES DE PROTECTION DU MOTEUR BOUTON DE VIDAGE du bac a poussiere cro...

Page 15: ...sse pour élimination des allergènes Granules anti allergie Certains modèles seulement 1 Adaptez la turbobrosse pour élimination des poils d animaux domestiques dans le bac à poussière sous la poignée de transport 4 4 Raccordez la Explorer lance à la poignée 2 Adaptez la brosse à meubles à l arrière de la poignée 5 Adaptez le tuyau inférieur dans le capot Adaptez la Explorer lanceet la poignée sur ...

Page 16: ...s d entretien de sols avant de passer l aspirateur IMPORTANT Lors du nettoyage de sols durs par exemple en vinyle ou en linoléum mettez le curseur à la position sol dur ou vous risqueriez d endommager le revêtement de sol DEVERROUILLAGE DE L ASPIRATEUR L aspirateur peut se régler sur 3 positions différentes Verticale Pour le rangement et lors de l utilisation d accessoires Position 1 Pour le netto...

Page 17: ...ains modèles seulement Tous les accessoires peuvent s adapter directement sur la poignée de l appareil ou sur la Explorer lance Combinez les accessoires en fonction de l utilisation LANCE EXPLORER 1 2 Appuyez sur le bouton de détacher de la lance et tirez la lance Explorer avec la poignée du corps de l aspirateur L appareil sera immédiatement prêt pour le nettoyage en hauteur et difficiles d accès...

Page 18: ...ez la lance de la poignée et remettez la à sa position d origine sur l aspirateur Rangez la poignée sur le côté de l aspirateur Eteignez l aspirateur et débranchez le Enroulez le cordon autour des crochets de rangement du cordon Une fois la poignée en position de rangement enroulez le cordon autour du crochet inférieur de rangement de cordon et de la poignée de transport IMPORTANT Faites particuli...

Page 19: ...ubelle Soulevez la partie supérieure du bac contenant le séparateur de la partie inférieure Appuyez sur les boutons de détacher du bac et retirez le bac a poussière de l aspirateur Remontez la partie supérieure du bac Refermez le bac complètement à l aide des clips puis reposez le bac a poussière sur l aspirateur Eliminez la poussière accumulée sur la surface du séparateur à l aide d un chiffon ou...

Page 20: ...e la languette pourvue Tapotez légèrement les deux filtres contre le côté du bac pour décoller la poussière accumulée Lavez le filtre en mousse GRIS soigneusement à l eau tiède jusqu à ce que l eau qui s en écoule soit claire Eliminez l excédent d eau en le secouant et laissez le sécher pendant 24 heures NE PAS UTILISER D EAU CHAUDE OU DE DETERGENTS 4 Lavez le filtre HEPA BLEU soigneusement à l ea...

Page 21: ...ez sur la courroie jusqu à ce que la brosse puisse se réencastrer dans son logement Faites tourner la brosse pour assurer le mouvement de la courroie Reposez le capot en veillant à ce que les ergots à l avant s adaptent dans les fentes du bord avant de la base Immobilisez le capot avec les 5 vis de fixation Reposez le curseur de réglage pour entretien moquettes 1 2 3 4 5 6 En cas d utilisation d u...

Page 22: ...nces potentiellement nuisibles pour l environnement et pour la santé Le symbole figurant sur le produit indique qu il ne peut pas être mis à la poubelle avec les ordures ménagères Vous devez le déposer dans un centre de recyclage des déchets électriques et électroniques La mise au rebut doit être effectuée conformément à la réglementation locale en matière de déchets Pour obtenir des compléments d...

Page 23: ...pareil dans la même prise 2 la cuve est elle pleine ou colmatée par des poussières fines Pour vider la cuve voir les instructions à la page 20 3 Le tuyau est il bouché Pour éliminer un blocage voir les instructions à la page 22 4 Y a t il un blocage au niveau de la base de l aspirateur Pour éliminer un blocage voir les instructions à la page 22 5 Les filtres sont ils colmatés Pour nettoyer les fil...

Page 24: ...zionalità che solo il nuovo Hoover Freerounder può offrire Questo apparecchio è dotato di doppio isolamento e non richiede la messa a terra La spina è dotata di fusibili da 13 Amp IMPORTANTE i fili contenuti nel cavo di alimentazione sono colorati secondo il seguente codice Blu NEUTRO Marrone FASE TENSIONE AVVERTENZE IMPORTANTI PER LA SICUREZZA Le sostanze spray possono risultare infiammabili NON ...

Page 25: ...XPLORER LANCE POSIZIONE DI PARCHEGGIO DELL IMPUGNATURA SPAZZOLA A PENNELLO REGOLATORE ALTEZZA SPAZZOLA TUBO DI ISPEZIONE PEDALE DI BLOCCO A 2 POSIZIONI GANCIO PER CAVO DI ALIMENTAZIONE MANIGLIA DI TRASPORTO TUBO FLESSIBILE PULSANTE PER RIMOVUERE IL CONTENITORE RACCOGLIPOLVERE TURBO SPAZZOLA PER PELI DI ANIMALI DOMESTICI PULSANTE DI ACCESSO AI FILTRI PRE MOTORE PULSANTE DI SVUOTAMENTO DEL CONTENITO...

Page 26: ...ne degli allergeni Granuli anti allergie Solo in alcuni modelli 1 Montare la turbo spazzola per peli di animali domestici nel contenitore raccoglipolvere sotto la maniglia di trasporto 4 4 Collegare l explorer lance all impugnatura 2 Montare la spazzola a pennello nella parte posteriore dell impugnatura 5 Inserire il tubo di ispezione nella calotta Inserire l explorer lance e l impugnatura nel cor...

Page 27: ...tazioni dure quali quelle in vinile o linoleum spostare la manopola del selettore sulla posizione PAVIMENTO In caso contrario si possono provocare danni alla superficie del pavimento SBLOCCO DELL ASPIRAPOLVERE È possibile regolare l aspirapolvere in tre posizioni differenti Verticale In stazionamento e durante l utilizzo degli accessori Posizione 1 Per la pulizia generale di tappeti e pavimenti Po...

Page 28: ...accessori possono essere inseriti direttamente nell impugnatura dell aspirapolvere oppure nell explorer lance Combinare gli accessori in base all utilizzo EXPLORER LANCE 1 2 Premere il pulsante per il rilascio dell explorer lance e tirare quest ultima insieme all impugnatura dal corpo principale dell aspirapolvere Sarà quindi possibile utilizzarla immediatamente per la pulizia di aree poste in alt...

Page 29: ...dell explorer lance Separare l explorer lance dall impugnatura e ripristinare quest ultima nella posizione originale sull aspirapolvere Posizionare l impugnatura sul lato dell aspirapolvere Spegnere l aspirapolvere ed estrarre la spina Avvolgere il cavo di alimentazione intorno ai ganci appositi Quando l impugnatura si trova nella posizione di stazionamento avvolgere il cavo di alimentazione intor...

Page 30: ... cestino contenente l unità di separazione dalla sezione inferiore Premere il pulsante per rimuovere il contenitore raccoglipolvere e rimuovere il contenitore raccoglipolvere dall aspirapolvere Rimontare la sezione superiore del cestino Spingere i fermagli indietro fino alla completa chiusura del cestino quindi rimontare il contenitore raccoglipolvere nell apparecchio Utilizzare un panno o la spaz...

Page 31: ...ltro HEPA BLU utilizzando la linguetta apposita Picchiettare delicatamente entrambi i filtri contro il lato di un cestino per rimuovere l eccesso di polvere Lavare accuratamente il filtro GRIGIO in materiale espanso con acqua tiepida fino a quando l acqua che scorre non risulta completamente pulita Scuotere per rimuovere l eccesso di acqua e lasciare asciugare per 24 ore NON UTILIZZARE ACQUA BOLLE...

Page 32: ...ore Sostenere il gruppo spazzole e tendere la cinghia fino a introdurre la spazzola nell alloggiamento dell aspirapolvere Ruotare la spazzola per assicurarsi del movimento della cinghia Rimontare la calotta accertandosi che le sporgenze presenti lungo il suo lato anteriore si inseriscano nelle fessure presenti nel margine anteriore della base Fissare la calotta con le 5 viti di ritenzione Rimontar...

Page 33: ...ropea WEEE RAEE 2002 96 EC sulla gestione dei rifiuti da apparecchiature elettriche ed elettroniche Garantendo il corretto smaltimento del prodotto il cliente contribuisce alla salvaguardia della salute delle persone e alla protezione dell ambiente che potrebbero altrimenti essere compromessi da uno smaltimento eseguito in maniera non idonea Il simbolo apposto su di esso indica che questo prodotto...

Page 34: ...o 2 Il sacco del contenitore raccoglipolvere è pieno o intasato da polvere fine Per svuotare il contenitore raccoglipolvere vedere le istruzioni a pag 31 3 Il tubo è ostruito Per eliminare un ostruzione vedere le istruzioni a pag 33 4 Si è verificata un ostruzione nella base dell aspirapolvere Per eliminare un ostruzione vedere le istruzioni a pag 33 5 I filtri sono ostruiti Per la pulizia dei fil...

Page 35: ...e Reinigung einfacher und effizienter Bitte nehmen Sie sich die Zeit um diese Anleitung sorgfältig durchzulesen Nur so werden Sie in der Lage sein die ganz besonderen Funktionen zu nutzen die Ihnen der neue Hoover Freerounder bietet WICHTIGE SICHERHEITSHINWEISE Raumsprays Sprühdosen können entzündlich sein NICHT in der Nähe des Staubsaugers versprühen NETZKABEL Während des Saugens NICHT über das N...

Page 36: ...TRAGEGRIFF AUSZIEHSCHLAUCH MINITURBODÜSE MOTORSCHUTZFILTER ZUGANGSTASTE STAUBBEHÄLTER ENTLEERUNGSTASTE UNTERER KABELHAKEN BEZEICHNUNG DER KOMPONENTEN STAUBBEHÄLTER 37 KABELHALTER Entriegelung F eXPLORER LANCE EIN AUSTASTE EXPLORER LANCE GRIFFABLAGE MÖBELPINSEL TEPPICHPFLEGE EINSTELLSCHALTER FUSSSCHLAUCH SPERRPEDAL 2 POSITIONEN STAUBBEHÄLTER FREIGABEASTEN ABLUFTFILTER STAUBBEHÄLTER CLIPS TURBODÜSE ...

Page 37: ...gene Allergie Abwehrgranulat Nur bestimmte Modelle 1 Setzen Sie die Miniturbodüse in die dafür vorgesehene Position am Staubbehälter unter dem Tragegriff ein 4 4 Verbinden Sie die Explorer Lance mit dem Griff 2 Bringen Sie den Möbelpinsel an der Rückseite des Griffs an 5 Stecken Sie den Schlauch in den Saugfuss Bringen Sie die Explorer Lance und den Griff am Staubsaugergehäuse an Dabei sicherstell...

Page 38: ...CHTIG Wenn Sie Fußböden wie Vinyl oder Linoleum reinigen die Einstelltaste auf Fußbodenposition HARD hart stellen Andernfalls könnte es zu Beschädigungen des Fußbodens kommen STAUBSAUGER ENTRIEGELUNG Sie können zwischen 3 verschiedenen Staubsauger Positionen wählen Aufrecht zum Verstauen und bei der Verwendung von Zubehör Position 1 für die allgemeine Reinigung von Teppichen und Fußböden Position ...

Page 39: ...ne nur bestimmte Modelle All Zubehörteile können direkt am Griff des Geräts oder der Explorer Lance angebracht werden Kombinieren Sie das Zubehör je nach Bedarf EXPLORER LANCE 1 2 Die Explorer Lance Lösetaste drücken und die Explorer Lance mit dem Griff vom Staubsauger abnehmen Nun lassen sich Decken und schwer erreichbare Bereiche z B hinter Heizkörpern usw reinigen Der Griff kann auch ohne die E...

Page 40: ...en Die Explorer Lance vom Griff trennen und wieder in ihrer Originalposition am Staubsauger anbringen Den Griff an der Seite des Staubsaugers verstauen Den Staubsauger ausschalten und den Netzstecker ziehen Das Netzkabel um die Kabelhaken wickeln Sicherstellen dass der Griff sich in der Griffablage Position befindet Das Kabel um den unteren Kabelhaken und den Tragegriff wickeln WICHTIG Sind Sie bi...

Page 41: ...ubbehälters mit dem Abscheider vom unteren Teil trennen Die Staubbehälter Lösetasten drücken und den Staubbehälter vom Staubsauger abnehmen Oberen Teil wieder einsetzen Clips zurückschieben um den Staubbehälter völlig zu schließen und den Behälter wieder am Staubsauger anbringen Staub von der Oberfläche des Abscheiders mit einem Tuch oder einer Staubbürste entfernen Den Staubbehälter flach hinlege...

Page 42: ...UEN HEPA Filterpackung trennen Beide Filter sanft an der Seite eines Abfalleimers abklopfen um überschüssigen Staub zu entfernen Den GRAUEN Schaumfilter gründlich unter handwarmem Wasser abwaschen bis das ablaufende Wasser sauber ist Wasser abschütteln und 24 Stunden trocknen lassen KEIN HEISSES WASSER UND KEINE REINIGUNGSMITTEL BENUTZEN 4 DenBLAUENHEPA Filtergründlich von innen unter handwarmem W...

Page 43: ...prüfen Den neuen Riemen um Motor und Bürstenblock schlingen Den Bürstenblock festhalten und Riemen soweit anbziehen bis die Bürste in das Staubsaugergehäuse einrasten kann Die Bürste drehen um die ungehinderte Bewegung des Riemens zu prüfen Die Haube so wieder aufsetzen dass die Ansätze an der Vorderkante der Haube in den Schlitzen entlang der Vorderkante der Grundplatte sitzen Die Haube mit den 5...

Page 44: ...für eventuell auftretende Garantieansprüche benötigt Änderungen vorbehalten Umweltschutz WEEE Richtlinie Dieses Gerät ist entsprechend der europäischen Richtlinie 2002 96 EG des europäischen Parlaments und Rates über Elektro und Elektronik Altgeräte WEEE Richtlinie gekennzeichnet Durch die sichere und umweltgerechte Entsorgung dieses Produkts tragen Sie dazu bei mögliche negative Auswirkungen auf ...

Page 45: ...olgenden Kontrolliste vor 1 Ist die Stromversorgung in Ordnung Mit einem anderen elektrischen Gerät überprüfen 2 Ist der Staubbehälter voll oder durch feinen Staub verschmutzt Zum Leeren des Staubbehälters siehe Anleitungen auf Seite 42 3 Ist der Saugschlauch verstopft Zum Entfernen der Blockierung siehe Anleitungen auf Seite 44 4 Gibt es eine Verstopfung im Geräteboden Zum Entfernen der Blockieru...

Page 46: ......

Page 47: ......

Page 48: ......

Page 49: ......

Page 50: ......

Page 51: ......

Page 52: ......

Page 53: ......

Page 54: ......

Page 55: ......

Page 56: ......

Page 57: ... 2008 0565 5343 1 Freerounder_EN_FR_IT_DE_Draft2 indd 47 03 09 2008 17 35 47 ...

Reviews: