

+1.800.796.CCTV (North America only)
© 2009 Honeywell International Inc. All rights reserved. No part of this publication may be reproduced by any means without written
permission from Honeywell. The information in this publication is believed to be accurate in all respects. However, Honeywell cannot
assume responsibility for any consequences resulting from the use thereof. The information contained herein is subject to change without
notice. Revisions or new editions to this publication may be issued to incorporate such changes.
Document 800-01620 – Rev C – 04/09
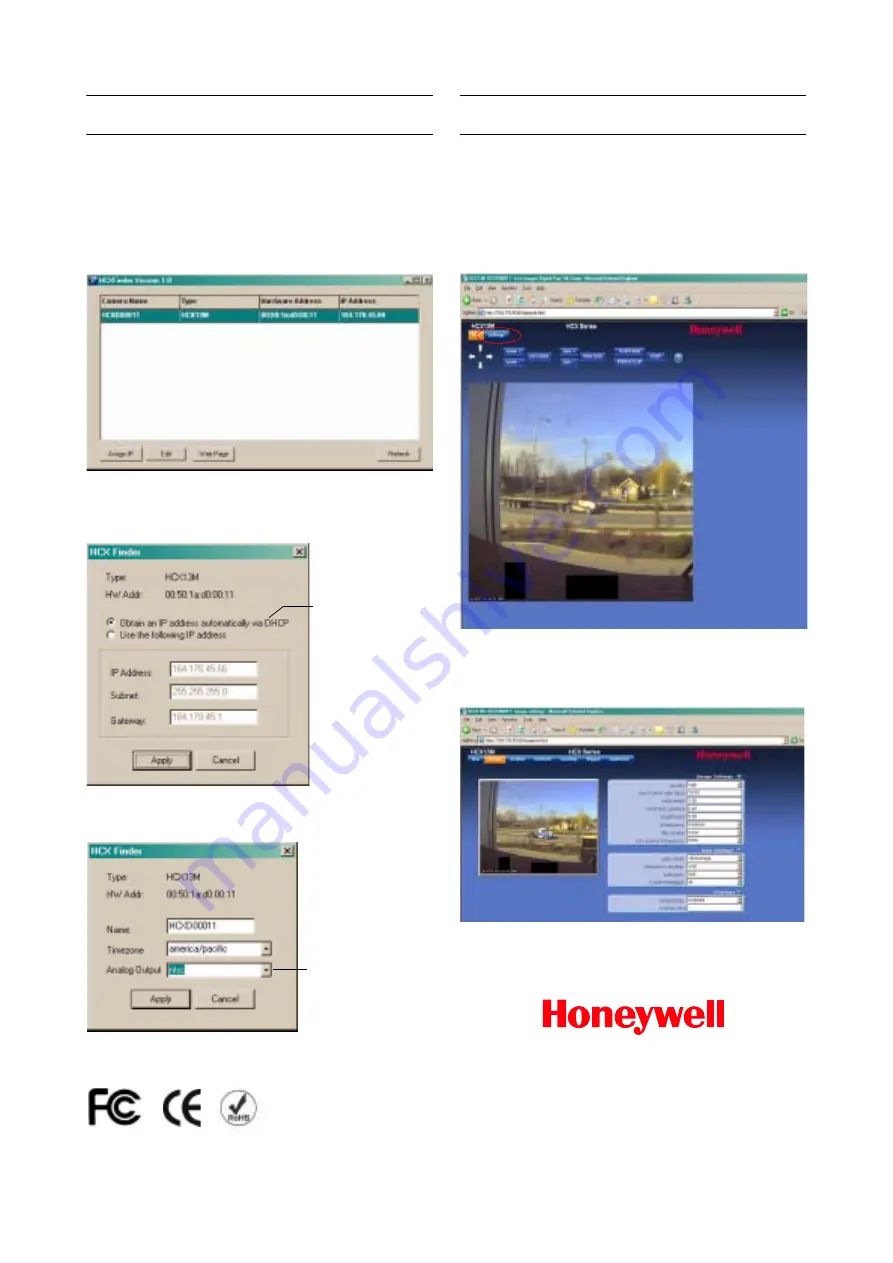
Configuration
1.
Insert the CD into the CD drive of the PC. The
HCXfinder installation application launches
automatically. If it does not, double-click
hcx_finder.exe on the CD to start the installation.
The HCX Finder window appears listing all the
detected cameras and their assigned IP address
2.
To assign a new IP address, Subnet, or Gateway of
the camera, highlight a camera in the list, and then
click Assign IP. Click Apply to accept your changes.
3.
To modify the camera name, time zone, or sync
system type, highlight a camera, and then click Edit.
View Live Video
To view a camera on the Live window:
•
Double-click on a camera entry in the list, or
•
Click Web Page, or
•
In Internet Explorer, enter the IP address of the HCX
device in the address field of the browser.
4.
To perform further configuration of the camera, click
Settings. When prompted, enter your user name
(default, root) and password (default, system). The
Live page Image window appears.
For more detailed information, refer to the HCX Series
Camera Reference Guide.
Select this option to
configure the camera
for DHCP.
Note
This requires
rebooting the
camera.
Select NTSC (default)
or PAL.


