WEB-700 WEB-700-O CP-700
13
95-7776—01
WEB-700; WEB-700-O; CP-700
OPTION CARD COM PORT ASSIGNMENTS
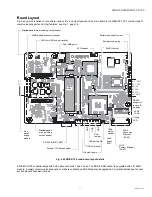
COM port assignments for option cards installed in a WEB/CP-700 start at COM5, with Slot 1 evaluated first, then Slot 2. (COM1
and COM2 are always assigned to the onboard RS-232 and RS-485 ports, while COM3 and COM4 are reserved for slots.)
INSTALLING AN OPTION CARD
For option-specific details, see the mounting & wiring document that accompanies the particular option card. The following
procedure provides a basic set of steps.
WARNING
Installing an option card in option Slot 2 requires careful attention—you must carefully pry up the shield tab to
install the option card under the tab. Do not install an option card in Slot 2 with the card resting on top of the
shield tab! Otherwise, an electrical short or some other issue from misaligned card header pins may result.
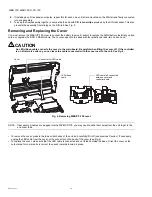
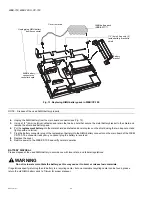
Mounting an option card in a WEB/CP-700.
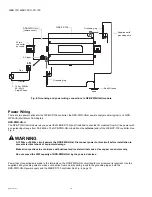
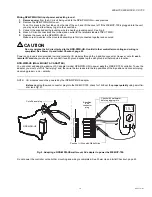
1. Remove power
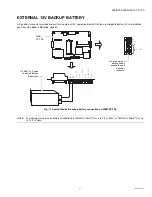
from the WEB/CP-700, including any external battery—see the previous on page 12.
2.
Remove the cover. See Removing and Replacing the Cover, page 10.
3.
Remove the blanking plate for the option slot, retaining the two screws. Retain the blanking plate in case the option card
must be removed later.
4.
Carefully insert the pins of the option card into the socket headers of the option card slot.
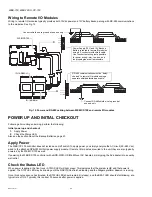
NOTE: If installing in Slot 2, first carefully pry up the shield tab that goes over the standoff.
Option card 2 must be installed
under the shield tab.
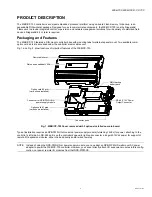
See Fig. 6, page 14 for an exploded view.
The mounting holes on the option board should line up with the standoffs on the base board. If they do not, the connec-
tor is not properly aligned. Press until the option card is completely seated.
5.
Place the custom end plate for the option card over the connector(s) of the option card. With some option cards, the card’s
end plate is pre-fastened.
6.
With the mounting holes aligned with the standoffs, place the two screws through the end plate, and into the standoffs on
the WEB/CP-700 base board. Using a screwdriver, hand tighten these screws.
7.
Replace the cover on the controller.
About DDR-2 RAM Upgrade
The WEB/CP-700 has one (1) populated memory slot for DDR-2 RAM. You can replace the standard 512MB SODIMM module
with a 1GB DDR-2 SODIMM memory module, Part Number NPM-1GB.
NOTE: Removal and reinstallation (upgrade) of the DDR-2 SODIMM module in a WEB/CP-700 involves removing its shield/
NiMH battery assembly and any option card in option slot 1. Therefore, it is strongly recommended that you unfasten the
controller from any mounting, and work on a flat surface.


