Assembly Instructions 4/6
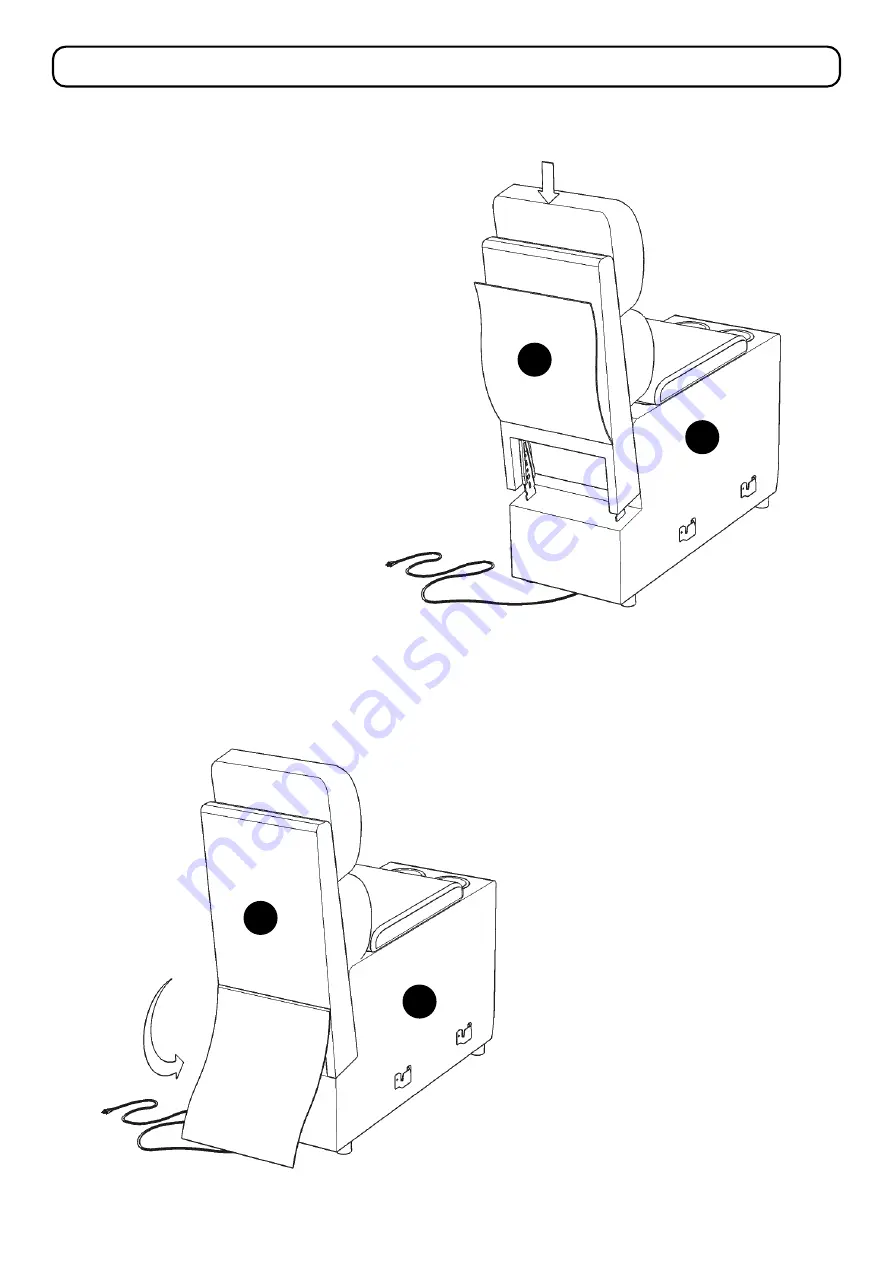
STEP 7
Attach Back (F) to Console (E).
STEP 8
Attach back flap of Back (F)
to back of Console (E).
E
F
Page 1: ...the carton and place them individually on a soft cloth to prevent scratches or other damage Carefully and strictly follow these assembly instructions to ensure a completed product as designed Do not...
Page 2: ...EP 1 Attach plug of Back B to plug of Seat A then flip the lock See Figures 1 and 2 A B Plug Plug Figure 1 Figure 2 STEP 3 Attach back flap of Back B to back of Seat A A B A B STEP 2 Attach Back B to...
Page 3: ...Assembly Instructions 3 6 STEP 4 Attach plug of Back D to plug of Seat C then flip the lock Plug D C Plug C STEP 6 Attach back flap of Back D to back of Seat C C D STEP 5 Attach Back D to Seat C D...
Page 4: ...Assembly Instructions 4 6 STEP 7 Attach Back F to Console E STEP 8 Attach back flap of Back F to back of Console E E E F F...
Page 5: ...Assembly Instructions 5 6 STEP 10 Attach left seat to unit STEP 9 Attach sofa console to right seat See Figure 4 Figure 4...
Page 6: ...Assembly Instructions 6 6 Plug A Plug B STEP 11 Attach Plug B to plugs of unit then flip the locks See Figures 5 and 6 Attach Plug A to Plug B then flip the lock Figure 5 Figure 6 Lock...
Page 7: ...DING with a soft cloth moistened in lukewarm soap and water Buff with a dry clean cloth CLEAN Home Styles will provide replacements free of charge for missing or damaged hardware or parts within 30 da...