Assembly Instructions 10/10
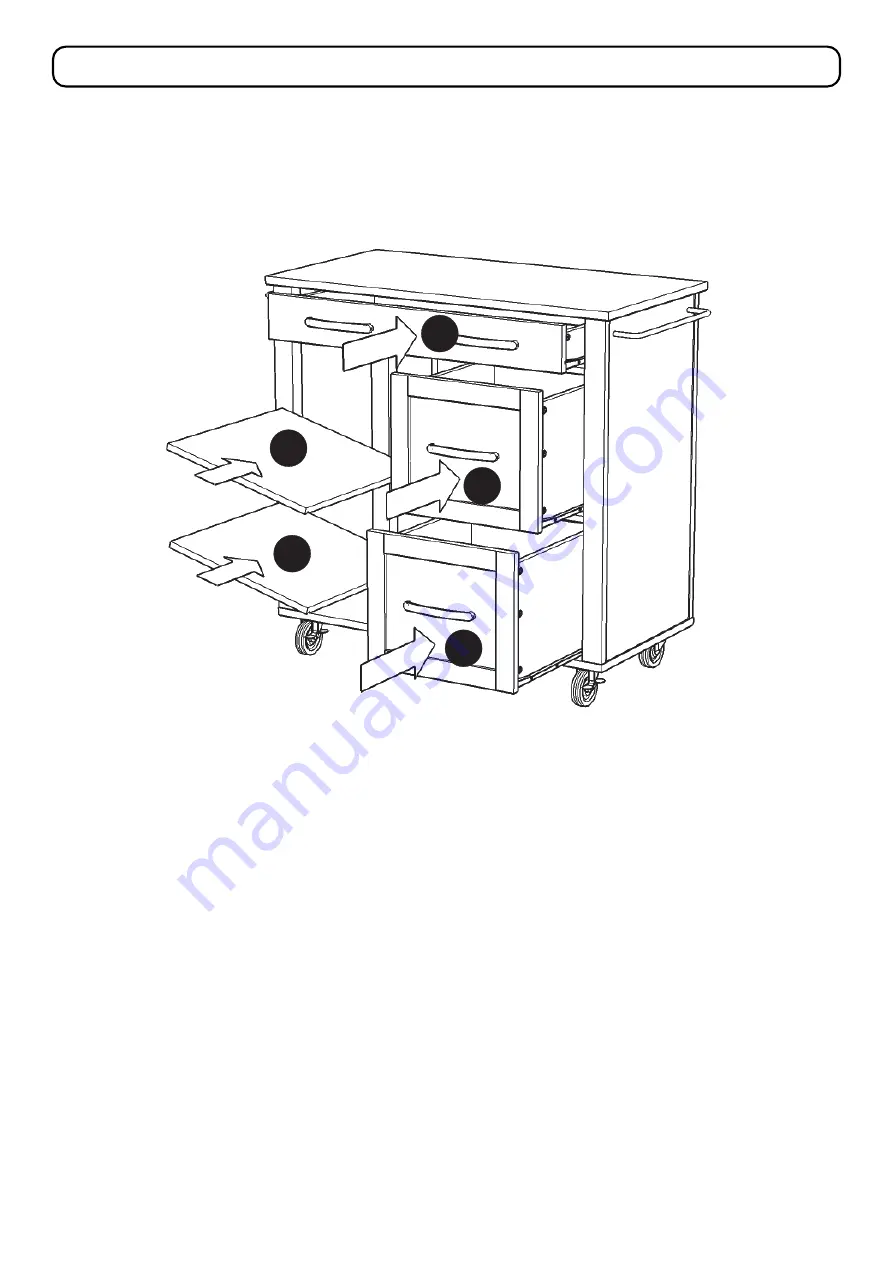
STEP 19
Place Shelves (Q) into position.
Slide Drawers (R) and (S) into position.
Q
R
S
Page 1: ...rt Refer to later page s of these instructions for drawer assembly D Middle Panel 1 pc E Post 1 pc F Post 1 pc S Drawer 2 pcs Q Shelf 2 pcs Home Styles Customer Service www homestyles furniture com se...
Page 2: ...rew Assembly 10 pcs 1 extra Left Runner 3 pcs M4x16 Caster Screw 16 pcs 1 extra Locking Caster 2 pcs Non Locking Caster 2 pcs Left Guide 3 pcs Side Bar 2 pcs Adjustable Pin 8 pcs 1 extra M4x12 Machine...
Page 3: ...anel D Supports G H and Posts E F then tighten See Figure 1 Attach Left Guides to Side Frame B and Middle Panel D with Varianta Screws See Figure 2 Insert Insert into pre drilled hole in Post F insert...
Page 4: ...Insert Covers See Figure 6 Attach Right Guides to unit with Varianta Screws STEP 2 Attach Back Rail L to Back Rail M with Assembly Screw L M Assembly Screw Assembly Screw Dowel STEP 3 Attach unit and...
Page 5: ...me B to unit from Step 3 with Dowels Cam Lock Screw and Cam Locks Attach Rail J and Side Panel C to unit with Dowels and Cam Locks Cover Cam Locks with Covers STEP 5 Cover Cam Locks with Covers See Fi...
Page 6: ...ach Casters to Base O with Caster Screws into pre drilled holes with Locking Casters at front See Figure 8 Note Arrow label indicates front of unit STEP 8 Slide Back Panel P into position Attach Base...
Page 7: ...and middle panel at desired level See Figure 10 Figure 10 A Adjustable Pin STEP 9 Turn unit to its upright position Attach Side Bars to unit with Head Cap Bolts into pre drilled holes Attach Plastic...
Page 8: ...Screws Dowels and Cam Locks Cover Cam Locks with Covers Handle Plastic Clip Screw Plastic Clip Wood Screw Left Runner Roller at back Right Runner Assembly Instructions 8 10 STEP 12 Slide Drawer Botto...
Page 9: ...Cam Locks with Covers Handle Wood Screw Left Runner Roller at back Right Runner Assembly Instructions 9 10 STEP 16 Slide Drawer Bottom S5 into groove Attach Drawer Back S2 to unit with Flat Head Screw...
Page 10: ...Assembly Instructions 10 10 STEP 19 Place Shelves Q into position Slide Drawers R and S into position Q Q R S S...
Page 11: ...DING with a soft cloth moistened in lukewarm soap and water Buff with a dry clean cloth CLEAN Home Styles will provide replacements free of charge for missing or damaged hardware or parts within 30 da...