background image

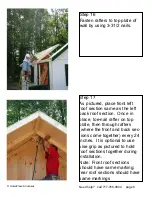
Step 16

Fasten rafters to top plate of 

wall by using 3-31/2 nails.

Need help?   call 717-768-0804     page 6

Step 17

As pictured, place front left 

roof section same as the left 

back roof section.  Once in 

place, toe-nail rafter on top 

plate, then through rafters 

(where the front and back sec-

tions come together) every 24 

inches.  It is optional to use 

vise grip as pictured to hold 

roof sections together during 

installation.

Note: Front roof sections 

should have same marking; 

rear roof sections should have 

same markings 

© HomePlace Structures

Summary of Contents for Garden Chalet

Page 1: ...Garden Chalet Assembly Manual HomePlace Structures ...

Page 2: ...joyment of this building is only a few hours away Have Fun Remember it is very important that you have a level site for your Garden Chalet and that the floor is perfectly level prior to setting the walls You have purchased a product that consists of heavy bulky pieces With your purchase you assume full responsibility to have the necessary manpower and or equipment available to unload the items You...

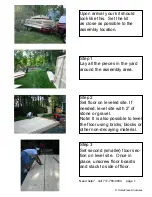
Page 3: ...mbly area Step 2 Set floor on leveled site If needed level site with 2 of stone or gravel Note It is also possible to level the floor using bricks blocks or other non decaying material Need help call 717 768 0804 page 1 Step 3 Set second smaller floor sec tion on level site Once in place unscrew floor boards and stack to side of floor HomePlace Structures ...

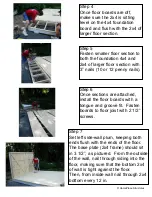
Page 4: ...loor boards are off make sure the 2x4 is sitting level on the 4x4 foundation board and flush with the 2x4 of larger floor section Step 7 Set left side wall plum keeping both ends flush with the ends of the floor The base plate 2x4 frame should sit in 3 1 2 as pictured From the outside of the wall nail through siding into the floor making sure that the bottom 2x4 of wall is tight against the floor ...

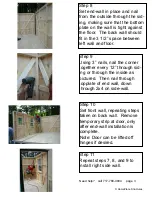
Page 5: ... and nail from the outside through the sid ing making sure that the bottom plate on the wall is tight against the floor The back wall should fit in the 3 1 2 space between left wall and floor Step 9 Using 3 nails nail the corner together every 12 through sid ing or through the inside as pictured Then nail through topplate of end wall down through 2x4 on side wall Step 11 Repeat steps 7 8 and 9 to ...

Page 6: ...of posts to side walls keeping top of posts flush with the end of sidewall top plate Screw through top plate down into the posts Set end piece between posts and secure through top plates Attach 6 decorative braces keeping wide side up Set loft porch ceiling in place nailing along edges Need help call 717 768 0804 page 4 HomePlace Structures ...

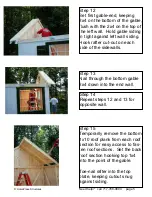
Page 7: ... with the 2x4 on the top of the left wall Hold gable siding in tight against left wall siding Hook rafter cut out on each side of the sidewalls Step 15 Temporarily remove the bottom 1x10 roof plank from each roof section for easy access to fas ten roof sections Set the back roof section hooking top 1x4 into the point of the gable Toe nail rafter into the top plate keeping cutout snug against sidin...

Page 8: ... left back roof section Once in place toe nail rafter on top plate then through rafters where the front and back sec tions come together every 24 inches It is optional to use vise grip as pictured to hold roof sections together during installation Note Front roof sections should have same marking rear roof sections should have same markings HomePlace Structures ...

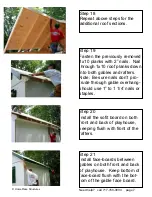
Page 9: ... nails don t pro trude through gable overhang should use 1 to 1 1 4 nails or staples Step 20 Install the sofit board on both front and back of playhouse keeping flush with front of the rafters Step 21 Install face boards between gables on both front and back of playhouse Keep bottom of face board flush with the bot tom of the gable face board Need help call 717 768 0804 page 7 HomePlace Structures...

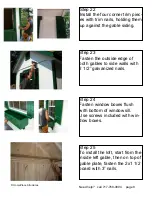
Page 10: ...f both gables to side walls with 2 1 2 galvanized nails Step 24 Fasten window boxes flush with bottom of window sill Use screws included with win dow boxes Step 25 To install the loft start from the inside left gable then on top of gable plate fasten the 2x1 1 2 board with 3 nails Need help call 717 768 0804 page 8 HomePlace Structures ...

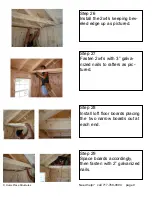
Page 11: ...27 Fasten 2x4 s with 3 galva nized nails to rafters as pic tured Step 28 Install loft floor boards placing the two narrow boards out at each end Need help call 717 768 0804 page 9 Step 29 Space boards accordingly then fasten with 2 galvanized nails HomePlace Structures ...

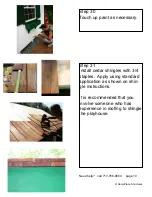
Page 12: ...cedar shingles with 3 4 staples Apply using standard application as shown on shin gle instructions It is recommended that you involve someone who has experience in roofing to shingle the playhouse Step 30 Touch up paint as necessary HomePlace Structures ...

Page 13: ...Need help call 717 768 0804 page 11 Congratulations Your Garden Chalet is now ready for you to enjoy for years to come HomePlace Structures ...

Reviews: