background image

UK

 - Page  15

MAINTENANCE

NOTE: 

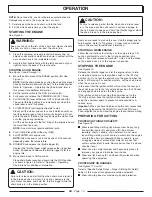
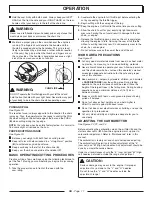
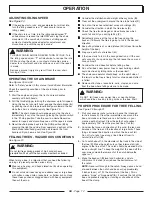
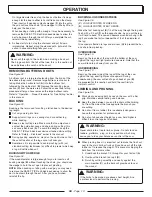
New chain tends to stretch. Check the chain tension

frequently and tension as required.

CAUTION:

A chain tensioned while warm may be too tight upon
cooling. Check the “cold tension” before next use.

CHAIN MAINTENANCE

See Figures 51 and 52.

CAUTION:

Check that the switch is in the STOP “ 

” position before

you work on the saw.

Use only a low-kick-back chain on this saw. This fast-cutting
chain provides kick-back reduction when properly maintained.

For smooth and fast cutting, maintain the chain properly.

The chain requires sharpening when the wood chips are small
and powdery, the chain must be forced through the wood during
cutting, or the chain cuts to one side. During maintenance of the
chain, consider the following:

Improper filing angle of the side plate can increase the risk of
a severe kick-back.

Raker (depth gauge) clearance (

A

). 

See Figure 55.

1. Too low increases the potential for kick-back.

2. Not low enough decreases cutting ability.

If the cutter teeth hit hard objects such as nails and stones, or
are abraded by mud or sand on the wood, have the Homelite
service dealer sharpen the chain.

NOTE:

 Inspect the drive sprocket for wear or damage when

replacing the chain (

B

). If signs of wear or damage are

present in the areas indicated, have the drive sprocket
replaced by a Homelite service dealer. 

See Figure 56.

SHARPENING THE CUTTERS

See Figures 53 through 56.

PARTS OF A CUTTER

4.

Keep the file level with the top plate of the tooth. Do not let
the file dip or rock. 

See Figure 54.

5.

Using light but firm pressure, stroke towards the front corner
of the tooth. 

See Figure 55.

6.

Lift the file away from the steel on each return stroke.

7.

Put a few firm strokes on every tooth. File all left-hand
cutters (

A

) in one direction. Then move to the other side

and file the right-hand cutters (

B

) in the opposite direction.

See Figure 56.

8.

Remove filings from the file with a wire brush.

CAUTION:

A dull or improperly sharpened chain can cause
excessive engine speed during cutting which may result
in severe engine damage.

WARNING:

Improper chain sharpening increases the potential of
kick-back.

WARNING:

Failure to replace or repair a damaged chain can cause
serious injury.

WARNING:

The saw chain is very sharp. Always wear protective
gloves when performing maintenance to the chain.

(

A

) Cutting Corner

(

B

) Side Plate

(

C

) Depth Gauge

(

D

) Toe

Be careful to file all cutters to the specified angles and to the
same length, as fast cutting can only be obtained when all
cutters are uniform.

1.

Wear gloves for protection.

2.

Tension the chain prior to sharpening.

NOTE:

 Refer to “Maintenance – Adjusting the Chain Tension”

earlier in this manual.

3.

Use a 4 mm (5/32 in.) diameter round file and holder. Do all
your filing at the midpoint of the bar.

(

E

) Gullet

(

F

) Heel

(

G

) Rivet hole

(

H

) Top Plate

TOP PLATE FILING ANGLE

See Figure 57.

(

A

) - CORRECT 30° – file holders are marked with guide

marks to align file properly to produce correct top plate
angle.

(

B

) - LESS THAN 30° – for cross cutting.

(

C

) - MORE THAN 30° – feathered edge dulls quickly.

SIDE PLATE ANGLE

See Figure 58.

(

D

) - CORRECT 80

– Produced automatically if you use the

correct diameter file in the file holder.

(

E

) - HOOK – “Grabs” and dulls quickly, increases the

potential of KICK-BACK.

Results from using a file with a diameter too small or a file
held too low.

(

F

) - BACKWARD SLOPE – Needs too much feed pressure,

causes excessive wear to the bar and chain.

Results from using a file with a diameter too large or file held
too high.

Summary of Contents for CSP3816 - UT74123D

Page 1: ...of rugged trouble free performance WARNING To reduce the risk of injury the user must read and understand the operator s manual before using this product Thank you for buying a Homelite chainsaw SAVE THIS MANUAL FOR FUTURE REFERENCE OPERATOR S MANUAL CSP3816 UT74123D 406 mm 16 in 38cc Chainsaw CSP4518 UT74125D 457 mm 18 in 45cc Chainsaw CSP4520 UT74127D 508 mm 20 in 45cc Chainsaw ...

Page 2: ...NT Servicing requires extreme care and knowledge and should be performed only by a qualified service technician When servicing use only identical Homelite replacement parts For safe operation read and understand all instructions before using the chainsaw Follow all safety instructions Failure to follow all safety instructions listed below may result in serious personal injury Look for this symbol ...

Page 3: ...ur right hand on the rear handle and your left hand on the front handle with your thumbs and fingers encircling the chainsaw handles A firm grip together with a stiff left arm will help you maintain control of the saw if kick back occurs 3 Make sure that the area in which you are cutting is free from obstructions DO NOT let the nose of the guide bar contact a log branch fence or any other obstruct...

Page 4: ...or if an improper tool is used to hold the flywheel in order to remove the clutch structural damage to the flywheel could occur and subsequently cause the flywheel to burst KEEPSAFE T TIP ANTI KICK BACKNOSEGUARD properly mounted on the guide bar to prevent rotational kick back FOLLOWTHESHARPENINGandmaintenance instructions for the saw chain USE ONLY THE REPLACEMENT GUIDE BARS and low kick back cha...

Page 5: ...e involved For example felling a tree requires a larger work area than making other cuts such as bucking cuts etc PUSH AND PULL The reaction force is always opposite to the direction the chain is moving Thus the operator must be ready to control the PULL when cutting on the bottom edge of the bar and the PUSH when cutting along the top edge NOTE Your chainsaw has been fully factory tested It is no...

Page 6: ...eye hearing and head protection when operating this equipment The SAFE T TIP nose guard on the guide bar helps prevent kick back No smoking sparks or open flame when mixing fuel or filling the fuel tank Hold and operate the saw properly with both hands Do not operate the saw using only one hand Engines produce carbon monoxide which is an odourless deadly poison Do not operate in an enclosed area D...

Page 7: ... tank capacity 575 cm3 19 4 oz Oil tank capacity 350 cm3 11 8 oz Bar lengths 41 50 cm 16 20 in Chain pitch 8 26 mm 0 325 in Chain gauge 1 27 mm 0 050 in Chain type Semi Chisel LoPro Drive sprocket 7 tooth Engine displacement 45 cm3 2 75 cu in Maximum engine power ISO 7293 1 9 kW 2 5 HP Maximum engine speed with attachment 12 500 min 1 Idling engine speed 2 800 3 400 min 1 Sound pressure level LpA ...

Page 8: ...imise the force of a kick back reaction by preventing the cutters from digging in too deeply at the kick back zone Only use replacement chain that is equivalent to the original chain or has been certified as a low kick back chain As saw chains are sharpened they lose some of the low kick back qualities and extra caution is required GUIDE BARS Generally guide bars with small radius tips have somewh...

Page 9: ...e eyes wash them immediately with clean water If irritation is still present see a doctor immediately Clean up spilled fuel immediately WARNING Check for fuel leaks If any are found correct them before using the saw to prevent fire or burn injury 50 1 FILLING THE TANK See Figure 6 Refer to Specific Safety Rules Refuelling earlier in this manual for additional safety information 1 Clean the surface...

Page 10: ... serious damage to the unit Never squeeze and hold the throttle trigger while the chain brake is in the brake position CAUTION Failure to release partial throttle when chain brake lever is in the brake position will result in serious damage to the unit Never squeeze and hold the throttle trigger while the chain brake is in the brake position Now you are ready to pick up the saw Use the proper grip...

Page 11: ...rottle without a cutting load may result in unnecessary wear to the chain bar and engine 7 Do not put pressure on the saw at the end of the cut WORK AREA PRECAUTIONS See Figure 21 Cut only wood or materials made from wood no sheet metal no plastics no masonry no non wood building materials Never allow children to operate your saw Allow no person to use this chainsaw who has not read this operator ...

Page 12: ...ght of heavy limbs B Clear out the undergrowth around the tree to be felled C Do not cut trees near electrical wires or buildings D Consider the direction in which the tree leans E Check the tree for damaged or dead branches which could fall and hit you during felling F Periodically glance at the top of the tree during the back cut to assure the tree is going to fall in the desired direction Keep ...

Page 13: ...ng wedge B without touching the chain you should use the wedge to hold the cut open to prevent pinching NOTE When bucking or felling with a wedge you may need to remove the SAFE T TIP anti kick back device to allow the bar to be drawn through the cut After you have finished reinstall the tip BUCKING LOGS UNDER STRESS See Figure 35 C LOG SUPPORTED AT ONE END D LOG SUPPORTED AT BOTH ENDS Make the fi...

Page 14: ...ter guide bar plate ensuring that the bar pin groove is at the bottom with the upper and lower edges angled away from the guide bar 12 Replace the clutch cover and bar mounting nuts ASSEMBLING THE BAR AND CHAIN See Figures 3 and 38 to 47 13 Tighten the bar mounting nuts finger tight only The bar must be free to move for tension adjustment 14 Remove all slack from the chain by turning the chain ten...

Page 15: ... from the steel on each return stroke 7 Put a few firm strokes on every tooth File all left hand cutters A in one direction Then move to the other side and file the right hand cutters B in the opposite direction See Figure 56 8 Remove filings from the file with a wire brush CAUTION A dull or improperly sharpened chain can cause excessive engine speed during cutting which may result in severe engin...

Page 16: ...ou need to check the tightness of the mounting screw before each use Tighten the mounting screw A of the nose guard as instructed below These are specially hardened screws If you cannot install the screw tightly replace both the screw and the SAFE T TIP B before further operation Do not replace the screw with an ordinary screw In addition to preventing chain contact with solid objects at the nose ...

Page 17: ...ese deposits to restore performance We highly recommend that only qualified service technicians perform this service CHECKING THE FUEL FILTER See Figure 70 Check the fuel filter A periodically Replace it if contaminated or damaged REPLACING THE SPARKING PLUG See Figure 71 This engine uses a Champion RCJ 4 with 0 63 mm 0 025 in electrode gap Use an exact replacement and replace every six months or ...

Page 18: ...g Set ignition switch to run I position Push and fully release primer bulb 7 times Pull starter three times with choke lever at run If engine does not start move choke lever to choke and repeat normal starting procedure If engine still fails to start repeat procedure with a new sparking plug Contact a Homelite service dealer for carburettor adjustment Contact a Homelite service dealer for carburet...

Page 19: ...de bar and chain for damage NOTE The carburettor adjustment needle s are equipped with plastic cap s which prevent anticlockwise rotation from the original factory adjustment If your product exhibits specific performance problem s where the Troubleshooting Section recommends an anticlockwise needle adjustment and you have made no adjustments since the original purchase take the product to a factor...

Page 20: ...ve been issued by the following approved body SLG Prüf und Zertifizierumgs GmbH Certificate No 100884D SLG Prüf und Zertifizierumgs GmbH Certificate No 100888O To effect correct application of the health and safety requirements stated in the EEC directives the following European and or national standards and or technical specifications were consulted EN292 1 1991 EN292 1 1991 A1 1995 EN 608 1994 I...

Reviews: