


11
Creating Your interLINX Network
The Homefront alarm communicates on its own private interLINX Network. This
network is created simply by powering up new alarms one at a time.
General Note:
The interLINX network is limited
to 18 total units. Only 12 of these units may be
smoke alarms.
The WARNING light will begin to flash slowly.
While the WARNING light is flashing at this rate,
additional alarms may be added to your network.
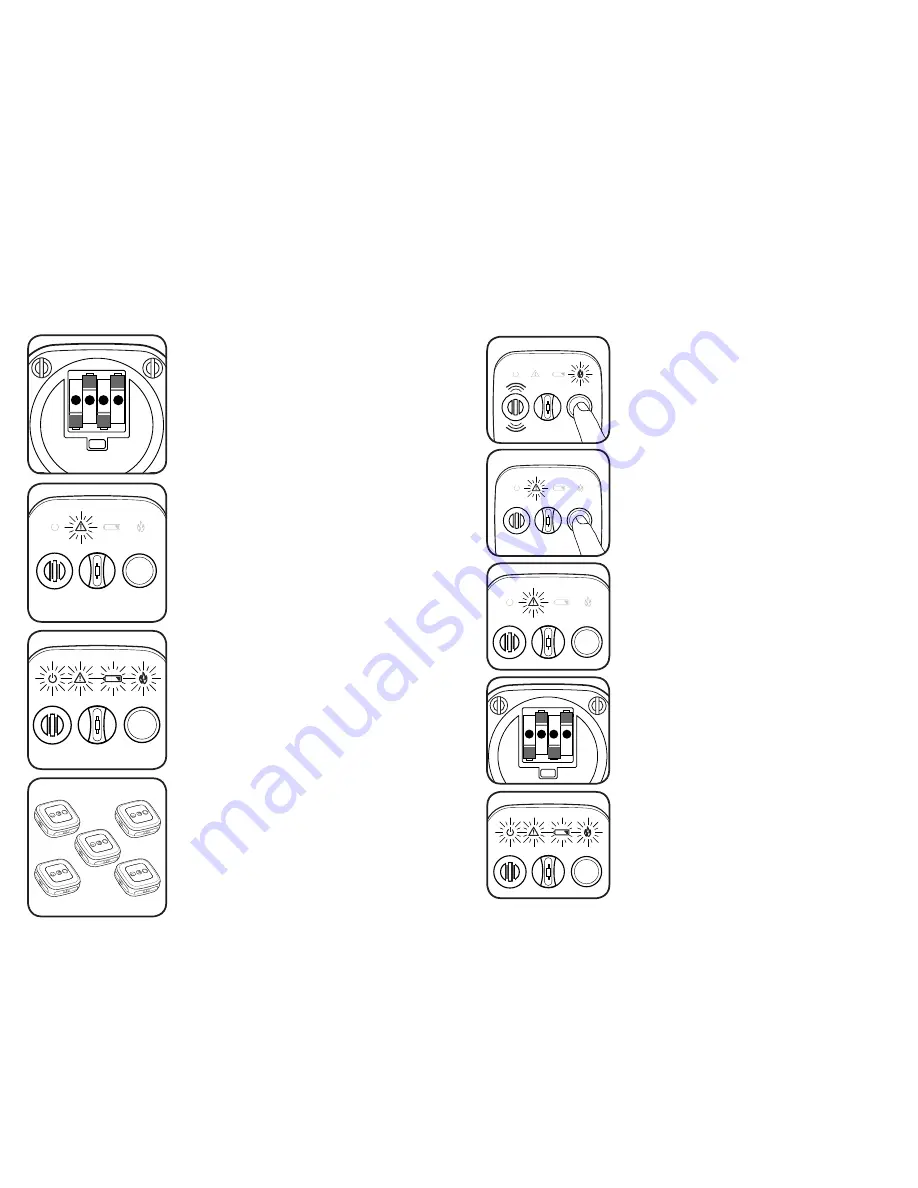
Install (4) AA batteries into the next alarm.
After a few seconds, the alarm will chirp twice
and all four of the lighted icons will strobe on.
This alarm has been added to
your network!
Install the 4 AA batteries into the first alarm.
One minute after installing the last set of
batteries, the WARNING light will stop flashing
on the original alarm, and it will join the network.
The network is now closed.
Continue installing batteries to each new alarm,
one alarm at a time, until all alarms have been
added to the network.
1
2
3
4
General Note:
It is easiest to first create the
interLINX network while all alarms are located
together, such as on a table.
12
Adding an Alarm to Your interLINX Network
1
2
3
4
In the event that an alarm must be added to the interLINX network after it has
closed, the following steps must be taken to reopen the network.
Select any alarm on the existing network. Press and
hold the button on the front cover of the alarm.
The FIRE light will flash rapidly and the alarm will
sound three tones.
Continue holding the button down.
Next, the WARNING light will begin to flash.
Count
5 flashes
of the WARNING light and
release the button.
The WARNING light will now slowly pulse,
signaling the network is again ready to receive
alarms.
Install batteries into the new alarm being added to
the network.
After a few seconds the alarm will chirp twice and
all four of the lighted icons will strobe on.
After one minute, the WARNING light will stop
flashing on the original alarm and the network
will close.
The alarm has been successfully added to
your network!


