background image


6. The Balanced Output Connectors of Channel A & B 


7. The Phantom Power Supply 


How to use the HOMEASY M3R? 


To


use


easily


is


the


aim


of


HOMEASY


Series


gears.


So


it


is


quite


easy


to


use


and


operate


the


M3R.


Each


of


the


two


pre

amplifier


channels


has


its


own


input


and


output


and


variable


gain


control


individually.


Step


1


Simply


connect


a


signal


for


processing


to


one


of


the


XLR


balanced


inputs


on


the


front


of


the


M3R.


Step


2


Make


a


connection


from


the


corresponding


channel


output


on


the


front


of


the


M3R


to


your


desired


destination


(Mixer,


recorder,


etc).


Step


3


Adjust


the


variable


gain


control


to


the


desired


pre

amplified


level.


To


ensure


you


do


not


over


pre

amplify


your


signal


a


peak


clip


indicator


light


has


been


provided


on


the


front


panel


of


the


M3R


for


each


channel.


When


illuminated,


this


light


indicates


that


the


preamplifier


is


overloaded


and


that


distortion


will


occur.


Please


turn


down


the


variable


gain


control


for


the


currently


selected


channel


until


the


peak


clip


light


is


no


longer


illuminated.


Always


trust


your


ears;


the


Peak


LED


is


after


the


gain


control


so


you


could


actually


distort


the


input


with


a


very


high


level.


The


jack


to


connect


the


AC


power


adapter


in


the


packing


box.


Balanced


TRS


signal


outputs


of


Channel


A


&


B


to


connect


to


a


mixer,


audio


interface,


etc.


Each


channel


features


a


phantom


power


supply


for


enabling


the


supply


of


48V


through


the


XLR


input


connector


to


power


condenser


microphones.


Each


Switch


controls


one


channel


individually.


Summary of Contents for M3R

Page 1: ...0 M3R 2 CHANNEL MIC PREAMP September 2nd 2014 Copyright 2006 2015 AC AUDIO Australia All Rights Reserved Proudly Presented by AC AUDIO User Manual ...

Page 2: ... situated away from other heat sources such as heaters radiators ovens or other appliances that produce heat POWER SOURCE Make sure your appliance is set to the correct voltage for the country in which it will be use before switching the device ON GROUNDING POLARIZATION Precautions should be taken so that the grounding or polarization means of an appliance is not defeated POWER CORD PROTECTION Pow...

Page 3: ...ce or The appliance has been dropped or the enclosure damaged SERVICING The user should not attempt to service the appliance beyond that is described in the Operating Instructions INSTALLATION Every HOMEASY gear was carefully packed in the factory and the packaging was designed to protect the unit from rough handling Nevertheless we recommend that you carefully examine the packaging and its conten...

Page 4: ...e gain control from 20dB to 40dB The completely metallic cover and panels give wonderful performance against external interference Furthermore M3R adopts NE5532 high class transistor operational amplifier module which has higher capability than 4558 to acquire more pure clear pre amplifying In one word HOMEASY M3R would be your most cost effective choice for preamp gear at this pricing level Produ...

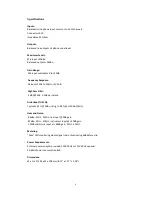
Page 5: ... 0 2dB High Pass Filter 3dB 90Hz 12dB per octave Distortion THD N Typically 0 1 0dBu rising to 0 3 15dBu 1KHz Hum and Noise 84dBu 22Hz 22KHz line input 0dB gain 82dBu 22Hz 22KHz instrument input 20dB gain 122dBu EIN mic input at 60dB gain 22Hz 22KHz Metering Peak LED monitoring whole signal chain illuminating 6dB before clip Power Requirements External power adapter provided 230V 50Hz or 115V 60Hz...

Page 6: ... of Channel A B to connect microphones line signals etc Each channel is completely individual Each channel features a rotary gain control for variable adjustment of the desired pre amplifier level Each channel has an individual peak indicator light which indicates the distortion Twinkle continually means approaching the peak while lasting illuminated means reaching the peak and the gear overloaded...

Page 7: ...sure you do not over pre amplify your signal a peak clip indicator light has been provided on the front panel of the M3R for each channel When illuminated this light indicates that the preamplifier is overloaded and that distortion will occur Please turn down the variable gain control for the currently selected channel until the peak clip light is no longer illuminated Always trust your ears the P...

Page 8: ... from such a modification adaptation 3 Free inspections maintenance repair work and replacement of parts are expressly excluded from this warranty in particular if caused by inappropriate use Likewise the warranty does not cover defects of expendable parts caused by normal wear of the product Expendable parts are typically pots potentiometers switches and similar components 4 Damages defects cause...

Page 9: ...of any kind for any purpose without the express written permission of AC AUDIO ALL RIGHTS RESERVED 2006 2015 AC AUDIO All the instructions descriptions and technical specifications are subject to change without prior notice www ac audio com ...

Reviews: