2612 West Townley Ave, Suite 5, Phoenix, AZ 85021
Phone: 602-995-9659 Fax: 602-995-7157
HII-3
Revision 110420
Made in America
5
Valance Installation
HOME DECOR
’s inside mount 1/2” return valances come preassembled with metal valance clips.
Attach the loose plastic valance clips to the front of the headrail, one at each end. Space any
remaining clips evenly. Press the slot in the Valance against the bottom post of the Valance Clip
and rotate it upwards.
6
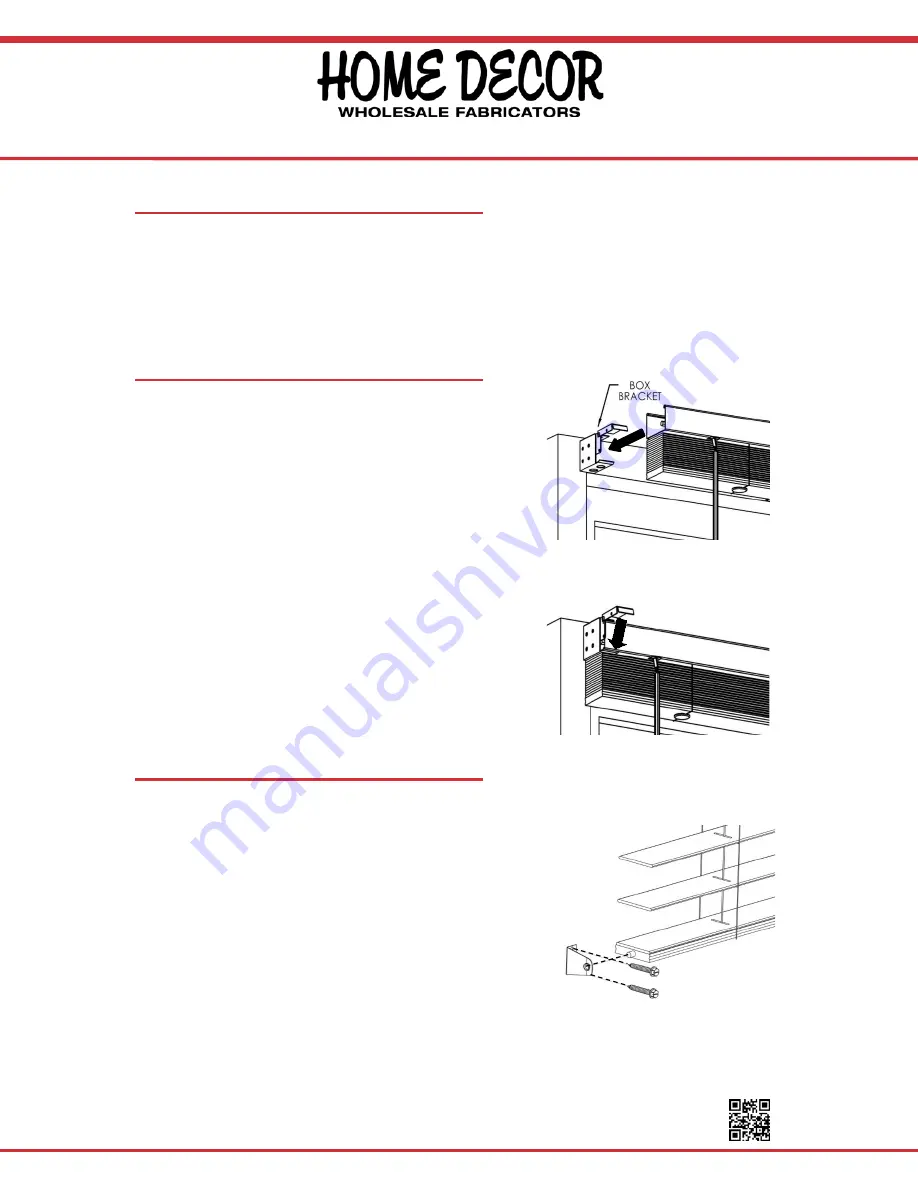
Blind Installation
Align the headrail with the center support and box brackets.
The headrail should have the tilt mechanism facing towards
the room. Be careful not to trap the top slat in the brackets
and slide the headrail straight back until it is snug in the
brackets. If the headrail can slide from side-to-side in the
box brackets, you can use a flat head screwdriver to bend
out the tabs on the end of the unit until it is snug.
Lower the front gate of each box bracket and press until the
locking tab clicks into place.
7
Attach Hold Down Brackets (If Needed)
To attach the hold down brackets to the shade, the installer
must drill a hole into the side of the bottom rail (drill bit should
be 3.99 mm in size.
For proper alignment. With the hold down brackets attached
to the bottom rail, lower the blind to the hold down bracket
mounting surface and mark the bracket locations.
Attach the hold down brackets at the bottom of the window or
door with the included screws as shown. To attach the bottom
rail, gently pull the brackets out slightly, and insert the pins into
the holes on the bottom rail of the blinds.


