background image

EN-6

Adjust the Back Cushion and the Seat Cushion Position as ilustrations to your favorite, so 
as to reach your workout aims.

DAILY MAINTENANCE

1.Lubricate the parts peridically.
2.Check and tighten all the parts of the product before using it.
3.Use a damp towel to clean the bench after using it and avoid chemical solvents for 
cleaning.

Summary of Contents for A91-191

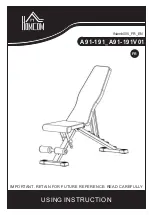
Page 1: ...FR USING INSTRUCTION IMPORTANT RETAIN FOR FUTURE REFERENCE READ CAREFULLY INamb005_FR_EN A91 191_A91 191V01...

Page 2: ...FR 2 Importantes informations de s curit...

Page 3: ...ssier 1 5 Cadre de r glage du si ge 1 6 Cadre de r glage du dossier 1 7 Coussin du si ge 1 8 Coussin du dossier 1 9 Chapeau de pied 30 60 4 10 Goupille bille 1 11 Boulon bague 1 12 Bouchon 4 13 Boulon...

Page 4: ...FR 4...

Page 5: ...endre immobile et ins rez la goupille billes 10 dans le trou du cadre de r glage du si ge 5 et du cadre de sup port avant 1 tape 3 Le cadre de r glage du si ge 5 a quatre trous pour changer l angle Pl...

Page 6: ...hoix afin d atteindre vos objectifs d entra nement ENTRETIEN QUOTIDIEN 1 Lubrifiez les pi ces p riodiquement 2 V rifiez et serrez toutes les parties du produit avant utilisation 3 Utilisez une serviet...

Page 7: ...EN USING INSTRUCTION IMPORTANT RETAIN FOR FUTURE REFERENCE READ CAREFULLY INamb005_FR_EN A91 191_A91 191V01...

Page 8: ...EN 2 Important Safety Information...

Page 9: ...EN 3 COMPONENT DIAGRAM...

Page 10: ...EN 4...

Page 11: ...make it stand still and insert the ball pin 10 into the hole of seat adjustment frame 5 and the front support frame 1 Step3 The seat adjustment frame 5 has four holes to change the angle Put the backr...

Page 12: ...ations to your favorite so as to reach your workout aims DAILY MAINTENANCE 1 Lubricate the parts peridically 2 Check and tighten all the parts of the product before using it 3 Use a damp towel to clea...

Reviews: