


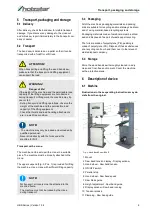


Operation
HBS Series | Version 1.06
16
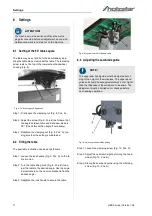
9.2 Rip fence
For straight longitudinal cuts, the workpiece is guided
along the rip fence. The rip fence can be adjusted to the
desired cutting width.
9.3 Cut types
Longitudinal cuts
The longitudinal cuts are sawing along the workpiece
grain. It is possible to saw along a torn line without a rip
fence or along the rip fence for a better result.
For right-angled cuts (the table is at right angles to the
band saw blade), the rip fence is placed to the left of the
band saw blade so that the workpiece can be guided
safely along the fence with the right hand.
In the case of longitudinal mitre cuts with an inclined ta
-
ble, the rip fence must be fitted to the right of the blade
on the downward side (if the width of the workpiece per
-
mits this) in order to secure the workpiece against slip
-
ping.
Cross sections
Cross-section is the sawing at right angles to the grain of
the wood. This type of cut can also be carried out without
a rip fence.
Freehand cuts
The ease with which curved cuts can be made is one of
the outstanding features of a band saw. For curved cuts,
choose a band saw blade with a width that can cut the
smallest radii in your workpiece. For freehand cutting,
you should work at a low feed rate so that the saw band
can follow the desired line. Make sure that you do not
push the workpiece sideways out of the cutting line. This
will cause the saw band to run and jam in the cutting
groove
.
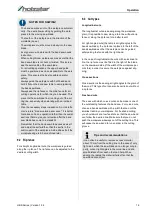
NOTES FOR SAWING!
- The band saw does not cut the workpiece automati
-
cally. The user allows cutting by guiding the work
-
piece into the moving saw blade.
- The teeth cut the workpiece in the direction of the
worktable (down).
- The workpiece must be moved slowly into the saw
blade.
- Every person who works with the band saw needs
instruction.
- When cutting thicker workpieces, make sure that the
band saw blade is not bent or twisted. This increa
-
ses the service life of the saw blade.
- For all cutting operations, the upper band guide
must be positioned as close as possible to the work
-
piece. This ensures the best possible operator
safety.
- Always guide the workpiece with both hands and
hold it flat on the band saw table to avoid jamming
the band saw blade.
- Always use the rip fence or the mitre fence for all
cutting operations for which they can be used. This
prevents the saw blade from running out of the cut
-
ting line, especially when working with an inclined
table.
- Plan the necessary steps in advance. An old crafts
-
man's rule is "measure twice, saw once". It is better
to make a cut in one operation rather than in several
sections that may require retraction after the band
saw blade has come to a standstill.
- Remember that the band saw blade causes a kerf
and adjust the kerf width so that the kerf is in the
section part of the workpiece. Add a little extra if the
workpiece edge is to be machined later.
Tips and recommendations
It can often be useful to remove excess material
about 10 mm from the cutting line. In the case of very
tight radii, which the saw blade can no longer cut pro
-
perly, cuts at right angles to the curve line and at a
small distance from each other can help. When
sawing the radius, the material falls off so that the
saw band cannot jam.