HO976100TX
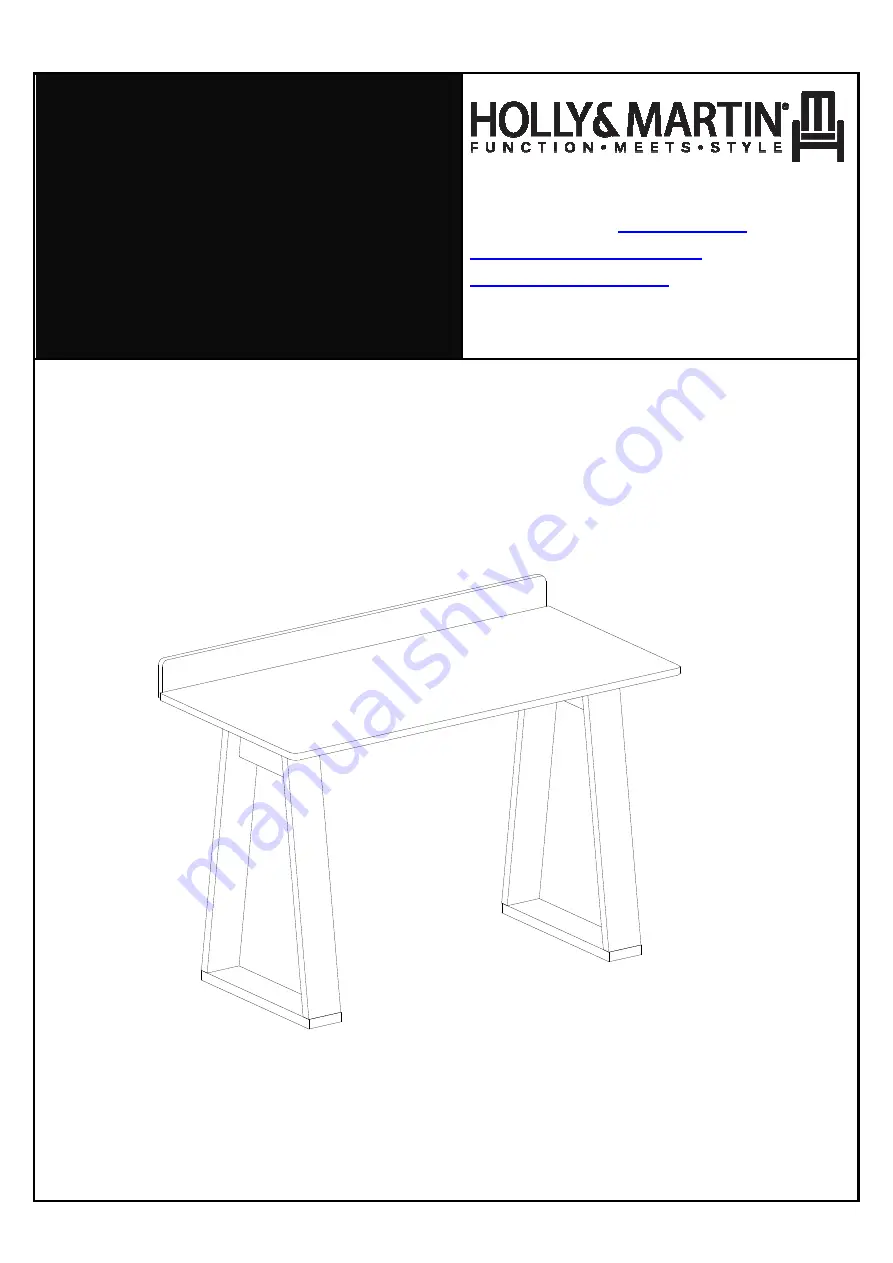
Hagio Desk
Assembly Instruction
Holly & Martin® a valued brand of SEI
Customer Service
1-800-633-5096
[email protected]
www.hollyandmartin.com
Page 1: ...HO976100TX Hagio Desk Assembly Instruction Holly Martin a valued brand of SEI Customer Service 1 800 633 5096 service hollyandmartin com www hollyandmartin com ...
Page 2: ...ng assembly separate each type of screw Carefully study the diagrams below You may receive extra hardware with your unit A Quantity Of 1pc Wood Top B Quantity of 4pc leg C Quantity of 2pc Top rail D Quantity Of 2pc Bottom rail E Quantity of 2pc Connect panel F Quantity of 2pc Apron G Quantity Of 1pc Back panel 1 Quantity Of 25pc Long bolt 1 4 x2 2 Quantity Of 8pc Short bolt 1 4 x7 8 3 Quantity Of ...
Page 3: ...nd Cleaning Instructions Before using wipe with a clean dry cloth Periodically apply furniture wax to renew the finish Avoid rubbing or scratching the surface with rough or abrasive objects For replacement parts or questions please call Customer Service at 1 800 633 5096 Please call manufacturer for assistance questions or parts Assembly Tool Required No 2 Phillips Screwdriver ...
Page 4: ...ding pre drilled holes until leg B top rail C meet Tighten by rotating cam lock 4 clockwise with Phillips screwdriver Attach PVC cover 9 on the cam locks holes as shown F F F Figure 2 igure 2 igure 2 igure 2 Insert T nut 3 into predrilled holes on leg B Attach bottom rail D to pre assembled unit on figure 1 by inserting wood dowel 7 long bolt 1 into predrilled holes until pre assembled parts in fi...
Page 5: ...rt T nut 3 into predrilled holes on leg B Attach connect panel F to pre assembled unit on figure 2 by inserting wood dowel 7 long bolt 1 into predrilled holes until pre assembled parts in figure 2 connect panel F meet Tighten bolt 1 with Allen wrench 6 Attach PVC cover 9 on the T nut holes as shown 1 ...
Page 6: ...wn F F F Figure 5 igure 5 igure 5 igure 5 Insert T nut 3 into predrilled holes on apron F Attach apron F to pre assembled unit on figure 4 by inserting wood dowel 7 long bolt 1 into predrilled holes until pre assembled parts in figure 4 apron F meet Tighten with Allen wrench 6 Attach PVC cover 9 on the T nut holes as shown ...
Page 7: ...h Phillips screwdriver not included F F F Figure igure igure igure 7 7 7 7 Insert T nut 3 into predrilled holes on back panel G Attach back panel G to pre assembled unit on figure 6 by inserting wood dowel 7 long bolt 1 into predrilled holes until pre assembled parts in figure 6 back panel G meet Tighten with Allen wrench 6 Attach PVC cover 9 on the T nut holes as shown 6 ...
Page 8: ...Now you Hagio Desk is ready to use ...
Page 9: ...n Enterprises at 800 633 5096 or in Dallas 972 869 0111 9am 4pm Mon Fri Central time if you have product issues or email us at service seidal com Please ask for customer service representative for issues involving damages or replacement parts Please ask for technical assistance representative for any issues with product and assembly construction Please contact the retailer that you purchased from ...