

2. Operation
2
-
9
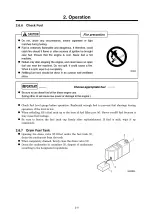
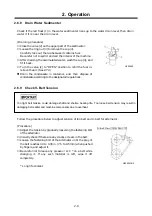
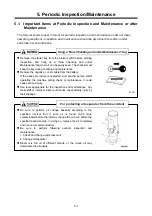
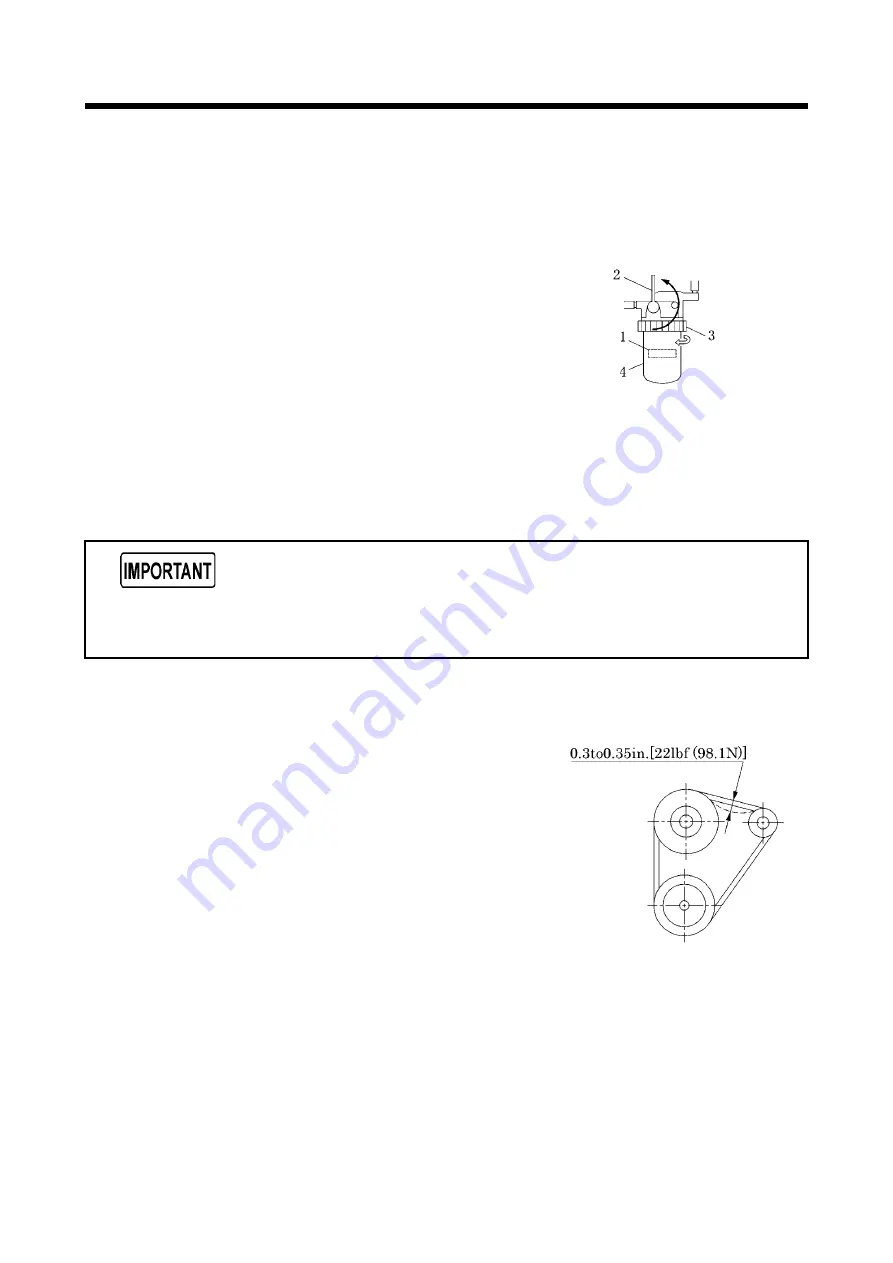
2.6.8 Drain Water Sedimenter
Check if the red float (1) in the water sedimenter rises up to the water drain level, then drain
water if it is near the drain level.
(Draining procedure)
①
Close the valve (2) on the upper part of the sedimenter.
②
Loosen the ring nut (3) to remove the cup (4).
Carefully take out the cup because it contains fuel.
Be careful not to spill it and soil the interior of the machine.
③
After draining the accumulated water, wash the cup (4), and
fit it back.
④
Turn the valve (2) to “OPEN” position to refill the fuel in,
relieve the air. (See 2.7.3)
Drain the condensate in container, and then dispose of
condensate according to the designated regulations.
2.6.9 Check V-Belt Tension
Too tight belt tension could damage shaft and shorten bearing life. Too loose belt tension may result in
damaging belt earlier and machine components due to overheat.
Follow the procedure below to adjust tension of fan belt and V-belt for alternator.
(Procedure)
①
Adjust the tension by gradually loosening the fastening bolt
of the alternator.
②
Visually check if there are any cracks or tears in the belt.
③
Loosen the fastening bolt of the alternator until the play of
the belt reaches 0.3 to 0.35 in. (7.5 to 8.5 mm) when pushed
by fingers, and adjust it.
④
Be careful not to leave any grease or LLC * on a belt while
changing it. If any such material is left, wipe it off
completely.
* Long life coolant
H000041E-2
H000040
Summary of Contents for Airman PDS100S-6B1
Page 1: ......
Page 2: ......
Page 4: ......
Page 5: ......
Page 9: ......
Page 10: ......
Page 11: ......
Page 12: ......
Page 13: ......
Page 14: ......
Page 15: ......
Page 16: ......
Page 17: ......
Page 18: ......
Page 19: ......
Page 20: ......
Page 21: ......
Page 22: ......
Page 23: ......
Page 25: ......
Page 26: ......
Page 27: ......
Page 28: ......
Page 29: ......
Page 30: ......
Page 31: ......
Page 38: ......
Page 40: ......
Page 42: ......
Page 44: ......
Page 47: ......
Page 48: ......
Page 49: ......
Page 50: ......
Page 52: ......
Page 53: ......
Page 54: ......
Page 55: ......
Page 56: ......
Page 57: ......
Page 58: ......
Page 59: ...9 Wiring Diagram 9 1 A040035...
Page 60: ...10 Piping Diagram 10 1 PDS100S 6B1 A050211...
Page 61: ...10 Piping Diagram 10 2 PDS130S 6B1 A050202E...
Page 62: ...10 Piping Diagram 10 3 PDS185S 6B1 A050204E...
Page 64: ......