

BA_PH_436-100_EN_44-21.docx
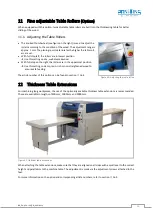
32
10.5
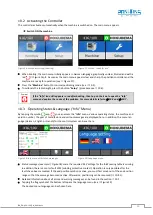
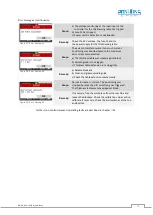
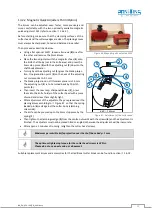
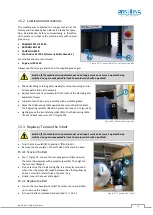
Calibrating the Table Height (“Setup” Menu)
The position controller makes it easy to calibrate the height of the thicknessing table.
For this purpose, you must first switch from normal positioning mode to the setup menu.
•
Press the
“
Home
”
button to switch to the main menu.
•
Then press the
“
Setup
”
button to enter the setup menu:
→
An alphanumeric keyboard appears with a password request.
Enter the password
7550
and confirm with
“
ENT
“ (Enter).
→
If the password has been entered correctly, the button
“
Calibrate
“
appears on the screen.
•
Now press the
“
Calibrate
“ button to enter the calibration menu
:
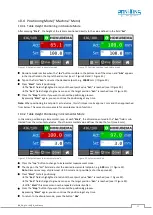
→
The calibration screen appears (see
Figure 24: Calibrate table height
Figure 25: Input of the reference value
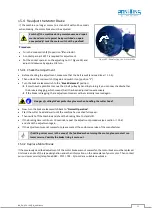
•
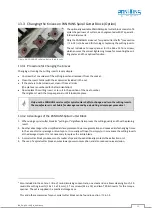
Now use a test workpiece that has already been dressed and set the table to any height that is suitable for a
thickness planing test run with the selected test workpiece.
•
Start the thickness planing test run.
•
Measure the machined test workpiece with a suitable measuring device (vernier caliper recommended!)
•
Enter the measured value (z. B.
101.3
mm) into the
“
Cal. Value
”
field (see
→
The "Set" button in the bottom line of the screen is highlighted in red.
•
Then press the
“
Set
”
button:
→
The table is automatically calibrated to the reference dimension
•
Finally, press
“
Home
”
to return to the main menu.
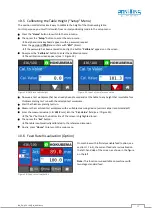
10.6
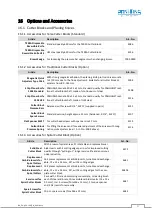
Feed Rate Visualisation (Option)
Figure 26: Feed rate visualisation
On machines with infinitely variable feed (option, see
section
16.2), the current feed rate is visualised on
the left-hand side of the screen, as shown in the figure
on the left.
Note:
This function is unavailable on machines with
two-stage standard feed.