background image


4 | 

P a g e


www.Hodedah.com 

Hardware List


M4x25mm Screw 


QTY 

24Pcs 

Washer 


QTY 

14Pcs 


JCBC M6x25mm 


QTY 

 8Pcs 

JCBC M6x35mm 


 6Pcs 

JCBC M6x45mm 


 4Pcs 
 

L Key (M4x65mm) 


 1Pcs 
 

L Key (M5x70mm) 


1Pcs 


Important 

1.  Before you throw the package, please use the Check Box to identify the parts and hardware to 

ensure that you have everything you need. 

2.  Check and measure the bolts before applying them to parts. 
3.  Do not completely tighten all hardware until the entire assembly is complete, unless indicated 

otherwise. 

Summary of Contents for HI 681

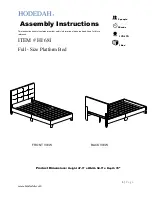
Page 1: ...This instruction booklet contains important safety information please read and keep for future reference ITEM HI 681 Full Size Platform Bed FRONT VIEW BACK VIEW Product Dimensions Height 47 5 x Width...

Page 2: ...o obtain warranty service original purchaser must present the following original bill of sale date of purchase where the product was purchased and images if applicable Components replaced warranted th...

Page 3: ...e and parts Parts are labeled or stamped on the raw edge Please inspect contents to ensure you have received all components If you are missing any hardware or parts please contact customer service rig...

Page 4: ...L Key M4x65mm 1Pcs G L Key M5x70mm 1Pcs Important 1 Before you throw the package please use the Check Box to identify the parts and hardware to ensure that you have everything you need 2 Check and mea...

Page 5: ...6mm QTY 1Pc 2 Foot Board 1426x305x30mm QTY 1Pc 3 Side Rail 959x155x15mm QTY 2Pcs 4 Side Rail 959x155x15mm 2Pcs 5 Side Support 275x84x30mm 2Pcs 6 LVL Slats 1384x60x12mm 12Pcs 7 Center Leg 250x30x30mm 4...

Page 6: ...6 P a g e www Hodedah com The Breakdown...

Page 7: ...7 P a g e www Hodedah com Step 1 Place and fix part 5 onto part 3 and 4 by inserting JCBC C with Washer B Fasten JCBC C using predrilled holes on part 5 into part 3 and 4 by using L Key F C F B...

Page 8: ...8 P a g e www Hodedah com Step 2 Place and fix part 9 onto part 1 Insert and Fasten JCJB D with Washer B into predrilled holes on part 9 by using L Key F...

Page 9: ...9 P a g e www Hodedah com Step 3 First prepare Part 6 7 and 8 Insert JCBC E into predrilled holes of Part 6 and 8 thru Part 7 Fasten JCBC E by using L Key F...

Page 10: ...10 P a g e www Hodedah com Step 4 Place Part 3 and 4 to hook Part 1 and Part 2 Fasten JCBC by using L Key G...

Page 11: ...11 P a g e www Hodedah com Step 5 Place Part 6 7 and 8 inside Part 1 2 3 and 4 Faster Screw A into predrilled holes of Part 6 by using Screwdriver A...

Page 12: ...12 P a g e www Hodedah com Job Complete Enjoy Thank you for purchasing from Hodedah...

Reviews: