background image

Interior Structure

06-27

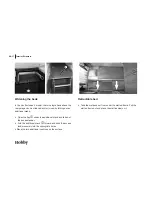
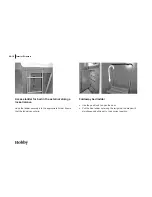
Converting the L-shaped seating arrangement / 
individual seat

If you wish to use the outer seat in models with an L-shaped 
seating arrangement or the individual seat in the T 600 FC mo-
del, you must convert these before you start to drive.

Conversion

•   Remove the seat and back cushions.
•   Fold back cushion cover 

j

 by 180° and place it on the 

crossbench.

•   Open locking bolt 

k

, swing the supporting wall out by 90° 

and then shut locking bolt 

k

.

•   Replace the seat and back cushions on the crossbench. 

Sort the seat belts and buckles.

1

1

2

1

6.11 Construction of the seats

Cushion fastenings

The seat and back cushions are held in place by an anti-slip 
mat. 

Ensure that the seat cushions and backrests are fastened 
securely and correctly.

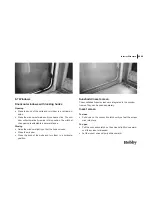
Adjusting the height of the headrests

•  Grasp the cushion on the headrest and push it to the desired 

position.

Summary of Contents for Van Exclusive

Page 1: ...Manual Motor home VAN VAN Exclusive Siesta Siesta Exclusive GB Version 03 2011...

Page 2: ...prevent operating errors and damage to the vehicle and its equipment Handling all of the technical details correctly will increase the pleasure you get from driving this vehicle and help to retain the...

Page 3: ...ter 4 Wheels tyres brakes 4 1 Wheels 04 1 4 2 Tyres 04 1 4 3 Tyre pressure 04 2 4 4 Tread depth 04 2 4 5 Wheel rims 04 3 4 6 Snow chains 04 3 4 7 Tyre repair kit 04 4 4 8 Changing a tyre 04 7 4 9 Brak...

Page 4: ...ings 09 1 9 2 Gas supply 09 3 Chapter 10 Built in devices 10 1 General Information 10 1 10 2 Heating 10 2 10 3 Electric Heating 10 7 10 4 Auxiliary Heating in the Driver s Cab 10 8 10 5 Refrigerator 1...

Page 5: ...if the safety instructions in this user manual and the warning stickers placed throughout the motor home are not observed Please use the motor home only when it is technically in top condition Any de...

Page 6: ...ap gas bottles in the gas bottle box during transportation When camping in winter heat the vehicle at night if there is danger of frost Please refer to the section on operating in winter heating Keep...

Page 7: ...its fittings will function perfectly Please remem ber that there may be some differences in description to the various kinds of equipment that can be supplied Warnings Warnings make you aware of dang...

Page 8: ...Introduction 01 4...

Page 9: ...und the alarm and call the fire department Only fight the fire yourself if you can do so without risk Chapter 2 Safety 2 1 General information Ensure that there is sufficient ventilation Never cover b...

Page 10: ...years Engine homes weighing between 3 5 and 7 5 tonnes must undergo a general inspection every two years during the first six years following initial registration After this a general inspection must...

Page 11: ...questions or difficulties your autho rised Hobby dealer will always be available to assist you 2 5 Before and while driving As the owner driver of the vehicle you are responsible for the state of the...

Page 12: ...be carried out inside the mobile home Preparing the interior Sort loose objects and stow them in the compartments Place heavy objects in the lower compartments If necessary switch the refrigerator to...

Page 13: ...r s cabin Do not forget the following Adjust the interior and exterior mirrors as well as your seat Check the lights In addition Check your tyre pressure Check all liquids such as oil cooling water br...

Page 14: ...garage When loading the rear garage adhere to the permissible axle loads and the technically permissible total mass Distribute payload evenly Excess point loads will damage the floor co vering Braking...

Page 15: ...r to familiarize yourself with the mobile home Remember to practise reversing The base vehicle is a commercial vehicle adjust your driving style accordingly The following applies for driving Do not un...

Page 16: ...ve jacket with white retro reflective stripes whenever you leave the vehicle on open roads and emergency strips The driver should wear this jacket when the vehicle comes to a stop outside city limits...

Page 17: ...do not acci dently disengage the handbrake Switching electric consumption The following applies when switching electric consumption Switch the refrigerator from 12 V to accelerator or 230 V Otherwise...

Page 18: ...he vehicle and the heating valve Install winter mats on the inner sides of the driver s cabin and the windscreen not included in scope of delivery Install an insulation mat between the driver s cabin...

Page 19: ...yre and or repair kit petrol 100 booster battery all of the standard equipment mounted by the factory as well as 75 kg for the driver plus basic equipment gas water electric 3 Basic Equipment The basi...

Page 20: ...uefied petroleum gas Number of built in gas regulators 1 1 Weight of an 11 kg aluminium bottle 5 5 5 5 Weight of 11 kg gas inflation 90 9 9 9 9 Total 15 4 15 4 b Liquids 200 l fresh water tank 90 100...

Page 21: ...longings such as clothes food pets bicycles surfboards other sport equipment etc Under no circumstances may the technically permissible total load be exceeded when the motor home has been loaded 5 T 6...

Page 22: ...ally Use the crank to level the levelling supports until the vehi cle stands level Retracting levelling supports Use crank to release levelling supports Continue to crank smoothly until the levelling...

Page 23: ...r home has an electric entrance step j Use the switch k on the inside next to the entrance door to activate it 3 4 Entrance step Do not step on the entrance step until it has been com pletely extended...

Page 24: ...VIN to hand when making any enquiries and on every visit to your dealer 3 6 Additional pneumatic springs Additional pneumatic springs on the rear axle optional extra provide a significant improvement...

Page 25: ...load in particular in conjunction with loading of the rear garage Simultaneous use of the towing fixture and the rear load carrier is not permitted While manoeuvring to hitch and unhitch loads ensure...

Page 26: ...ings and draw up a corresponding expertise road traffic authorities Take the expertise and the registration documents Parts I and II to the Driver and Vehicle Licensing Agency They will copy the chang...

Page 27: ...eel rims steel and light metal After this the tyre bolts should be checked regularly that they are securely tightened 4 2 Tyres Use only tyres that have been entered in the vehicle s documents Other t...

Page 28: ...y cause overheating of the tyre possibly resulting in severe damage to the tyre For the correct inflation pressure please refer to the table in the chapter on Technical Data or the operating instructi...

Page 29: ...ms may not be used for steel rims When using aluminium rims tyres may not be changed from the front to the back or vice versa 04 3 Models with front wheel drive If you wish to use snow chains the whee...

Page 30: ...out air Small cuts especially in the tyre tread can be resealed using the tyre repair kit Do not remove foreign bodies such as screws or nails from the tyre The tyre repair kit can be used at outside...

Page 31: ...g tube and then press them together Press the entyre bottle contents into the tyre Pull the fill hose off j and screw the valve insert k tightly into the tyre valve with the valve core remover l B Uns...

Page 32: ...evenly distributed within the tyre Maximum speed 80 km h Especially in curves Check tyre pressure after driving 10 minutes If the tyre pressure has fallen under this minimum value q you may not drive...

Page 33: ...Turn the wheel spanner a few times to loosen the wheel mounting screws but do not remove them Jack up the vehicle until the wheel is 2 3 cm above the ground The car jack may only be inserted in the ap...

Page 34: ...arly for lea kage Martens often gnaw at rubber hoses Use only brake fluids with the same qualities as those fluids already in the brake circuit Further information is given in the operating instructio...

Page 35: ...ter 5 Exterior Structure 5 1 Overview of tank and service flaps Storage flap j Toilet flap k Gas box flap l T500 GFSC Van Classic T500 FSC Van Classic T555 GFSC Siesta T600AK KM Siesta T650AK GFM Sies...

Page 36: ...Exterior Structure 05 2 Storage flap j Toilet flap k Gas box flap l T600AK FC Siesta Exclusive T650 FLC Siesta Exclusive T650 ESC Siesta Exclusive...

Page 37: ...turer s operating instructions Watery vapour is produced while cooking from wet clothes etc Every person transpires up to 35 g of water per hour Therefore depending on the relative humidity the window...

Page 38: ...em is supplied with fresh air from outside j This ventilation flap also permits exhaust air from the system to escape 1 Blocked ventilation openings can lead to suffocation Therefore never block venti...

Page 39: ...ger door plus bonnet unlocking me chanism Note the manufacturer s operating instructions for the basic vehicle Entrance door external Opening Use key to unlock door Pull on door handle Open door Closi...

Page 40: ...e to be opened from the inside The entrance door is your escape route in case of emergency Never obstruct the door from the outside Closing Pull the door shut until you hear it lock Locking Push the b...

Page 41: ...lap a strong push inwards Swing flap up and secure it with the hook Closing Lift the arrestor hook up and unlatch the flap Swing flap down Lock it with the key Toilet flap Opening Use key to unlock fl...

Page 42: ...an be fitted with an exterior gas supply k Equipment that uses gas such as a gas grill or a gas lamp can be supplied from outside the motor home Opening Pull the cover plate j of the flap towards you...

Page 43: ...nk filler cap The tank filler cap is located behind the driver s door in the lower section of the B pillar behind a flap Opening Pull the flap open by inserting your finger into the convex opening j a...

Page 44: ...vier the roof load the worse the vehicle s performance The maximum overall load is 50 kg Observe the maximum permissible axle loads when loading Add the measurements of the roof load to the height of...

Page 45: ...bicycles Even when unloaded and folded up the carrier must be secured using the clips provided Ensure that the existing lighting equipment is not completely or partially obscured by any loads 5 6 Loa...

Page 46: ...simultaneously The load carrier can be fitted with special kits e g for bi cycles luggage boxes or similar Only SAWIKO mounting adapters are permitted for use if other makes are used all guarantee cla...

Page 47: ...until the awning has been exten ded to the desired position Remove the crank Unfold the telescopic rods on the inside of the drop tube and use them to support the awning Retracting Retract the telesco...

Page 48: ...Exterior Structure 05 14...

Page 49: ...Opening and closing doors and flaps 06 1 Stowage and kitchen wall cabinets To open Press the pushbutton j to unlock the flap Pull on the handle until the flap opens To close Use the handle to press t...

Page 50: ...wage cabinets 06 2 Front stowage cabinets To open Pull on the handle and swing the flap up To close Use the handle to press the flap shut until you can feel it lock into place Furniture doors with han...

Page 51: ...ob Wardrobes Turn the knob to open or shut the door 1 Kitchen pull out To open Press the push button j to unlock the pull out Pull on the handle until the pull out opens To close Use the handle to pre...

Page 52: ...pen Open the door Closing Push the door handle until the lock snaps into place Doors with push locks Refuse cupboard Opening Depress the push lock until the knob pops out Carefully pull the knob and o...

Page 53: ...tre bar and push them both outwards Closing Grasp the doors by the centre bar and push them shut until they meet in the middle Bar in the entrance area layout model specific To open Pull on the handle...

Page 54: ...V holder before driving 6 2 Television holder for flat screen monitor To unlock press in on the metal rail j Then extend the TV mount 230 V power sockets and an aerial socket for the TV and or receive...

Page 55: ...y firmly tightening the knurled wheel k Pull the table top off by pulling it straight up Pull the middle section of the pillar l off the foot m and remove it Place the table top on the foot m 1 4 3 2...

Page 56: ...and remove it Pull the table top out of the upper wall bracket n Raise the front end of the table top by approx 30 and hook it into the lower wall bracket o Please note To ensure that it is easier to...

Page 57: ...floor To swivel out Pull the locking pin k Swivel the lower table top j to the desired position 2 6 7 Table extension Turn the wheel j under the table until the table is loose Lift the table slightly...

Page 58: ...10 Push the table towards the leaf and place them in the appropriate openings Kitchen extension Swing the locking mechanism jupwards and pull it back Swivel out the extending support k Fold down the...

Page 59: ...e floor Raise the inner plank l approx 15 above the horizontal position Wedge the outer plank k in a 45 angle approx beneath the inner plank l to support it Place the cushions on the bed according to...

Page 60: ...ansverse Seat In order to use the additional bed in the rear the transverse seat must be converted Conversion Remove the seat and back cushions Lower the pillared table Fold the cushion j cover forwar...

Page 61: ...ns T500 FSC Van Classic T500 GFSC Van Classic Back cushion 925x450x125 Back cushion 925x450x125 Seat cushion 980x640x125 Seat cushion 980x640x125 Seat cushion 581x590x125 Seat cushion 581x590x125 Addi...

Page 62: ...iesta Back cushion 1000x450x125 Seat cushion 1055x640x125 Seat cushion 581x590x125 Back cushion 481x360x125 Additional cushion 1000x70x125 Additional cushion 1060x60x125 Additional cushion 1945x220x12...

Page 63: ...ushion 1095x640x125 Seat cushion 1095x640x125 Additional cushion 1945x220x125 Back cushion 1040x450x125 90 Additional cushion 140x215x125 Back cushion 640x450x125 90 Back cushion 545x360x125 Back cush...

Page 64: ...at cushion 1040x450x125 90 Additional cushion 1040x80x125 Additional cushion 1170x248x125 Seat cushion 1095x640x125 Seat cushion 1082x590x125 Back cushion 982x360x125 Additional cushion 1170x248x125 S...

Page 65: ...ditional plank Open the flapjunder the additional plank and take out the access ladder Fold the additional plank kforward and hook the access ladder securely into the appropriate holes Place the two a...

Page 66: ...ren s bed or elevated bed at the rear end of the mobile home the safety nets must be pulled up and fitted in the brackets as a protection against falling out If you have put small children in the uppe...

Page 67: ...n the door Pull the bed ladder out along the rail guide the steps will simultaneously slide out to their correct position Access ladder for bed in the external storage locker alcove Hook the ladder se...

Page 68: ...tages Closing Raise the window slightly so that the hook unlocks Close the window Press the knob of the bolts and turn them to a horizontal position Sunshade insect screen The sunshades insect screens...

Page 69: ...lose Move the sunshade slowly and evenly to the desired posi tion To open Push the shade up slowly and evenly Skylight The skylight cannot be opened It is fitted with an integral dimming shade which c...

Page 70: ...atically lock 6 8 Dimming system for driver s cabin The dimming shades may only be drawn when the vehicle is standing and the motor has been turned off Before starting your drive you must fold up the...

Page 71: ...e sunlight is very strong pull the sunshade only 3 4 closed otherwise there is a danger of heat build up The vents for ventilation must always remain open Never shut or cover up these vents Before dri...

Page 72: ...n feel resistance The crank can be folded back into the crank niche when the skylight is closed To ensure safe closure the crank should be folded back into the crank niche Check the skylight is closed...

Page 73: ...to face in the driving direction while driving Do not swivel them When the vehicle is stationary when swivelling the driver s seat make sure that the handbrake is not relea sed by accident Round roof...

Page 74: ...s Put the armrests up Move the seat to the middle position Release the lever to swivel the seat The seat will be relea sed from the locking position Push the seat belt buckle down to avoid damaging it...

Page 75: ...over j by 180 and place it on the crossbench Open locking bolt k swing the supporting wall out by 90 and then shut locking bolt k Replace the seat and back cushions on the crossbench Sort the seat bel...

Page 76: ...ing only one seatbelt Seatbelts alone are not suitable for persons under 150 cm tall In such cases use additional restraining equip ment Replace seatbelts after an accident Do not twist the seatbelt i...

Page 77: ...ve T 600 FC Siesta Exclusive Seats 1 4 may be used while driving Seat 5 must not be used while driving Seats 1 4 may be used while driving Seat 5 must not be used while driving Seats 1 4 may be used w...

Page 78: ...riving Seats 1 4 may be used while driving Seats 5 6 must not be used while driving Seats 1 4 may be used while driving Seat 5 must not be used while driving Seats 1 4 may be used while driving Seats...

Page 79: ...1 T650 AK GFM Siesta Seats 1 4 may be used while driving Seats 5 6 Only for the optional additional belt rack If the additional belt rack has not been fitted as an option this seat may not be used whi...

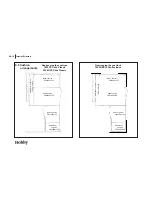
Page 80: ...Interior Structure 06 32 6 14 Overview of day and night positions Day position Night position T 500 FSC Van T 500 GFSC Van...

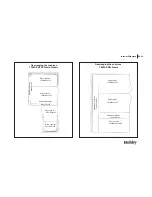
Page 81: ...Interior Structure 06 33 Day position Night position TL 500 GESC Van Exclusive T 555 AK GFSC Siesta...

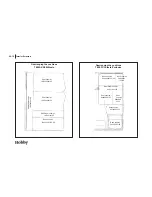
Page 82: ...Interior Structure 06 34 Day position Night position T 600 AK KM Siesta T 650 AK GFM Siesta...

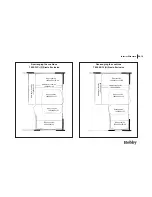
Page 83: ...Interior Structure 06 35 Night position Day position T 600 FC Siesta Exclusive T 650 FLC Siesta Exclusive...

Page 84: ...Interior Structure 06 36...

Page 85: ...d CONSUMER BATTERIES Chapter 7 Electrical Installations 7 1 Safety instructions The following must be observed Do not remove the signs on electrical components giving safety instructions or danger war...

Page 86: ...e ancillary battery is not being used for a longer period of time more than 1 2 months Even if the main switch of the battery has been interrupted the batte ry may be recharged by the charger Conserva...

Page 87: ...nsumer batteries r LED indicates test of vehicle battery flashing indicates empty battery s LED indicates test of consumer battery flashing indicates empty battery LED indicates that 230V mains is con...

Page 88: ...ageing Legend j DOD display Shows the remaining amount of time for use if current amount of use is continued k Electric power display Red discharge Green charge l Electricity as a numerical value Exam...

Page 89: ...r the aux supply solar charger controller q 25A fuses for supply of the electric step r 3A fuse s 3A fuse Bridge circuit Simulated D alternator output for electric step and refri gerator Changeover sw...

Page 90: ...a malfunction is caused by a defect piece of electric equipment or a defect in its supply line Repair the defect before switching the circuit breaker on again If the defect cannot be repaired consult...

Page 91: ...ogy and charges in three phases in accordance with the so called IU0 U1 curve The charging period should be at least 12 hours Batteries do not respond well to cold temperatures in such cases they do n...

Page 92: ...evice If the battery charger should become hot because of high en vironmental temperatures or high charging currents a built in thermal switch turns off the battery charger until the temperature in th...

Page 93: ...V At this point you should ensure that it is recharged from the dynamo or from public supply Operation when the motor is running As soon as the motor is running a relay connects the starter battery an...

Page 94: ...pply of the board network Several discharging charging operations are possible Use only the same kind of batteries when exchanging the battery same capacity and voltage cycle proof mainte nance free a...

Page 95: ...the fuse on the corresponding electric circuit Replace the fuse If the fuse blows again please contact your authorized Hobby dealer Circuit breaker To protect the modular battery from being exhaustiv...

Page 96: ...hich can be clipped into a special holder on the dashboard It then functions immediately Press the right switch j forward First remove the right hand side of the sat nav device then the left hand side...

Page 97: ...cause interference with the electronic systems already installed in the motor home A CE mark is mandatory for devices that have been subsequent ly installed and which cannot be used while driving 07...

Page 98: ...Electrical Installations 07 14...

Page 99: ...lves Open the protective cover k of the filler neck by pulling it Unlock and open the filler cap j Fill the tank with drinking water Switch on the 12V main switch If applicable turn on the water pump...

Page 100: ...in use and especially if there is frost Always ensure that the fresh water tank is filled before switching on the pump The pump can be destroyed if allowed to run dry Never introduce anti freeze or ot...

Page 101: ...zing The waste water tank is not sufficiently protected against damage from frost when the vehicle is not in use Therefore if there is any danger of sub zero temperatures empty the waste water tank co...

Page 102: ...shower fitting Check that water is draining out Clean the tanks and rinse them thoroughly Allow the water system to dry for as long as possible Do not forget to empty the toilet cassette If the vehic...

Page 103: ...er supply Your motor home is equipped with a heating system with integrated boiler The boiler holds 10 litres of water During summer use the water can be heated independently of the heating system Ple...

Page 104: ...f the waste tank Return the drain nozzle to its original position Use toilet fluids very sparingly An overdose is no guaran tee of preventing possible odours Push the waste tank back into position Ens...

Page 105: ...approx 5 flushes Open the toilet flap and pull the holding bar up to remove the waste tank The waste tank can only be removed when the drain valve is closed Using the toilet Turn the toilet bowl to a...

Page 106: ...zle is pointing downwards Press the vent button with your thumb and hold it down The waste tank will drain itself Return the waste tank to its storage position ensuring that it is pushed in until the...

Page 107: ...s porous spots or similar damage The operator is responsible for having checks carried out If you suspect that gas is leaking take the following measures immediately Close the stop valve on the gas cy...

Page 108: ...ors The operating pressure for gas is 30 mbar Before initial operation The waste gas pipe must be tightly connected to the hea ting and chimney without any leaks It may not be dama ged Keep vents clea...

Page 109: ...ottle cabinet is either via the rear storage compartment or separately in the side wall The gas bottle cabinet holds 2 x 11 kg propane gas cylinders These are connected to the gas pressure governor mo...

Page 110: ...not smoke or ignite open flames while changing the gas cylinders Hold the hose breakage protector unscrew the knurled nut left handed thread and remove the breakage protection and the high pressure ho...

Page 111: ...uthorised workshop for gas facilities check your system Never carry out leak tests near an open flame Heating Oven Gas cooker Refrigerator Switching valve for the two cylinder gas unit As an optional...

Page 112: ...tor for the switching valve As an optional feature your vehicle is equipped with a remote indicator for the switching valve for the two cylinder gas unit a Operation in summer Press the switch down an...

Page 113: ...infor mation on the individual built in devices please refer to the separate operating instructions that have been included in the blue service bag found in the vehicle Only the device manufacturer s...

Page 114: ...so that the warm air is blown out where required Check that the chimney is clear Remove any covers Open the gas cylinder and the gas stop valve Operating panel a Rotary switch for room temperature 1...

Page 115: ...t to the outside through the vehicle floor To activate Push in the knob at position m slightly and at the same time move it 90 towards position k If the switch is in position k the knob will remain in...

Page 116: ...er will turn off and the yellow LED g will go out Winter operation Heating with regulated water temperature Set the rotary switch to operating position e Turn the rotary button a to the desired thermo...

Page 117: ...ice is above 40 C If the boiler is full the water will automatically also be heated The water temperature will depend on the heat produced and the duration of heating required to reach the room temper...

Page 118: ...until it locks into place Turn on the 12V power supply by turning on the main switch on the control panel Turn on all taps and set them to warm Leave them on until the boiler fills up due to the air...

Page 119: ...energy b Electrical operation 230 V 1800 W c Electrical operation 230 V 900 W d Operating on gas e Mixed operation gas and electrical operation 900 W f Mixed operation gas and electrical operation 180...

Page 120: ...b and the motor This heating unit is integrated in the water circuit electric power is supplied by means of the 12V modular battery Function The heating function is set manually using the switch in th...

Page 121: ...before using the refrigerator 12 V operation 12 V operation can only be used while driving when the mo tor is running When resting or if you have stopped for a lon ger period of time turn off the 12 V...

Page 122: ...g on the model When the pilot light has ignited let go of the thermostat Repeat the previous step if there has not been ignition Set the cooling temperature using the thermostat To turn the refrigerat...

Page 123: ...perature and the rate of humidity are very high drops of water may form on the metal frame of the separate freezer compartment For this reason it has been fitted with a frame heater Dometic only If th...

Page 124: ...o a lack of oxygen and the odourless carbon monoxide which could be generated 10 6 Gas cooker The kitchen in the motor home is equipped with a gas cooker with three burners Before initial operation Op...

Page 125: ...e the rotary switch k and turn to the desired set ting large or small flame If ignition was unsuccessful repeat the procedure Use oven gloves or potholders when handling hot pots pans or similar objec...

Page 126: ...ccessory for longer than 25 minutes Never use the oven to heat the motor home Switching on Turn on the 12 V power supply at the main switch of the control panel Open the main stop valve on the gas cyl...

Page 127: ...on the gas cylinder and the gas stop valve Oven 10 8 Fume Hood Special Accessory As an option the kitchen can be fitted with a fume hood The built in fan blows kitchen odours directly outside Clean th...

Page 128: ...ould observe the following Ensure sound thermal insulation seal chinks and cover up glass areas Avoid opening doors and windows unnecessarily Do not plug or cover up air intakes and openings Do not sp...

Page 129: ...ondensation The following applies for maintenance intervals Have the first maintenance carried out by a HOBBY dealer 12 months after the vehicle was first registered All further maintenance should be...

Page 130: ...here to environmental protection measures Do not use cleaning agents containing solvents Washing with a high pressure cleaner Do not spray stickers and external decors directly with the high pressure...

Page 131: ...given by the wax manufacturers The following applies when polishing the surfaces In exceptional cases use polish to refinish weathered varnished surfaces We recommend solvent free polishing paste Use...

Page 132: ...ong cleansers in the toilet Sand and dust can damage the surface of PVC flooring that is walked on regularly When in use clean the floor daily with a Hoover or a broom Use cleansing agents for PVC flo...

Page 133: ...e camping season often ends when winter starts Your mobile home must be prepared accordingly before being laid up for the winter It should only be left in a closed space if this is dry and easy to air...

Page 134: ...tank Completely empty the hot water boiler use the control panel to switch off the electric power supply and open all of the water taps Shut the main stop valve on the gas cylinder as well as all sepa...

Page 135: ...obile home has been designed to allow you to use it to a certain extent in winter If you really wish to camp in winter we recommend that you optimize your mobile home to meet your personal requirement...

Page 136: ...lear The toilet can be used normally even in cold weather as long as the interior of the mobile home is heated If there is a danger of frost both the excrement and the flushing water tanks should be e...

Page 137: ...e environment Always use your vehicle in an environmentally friendly way 12 1 The following applies for environmentally fair use When spending longer periods in towns and cities ask about specially de...

Page 138: ...clarification plants Empty your waste water tank as often as possible even if it is not completely full hygiene If possible rinse out the waste water tank with fresh water after emptying 12 2 Only emp...

Page 139: ...s leave picnic spots clean and tidy even if you dispose of someone else s waste 12 3 Careful use of the environment is not only in the interest of nature but also of motor home and caravan drivers eve...

Page 140: ...ever have to give up your motor home and have it recycled the manufacturer of the basic vehicle is responsible for taking it back status at the time of printing This means that your HOBBY motor home...

Page 141: ...100 417 TL 500 GESC Van Exclusive K 2600 75 68 110 2853 3500 647 4 225 422 6 8 108 315 T 600 FC Siesta Exclusive X 2603 75 68 110 2856 3500 644 3 150 494 6 5 95 399 T 650 FLC Siesta Exclusive X 2744...

Page 142: ...only valid for standard tyres by alternative manufacturers e g Continental Goo dyear etc Tyres Tyre pressure bar Basis Michelin XC Camping 215 75 R 16 C front 3 5 rear 5 5 FORD other tyre manufacture...

Page 143: ...TDCi 103 kW Flat bottom 205914 lowered SAWIKO 30LF70003P Typ 05 3009000500 TL 500 GESC Van Exclusive H2 FORD Transit FT 350 L 2 2 TDCi 85 kW Flat bottom 205913 lowered SAWIKO 30LF70001P Typ 05 300900...

Page 144: ...00 933 1766 UAP 324 20 10006953 4 3500 1750 2250 750 1000 4500 4397 6750 2710 2180 1757 1718 3750 933 2067 MSP 500 20 10005970 3 3500 1750 2250 750 1000 4500 4083 6452 2830 2360 1757 1718 3750 933 176...

Page 145: ...lowered SAWIKO 30LF70003P Typ 05 3009000500 TL 500 GESC Van Exclusive H2 FORD Transit FT 350 L 2 2 TDCi 85 kW Flat bottom 205913 lowered SAWIKO 30LF70001P Typ 05 3009000500 T 600 FC Siesta Exclusive H...

Page 146: ...00 933 1766 UAP 324 20 10006953 4 3850 1750 2250 750 1000 4500 4397 6750 2710 2180 1757 1718 3750 933 2067 MSP 500 20 10005970 3 3850 1750 2250 750 1000 4500 4083 6452 2830 2360 1757 1718 3750 933 176...

Page 147: ...2250 215 75 R 16 C 5 65 160 5 J x 16 ET 56 215 75 R 16 C 5 65 160 At present the manufacturer cannot supply light alloy rims T 600 FC Siesta Exclusive 3500 1750 2250 215 75 R 16 C 5 65 160 5 J x 16 ET...

Page 148: ...x 16 ET 56 215 75 R 16 C 5 65 160 At present the manufacturer cannot supply light alloy rims T 600 FC Siesta Exclusive 3850 1750 2250 215 75 R 16 C 5 65 160 5 J x 16 ET 56 215 75 R 16 C 5 65 160 At p...

Page 149: ...Hobby multimedia package 23 0 Hobby surround sound system ELAC 4 5 Interior upholstery for driver s and passenger s seats 3 0 Leather upholstery 12 0 Motorcycle mount 36 0 Mud flaps rear 2 0 Outer te...

Page 150: ...Technical Data 13 10...

Page 151: ...ing economically 02 7 Driving in curves 02 7 Driving in reverse 02 6 E Electric heating system 10 7 Electric power supply 07 6 Electric power supply unit 07 7 Electrical devices installation safety ti...

Page 152: ...ocation 07 10 Modular battery 07 11 N Navigation 07 12 O Operating in winter 11 7 anti freeze measures 11 8 ventilation 11 7 Operating the cooker 10 13 Outside shower water supply 08 8 Overflow valve...

Page 153: ...legal requirements To determine your remaining load simply subtract the mass when the vehicle is ready to start the conventional load all additional equipment as well as your personal luggage from th...

Page 154: ...permissible overall mass Mass when the vehicle is ready to start incl gas water electricity driver and fuel Conventional load no of seats excl driver x 75 kg Additional equipment 1 2 3 4 5 6 7 8 9 10...

Reviews: