FLYING THE AIRPLANE
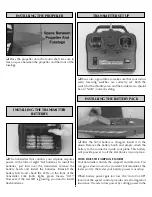
1. First, turn your transmitter power switch “ON.” This
immediately puts you in control. Be sure your throttle
stick is back (pulled all the way towards you).
2. Now pick up the airplane and switch the airplane on.
3. Press the start button.
Caution: keep your hands
behind the prop.
4. Move the throttle stick forward (moved away from
you). The propeller will start to turn. The farther you
move the stick, the faster the propeller will turn.
5. With the throttle stick moved fully forward (full
throttle), hand launch your airplane into the wind, at a
slight upward angle.
6. Allow the airplane to climb a few seconds before
turning it.
7. The right stick is your rudder control. When your
plane is moving away from you, moving the rudder stick
to the left will make your plane turn to the left. Moving
the rudder stick to the right will make your plane
turn right.
8. When the plane is coming toward you, moving the
rudder stick left still causes left rudder, but your plane
goes to
your
right. In short, you have to reverse the way
you control the rudder. A good way to familiarize
yourself with the controls is when the plane is coming
toward you, turn your body so that you are facing the
same direction the plane is going, looking over your
shoulder at the plane. Now when you move the rudder
stick left the plane will go left.
9. When turning, the plane will lose some altitude. The
sharper the plane turns, the more altitude it will lose. Try
to make gentle turns.
10. Don’t let the airplane get too far away from you. The
farther away it is, the harder it is to see what the plane
is doing.
LANDING
Once the motor cuts off, prepare to land. Always land
as straight into the wind as possible. You may need to
circle the plane a few times to gradually descend to the
ground.
AFTER THE FLIGHT
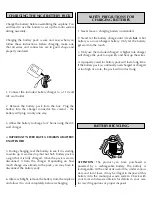
Switch the airplane then the transmitter off. Unplug and
remove the NiCd battery. Allow the NiCd battery to cool
before recharging. Check the plane to make sure
nothing has come loose.
STRUCTURE
In the unfortunate event that you may damage your
airplane, repairs are fairly simple to make yourself. If
there are any cracks in the wing or fuselage, apply
6-minute epoxy to the broken area and hold together
with clear packaging tape. Let the glue cure, leaving the
tape in place for added strength.
After all repairs are completed, check that the prop is
not hitting the fuselage or is damaged.
We hope this short instruction manual and the included
video on flying helps you get off to a great start in
R/C flying.
Replacement parts for your Zoom/Sun Pilot
Sun Pilot Parts
Stock #
Description
HCAA3251
Complete Wing Set
HCAA3252
Complete Tail Set
HCAA3253
Fuselage
HCAA3254
Decal Set
HCAM7027
Battery
HCAG1020
Motor
HCAM7028
Electronic Speed Control
Zoom Pilot Parts
Stock #
Description
HCAA3260
Complete Wing Set
HCAA3261
Complete Tail Set
HCAA3262
Fuselage
HCAA3263
Decal Set
HCAM7027
Battery
HCAG1020
Motor
HCAM7028
Electronic Speed Control
PARTS LIST


