How to assemble your R/C MicroSizers PowerBrute
How to install the batteries
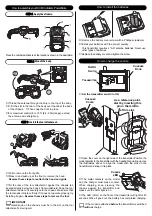
STEP 2: Mount the body.
STEP 3: Install the tool attachment.
Place the numbered stickers at the locations shown in the illustration.
➊
Pull to remove the front grille.
➋
Press in and push up at the front to remove the hood.
Reverse these steps to reattach the hood and grille.
➌
Fit the rear of the tool attachment against the chassis tab
located directly below the body’s front windshield. Snap the tool
attachment down to fit securely onto the chassis. Make sure that
the tool snaps into place firmly. If it does not operate properly, try
installing it again. Reverse these steps to remove the tool.
☞
IMPORTANT
This raised knob on the chassis must be in the slot on the tool
attachment’s moving arm.
➋
Open the cover on the right side of the transmitter. Position the
model parallel to the transmitter with the headlights pointing up. Use
the illustrations above to align the model with the pins on the
transmitter and snap it into place.
➊
Thread the antenna through the hole in the top of the body.
➋
➀
Fit the slot in the rear of the body over the tab at the back
of the chassis.
➁
Then snap the front in place.
➌
For maximum control (8 to 10 ft. [2.4-3.0m] range), extend
the antenna wire straight up.
➊
Remove the battery cover screw with a Phillips screwdriver.
➋
Install your batteries with the correct polarity.
This transmitter requires 2 "AA" alkaline batteries. Never use
other types of batteries.
➌
Replace the battery cover and tighten the screw.
How to charge the vehicle
➊
Set the transmitter switch to ON.
O
N
/O
FF
S
WITCH
T
RANSMITTER
C
HARGER
D
OOR
➌
The metal contacts on the model
and the charger must make contact.
While charging, keep pressing the
chassis against the transmitter and
make sure the CHG light is on.
➍
The LED (CHG) on the front of the transmitter will light for 45
seconds. When it goes out, the battery has completed charging.
☞
If the model is attached before the transmitter is switched
on, it will not charge.
STEP 1: Apply the stickers.
C
HARGE
LED
C
HARGER
C
OVER
As a reference point,
start by inserting this
pin in the middle
of this slot.


