


GEAR SHAFT REPLACEMENT
1. Remove the rotor blade from the gear shaft.
2. Push the shaft down to remove it from the gear.
3. Install the new gear shaft and rotor blade if it is not damaged.
Note:
While the gear is out, check it carefully for any cracks or damage to
the teeth.
MOTOR REPLACEMENT
1. Remove the screw securing the motor cover to the arm and pull to cover
off the motor.
2. Use a small flat blade screwdriver to separate the motor plug from the
socket. DO NOT pull the wires.
3. Remove the motor from the frame and insert the replacement. Make sure
that the wire colors on the replacement motor are the same as the original.
The motors for the clockwise props have black and white wires. The
counter-clockwise props use motors with blue and red wires.
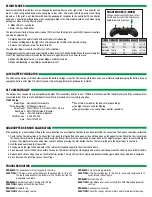
BLADE REPLACEMENT
FRONT
Color Blades,
Color LEDs
REAR
Black Blades,
White LEDs
1. Remove screw that secures the rotor blade to the gear shaft.
2. Pull prop off the gear shaft.
3. Install new rotor blade and secure with screw.
Note:
The rotor blades have arrows that indicate which direction they rotate. Please
refer to this diagram to verify that the correct replacement rotor blade is installed.
FLIGHT CONTROL BOARD REPLACEMENT
5.
Install the new control board and
route the wires for motors. To
prevent damage to the wires, route
them between the guides on the
inside of the arms.
6. Install the LED covers. There are openings on the cover for the wires. Before tightening the
screws, make sure the wires are positioned correctly.
7. Replace the motor covers.
8. Calibrate the quadcopter sensors.
1. Remove all 4 motor covers.
2. Remove the 4 screws that secure the battery frame to the main frame.
3. Remove the LED covers on each arm.
4. Remove the control board. Transfer
the O-rings to the LEDs on the new
board.


