HME HM-16D-DVR Instructions Manual Download Page 44

44 


ICON 

DESCRIPTION 

Start Time 

The start time of backup file   


End Time 

The end time of backup file   


Backup Channel 

Choose    CH1    CH2    CH3    CH4 

Backup Destination       

Select USB or PC as the backup device   


Free space 

The available space in the backup device 

Request space 

Show the size of the backup file   


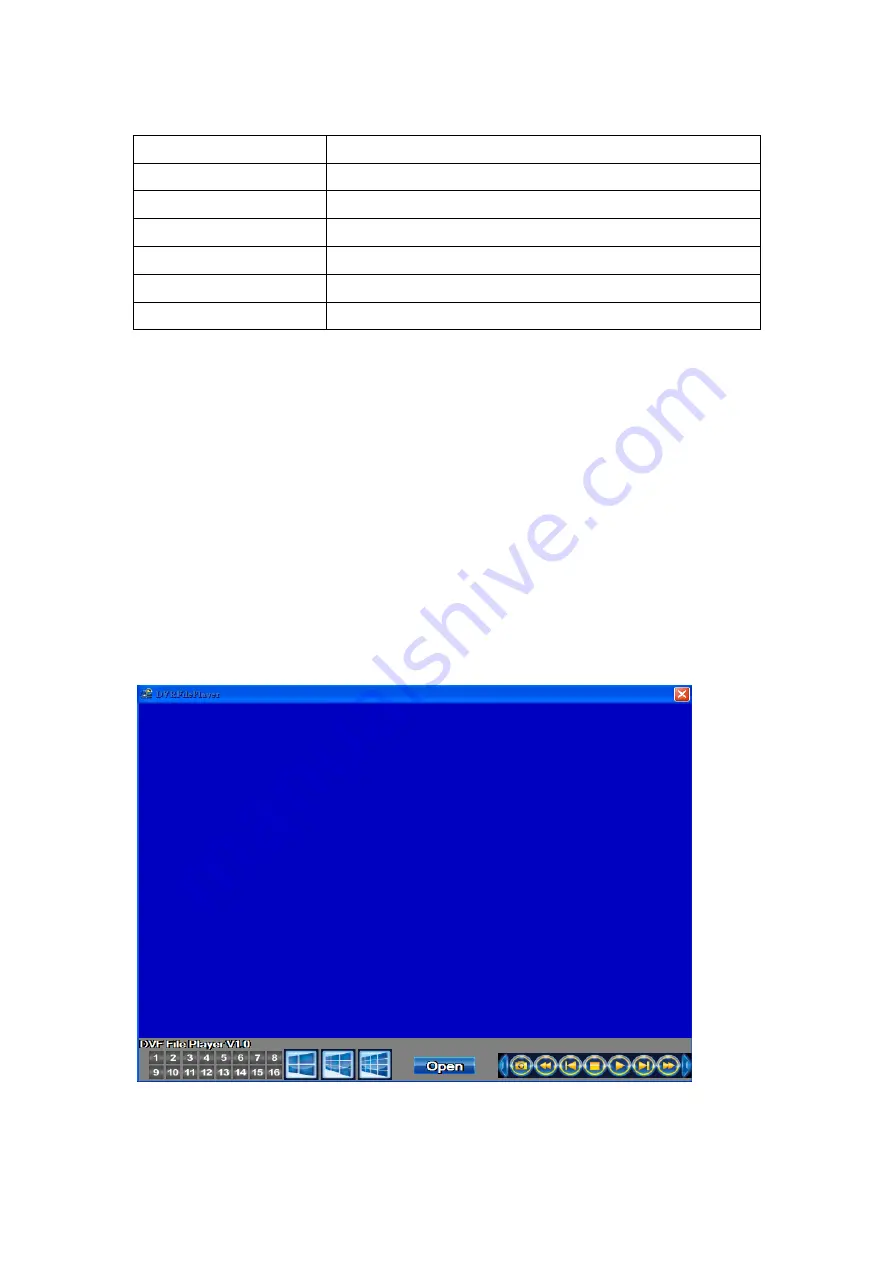
5-1-1 DVF Player Usage 
 

Step 1: install 

DVR play

software to your PC. You can get

DVR play

file 

from the CD with DVR Packing.   


PS: When you using USB to backup file, DVRplay.exe will copy to USB with the 

backup file automatically. 


Step 2

Setup

DVRplaypack.exe

」。


Summary of Contents for HM-16D-DVR

Page 1: ...hapter 2 Panel Appearance P 7 8 2 1 Front panel controls P 7 2 2 Rear panel connectors P 8 Chapter 3 Live Playback Operations P 9 15 3 1 In LIVE mode the remote control instructions P 9 3 2 In LIVE mode the operating instructions of right click mouse icon in a rapid functional P 10 Table 3 2 1 Table 3 2 2 Table 3 2 3 Table 3 2 4 Table 3 2 5 Table 3 2 6 Table 3 2 7 Table 3 2 8 P 11 16 ...

Page 2: ...etwork P 29 4 6 1 2 DHCP P 30 4 6 1 3 PPPOE P 30 4 6 2 HTTP P 31 4 6 3 DDNS P 32 4 6 4 E MAIL P 33 4 7 Data Backup P 34 4 8 System Setup P 35 4 8 1 Display Setup P 36 4 8 2 Time Date Setup P 37 4 8 2 1 Change Date Time Setup P 37 4 8 2 2 Daylight Saving Time Setup P 38 4 8 2 3 Internet Time Setup P 39 4 8 3 User Account Setup P 40 4 8 3 1 Permission Setup P 41 4 8 3 2 Control Relay Setup P 42 4 8 ...

Page 3: ...cation software and IE operation P 55 Chapter 7 Digital Video Recorder DVR Specifications P 56 57 Chapter 8 Mobile Application Installation and Usage P 58 74 8 1 Mobile Application Connect with DVR P 58 61 8 2 Mobile Software and Operation with DVR networking iPhone Software Installation and Operation AquilaDVR Software Installation P 62 68 8 3 Mobile Software and Operation with DVR networking Goo...

Page 4: ...e neither HDD nor R W Step 1 Remove the three screws in rear case as the following figure at circle marked Step 2 Remove a screw in the right case as the following figure at circle marked Step 3 Remove a screw in the left case as the following figure at circle marked ...

Page 5: ...5 Step 4 Open the chassis cover along the direction of the arrow Step 5 Connect SATA Power wire to Hard Disk and put it on right position of the bottom case ...

Page 6: ...se as the picture indicated Step 6 Put the cover back and fix it with 5 screws as Step 1 indicated Note After installation please initialize Hard Disk before starting to record For more detailed information please check out User Manual System Tools for reference ...

Page 7: ...ing to the setting time 5 Play Play Stop Playback Forward 6 MENU Menu setup Enter Leave 7 Zoom Mode Enter Delete Use arrow keys or mouse to zoom the specific area 8 Arrow Keys Up down left and right arrow keys to select the control button 9 Split Key Back to quad display 10 LED Power DVR power On 11 Manual Record On Off 12 LED REC Recording 13 LED Alarm Alarm on signal break and motion detection 1...

Page 8: ...or CH1 3 AUDIO IN RCA input For CH1 4 VIDEO IN For camera BNC input 4 ports 5 MAIN monitor MAIN SPOT monitor BNC video putout 6 RS485 Port RS 485 for PTZ 7 VGA VGA port 8 LAN Network port 9 USB 2 0 Port USB port 10 ALARMIN RELAY OUTPort ALARMIN RELAYOUTPort DESCRIPTION Table 3 2 7 ...

Page 9: ...OM Enter Delete Zoom mode ESC Return last menu ENTER Enter FF Fast forward Each press increases the speed to the next level There are six speeds 2x 4X 8X 16X 32X and 64X STOP Stop playback RF Rewind Fast Each press increases the speed to the next level There are six speeds 2x 4X 8X 16X 32X and 64X Pause Turn on off PAUSE Split Switch to split windows Polling Staring the Auto Sequence PIP On OFF pi...

Page 10: ...ing Setup OSD Motion Sound Record Video Record Alarm Record Schedule Record Alarm Setup Event Time Setup Image Broken Setup HDD Loop Record Residual Rate Alarm Capacity State Networking setup LAN DHCP PPPOE HTTP DDNS EMAIL Setup Data backup Interface Option System Event Clear System Update Setup System setup Name Language VGA Resolution Menu Lock Display Option User Relay Setup Leave ESC System Di...

Page 11: ...layback Freeze screen is frozen Lock LOCK Backup information backup Table 3 2 3 Graphical icons that will display after right clicking your mouse under Remote mode DESCRIPTION Remote Snapshot take picture on camera and store Pre archived folder My Documents Folder DVRData Snapshot Select Archive Folder Select the folder to store the photo and video Quad Display 9 Screen Display 16 Screen Display ...

Page 12: ...e PLAYBACK Mode by pressing PLAY button under the LIVE mode The control panel will appear on down right of screen the control panel can be moved be mouse ICON DESCRIPTION Snapshot turn the current screen into the Image and store in USB device the Image will be stored in computer on Remote mode Rewind Fast Each press increases the speed to the next level There are six speeds 2x 4X 8X 16X 32X and 64...

Page 13: ...in full screen the icon appears when the one of the cameras is recording Event occur appear on alarm lost channel motion detected Recording in signal screen the icon appears when the camera is recording Live Audio is on in signal screen Live Audio is off in signal screen OSD motion detection is on in signal screen Relay off Relay on Shows the current hard disk space has been used ...

Page 14: ...ion under the PTZ mode ICON DESCRIPTION Arrow keys Up down left right ENTER KEY Executive function PTZ arrow keys Move PTZ camera ZOOM IN Let PTZ camera closer ZOOM OUT Let PTZ camera further Mouse operation under the PTZ mode ICON DESCRIPTION Pr set point set location through arrow keys and press Enter and then camera starts to patrol Pre set number N 1 255 Move to Pre set number N Delete Pre set...

Page 15: ... 1 Sensor 1 14 Sensor 2 2 Sensor 3 15 Sensor 4 3 GND 16 GND 4 Sensor 5 17 Sensor 6 5 Sensor 7 18 Sensor 8 6 ALARM_N O 19 ALARM_COM 7 ALARM_N C 20 RELAY1_N O 8 RELAY1_COM 21 RELAY1_N C 9 RELAY2_N O 22 RELAY2_COM 10 RELAY2_N C 23 RELAY3_N O 11 RELAY3_COM 24 RELAY3_N C 12 RELAY4_N O 25 RELAY4_COM 13 RELAY4_N C ...

Page 16: ... 5 24 Sensor 13 6 Sensor 6 25 Sensor 14 7 Sensor 7 26 Sensor 15 8 Sensor 8 27 Sensor 16 9 GND 28 RELAY1_N O 10 RELAY1_N C 29 RELAY1_COM 11 RELAY2_N O 30 RELAY2_N C 12 RELAY2_COM 31 RELAY3_ N O 13 RELAY3_N C 32 RELAY3_COM 14 RELAY4_N O 33 RELAY4_N C 15 RELAY4_COM 34 ALARM_N O 16 ALARM_N C 35 ALARM_COM 17 GND 36 RS485 TX 18 RS485 RX 37 RS485 TX 19 RS485 RX ...

Page 17: ...er 4 The Main Menu Setup Enter the setup menu first time please choose the login account and then enter the password Administrator default password is 123456 Verify password if correct will enter the setup menu ...

Page 18: ...camera channel name PTZ Enable On Off No of PTZ PTZ Number 0 255 Baud Rate Select the PTZ camera transmission speed 2400 4800 9600 19200 PTZ Protocol Support PELCO D PELCO P HME PDZ UNITED D Brightness Brightness Adjustment From value1 255 Contrast Contrast Adjustment From value1 255 Hue Color Adjustment From value1 255 Saturation Chroma Adjustment From value1 255 Volume Channel 1 can adjust the v...

Page 19: ...19 4 2 Event Setup ICON DESCRIPTION Motion Setup Enter Motion Detection Setup Sensor Setup Enter Sensing Device Setup ...

Page 20: ...Enable Switch on or off the motion detection function Buzzer Alarm On Off Sensitivity Set up Sensitivity from value 1 to 10 for each channel The lower value you set the higher sensitivity it will be Motion Area Setup Enter to Motion Area Setup Apply All On Off Motion Popup On Off ...

Page 21: ...r Setup ICON DESCRIPTION Popup On Off NO 1 2 3 4 On Off Polarity Low Start High 12V start All Enable All sensing device on All Disable All sensing device off All Low Sensitivity all low All High Sensitivity all high ...

Page 22: ...up OSD X axis OSD Position Y Setup OSD Y axis OSD Position setup Setup OSD axis Record Sound On Off HDD Circulate Record On Off Alarm recording time 1 60 seconds Recording Mode Manual Schedule Record 1 6 Schedule Record Setup Schedule Record On Quality Frame Rate Setup Turn On Quality Frame Rate Setup ...

Page 23: ...23 4 3 1 Sequence Setup ICON DESCRIPTION Stop REC Enter Motion REC Enter Full Time REC Enter SEQ Schedule Record Manual Schedule Record 1 6 All Same Recording Mode All the Same ...

Page 24: ... 3 4 Check uncheck the box enable disable selected channel recording Resolution Select recording resolution NTSC 352x240 704x240 704x480 PAL 352X288 704X288 704X576 Quality Select quality Below Basic Basic Normal High Highest FPS Select recording frame rate Auto Assign each channel with its maximum accessible fps ...

Page 25: ... 4 Alarm Setup ICON DESCRIPTION Alarm Event Record On Off Video Loss Detect On Off Video Loss Alarm Time 0 99 Seconds Alarm Time Setup Sensing Motion Locking alarm time Buzzer 0 99 Second Relay 0 99 Second ...

Page 26: ...26 4 5 Hard Disk Management Setup ICON DESCRIPTION HDD Cycle Recording On Off Hard Disk Information Hard Disk Information Instruction H D Formated Setup Hard Disk Format ...

Page 27: ...DR IP Address DVR Network IP address if DVR doesn t connect it will show Network not connected MAC ADDR MAC Address Mac Address of DVR NO NUMBER The number of the hard disk NAME The name of the hard disk CAPACITY The capacity of the hard disk STATUS Shows the current hard disk space has been used ...

Page 28: ...28 4 6 Networking Setup ICON DESCRIPTION Connectivity Connectivity Setup PPPOE DHCP LAN HTTP Setup Enter HTTP setup menu DDNS Setup Enter DDNS setup menu E Mail Setup Enter E Mail setup menu ...

Page 29: ...g information is required ICON DESCRIPTION Local IP Address Enter IP address provided by ISP Mask Enter IP address of Subnet Mask provided by ISP Gateway Enter IP address of Gate way provided by ISP DNS Server Enter DNS address provided by ISP Note The correct DNS address must be entered for DDNS function ...

Page 30: ... address will be assigned by DHCP server automatically 4 6 1 3 PPPOE Select PPPOE for network connection the following information is required ICON DESCRIPTION User name Enter user name provided by ISP Password Enter password provided by ISP ...

Page 31: ...e DVR over the network if the HTTP function is activated HTTP Port Enter a valid port value from 1 up to 65000 The default value is 80 Auto Assign each channel with its maxima accessible fps No Channel number Quality Set up record quality There are below basic basic normal high highest FPS Setup record FPS ...

Page 32: ...gistered SMTP Server DYNDNS ORG NO IP ORG Host Name Enter the completed registered SMTP Server Including username Server If the user name is hme264 and you choose DYNDNS ORG as your server you should enter hme264 DYNDNS ORG User Name Enter DDNS Server User Name Password Enter DDNS Server password ...

Page 33: ...3 4 6 4 E MAIL Setup ICON DESCRIPTION Enable E mail Notification ON OFF E MAIL Notification Function SMTP server Enter to set up SMTP Server name Varies according to the user SMTP port Normally it is 25 ...

Page 34: ...mail address of receivers Receiver E MAIL Enter to set up e mail addresses for up to 6 receivers individually 4 7 Data Backup Setup ICON DESCRIPTION DATA BACKUP ENTER DATA BACKUP MENU CD DVD data backup Enter CD DVD DATA BACKUP MENU Save DVR Setup to USB Enter backup to USB MENU Set the DVR to a USB device USB will appear the file Get DVR Setup from USB Enter Download Setup from USB settings menu ...

Page 35: ...h USB update DVR software Before Update please backup DVR settings Restart DVR after updating Format USB Disk Enter Format USB Disk Menu and press YES clear all the USB data successfully until initialized and formatted USB drive completed Change Boot Logo Enter and Change the computer opening screen Logo 4 8 System Setup ICON DESCRIPTION DVR NAME Display name for application software log remotely ...

Page 36: ... Account Enter User Account setup Control Relay setup Enter relay setup 4 8 1 Display Setup ICON DESCRIPTION Display Time On Off Date and Time Display Display Camera Info On Off camera information Display Record Info On Off Record Information Display Control Relay On Off control relay Display Border On Off Border Time Position up down Border Color RED 0 255 GREEN 0 255 BLUE 0 255 ...

Page 37: ...ate Format year month date date month year month date year Select Time zone Adjust to Greenwich Mean Time GMT Change Date Time On Off Change date Time DayLight Saving Time Setup on off Daylight saving time Internet Time Setup On Off Network time ...

Page 38: ...38 4 8 2 1 Change Date Time Setup Select the Year Month Date and press YES 4 8 2 2 Daylight Saving Time Setup ICON DRSCRIPTION Daylight Saving Time Mode ON OFF ...

Page 39: ...o enable DVR automatic synchronization function Effective by this option selected DVR will automatically synchronize the time upon rebooting or by every 24 hours after booting Update Now Effectively Date and Time show on DVR will immediately correspond with those in internet server ...

Page 40: ...users to access DVR over network The default admin account and password is admin and 123456 ICON DESCRIPTION NUMBER NO Check to activate the user s account USER NAME Setup username PASSWORD Set up password for each user PERMISSION Set up Permissions for each user CHANGE ADMIN PASSWORD Change administrator s password 4 8 3 1 Permission Setup ...

Page 41: ...41 4 8 3 2 Control Relay Setup ICON DESCRIPTION NO Choose Relay1 2 3 4 Unstable time 0 is the solid state 1 255 seconds Time Control Enter the Setup Menu ...

Page 42: ...42 4 8 3 2 1 Relay Timer Setup There are 8 sections Start the Relay by setting the time and choose ON OFF 4 9 EXIT Main Menu Options ...

Page 43: ...n backup any segment of recorded data in a specified time frame To do so either a CD R W or storage device like USB must be connected to the DVR DVF file that can be played by DVFPLAYER Use the USB flash backup the system will automatically copy DVFPLYER to the USB ...

Page 44: ... as the backup device Free space The available space in the backup device Request space Show the size of the backup file 5 1 1 DVF Player Usage Step 1 install DVR play software to your PC You can get DVR play file from the CD with DVR Packing PS When you using USB to backup file DVRplay exe will copy to USB with the backup file automatically Step 2 Setup DVRplaypack exe ...

Page 45: ...45 Step 3 Click open choose and star a DVR backup file Step 4 DVRplay software will play the backup file automatically ...

Page 46: ...46 5 2 Playback Search Setup ICON DESCRIPTION TIME SEARCH Enter time search menu EVENT SEARCH Event search menu ...

Page 47: ... data are marked with a red square System will start playing back according to the date you selected Calendar will be shown by using mouse to click on year and month Click date to display recording time of that specific date with time bar You can change time hour minute second or click on a specific time of time bar by mouse then press ok DVR will playback the selected recording data ...

Page 48: ... Application Software Installation and Setup Step 1 Enter the IP address of DVR in IE browser Step 2 Windows as below will show up Please enter the user name and password Default user name and password is admin 123456 Other related setup about user account and password please check 4 5 Account Setup The user name and password appeared in this image is only for demonstration Actual user name and pa...

Page 49: ...49 Step 3 Click on the link to start downloading the AP software Step 4 Run or Save our AP software ...

Page 50: ...choose to run the software Start window will be shown up Please enter information of login DVR IP Port Username and Password or choose Play Recorded File to open backup files in your PC Step 6 You ve logged into the DVR ...

Page 51: ...ding on the setup of on site DVR Step 2 Windows as below will show up Please enter the user name and password Default user name and password is admin 123456 Other related setup about user account and password please check 4 5 Account Setup The user name and password appeared in this image is only for demonstration Actual user name and password depend on the setup of on site DVR ...

Page 52: ...he first option is for IE view please refer to next chapter for more information p s There will be IE connection security issue when clicking this link for the first time Please refer to index II for Remote Monitoring IE ActiveX Control Installation Instruction Step 4 DVR images appear ...

Page 53: ...ddress is depending on the setup of on site DVR Step 2 Windows as below will show up Please enter the user name and password Default user name and password is admin 123456 Other related setup about user account and password please check 4 5 Account Setup The user name and password appeared in this image is only for demonstration Actual user name and password depend on the setup of on site DVR ...

Page 54: ...54 Step 3 Click on Jpeg Viewer Step 4 DVR images appear PS Only for viewer without any operation function ...

Page 55: ...ce 7series Geforce 8series Geforce 9series Geforce 200series etc Or visit http en wikipedia org wiki Comparison_of_Nvidia_graphics_processing_units ATI Radeon R300series Radeon R400series Radeon R500series Radeon R600series Radeon R700series Radeon HD 3xxx IGPseries Mobility Radeonseries 9500 above Mobility Radeon Xseries Mobility Radeon HDseries or FireGL Vseries etc Or visit http en wikipedia or...

Page 56: ...56 Chapter 7 Digital Video Recorder DVR Specifications ...

Page 57: ...57 ...

Page 58: ...58 Chapter 8 Mobile Application Installation and Usage 8 1 Mobile Application Connect with DVR Step 1 Connect mobile phone to the internet Step 2 Turn On the Browser ...

Page 59: ...59 Step 3 Key in IP address as picture showed Step 4 Key in User Name Password as picture showed User name admin Password 123456 ...

Page 60: ...60 Step 5 Select LIVE JPEG as picture showed Step 6 Select normal device auto reload as picture showed ...

Page 61: ...61 Network connection completed Step 7 Select camera CH1 as picture showed ...

Page 62: ... Software and Operation with DVR networking iPhone Software Installation and Operation AquilaDVR Software Installation Step 1 Connect mobile phone to the internet and unlock Step 2 Open and execute App Store program ...

Page 63: ...63 Step 3 Key in software name Aquila Step 4 Display Software introduction and show FREE to download click upper right FREE to star downloading ...

Page 64: ...64 Step 5 Select upper right Install to star downloading APP Step 6 When Login User Name is displayed key in register Apple ID Username password ...

Page 65: ...65 Step 7 After the installation is completed it will show AquilaDVR Step 8 Software operation execute AquilaDVR ...

Page 66: ...66 Step 9 Add new DVR information For first time connection must enter and save DVR information Select bottom left Add Step10 Add new DVR information for connecting ...

Page 67: ...67 Step 11 Key in DVR Name Address Port User Name Password then select save for saving Step 12 After saving it shows HMEDVR select HMEDVR then click GO ...

Page 68: ...68 Step 13 The logging time depends on network bandwidth When login successfully it shows DVR live view ...

Page 69: ...69 8 3 Mobile Software and Operation with DVR networking Google Android Phone Software Installation Operation Step 1 Connect the mobile phone to the internet Step 2 Open Market ...

Page 70: ...70 Step 3 Select upper right Search Step 4 Key in Software name Aquila and search ...

Page 71: ...71 Step 5 Select Aquila and Install Step 6 Select OK for authorization ...

Page 72: ...72 Step 7 Check Notifications for installation progress Step 8 After installation completed it shows the download file Aquila DVR ...

Page 73: ...73 Step 9 Execute AquilaDVR Step 10 Add new DVR information for connecting DVR For first time connection must enter and save DVR information Select bottom left New ...

Page 74: ...74 Step 11 After saving it shows DVR click DVR twice continously to log in Step 12 The logging time depends on network bandwidth When login successfully it shows DVR live view ...

Reviews: