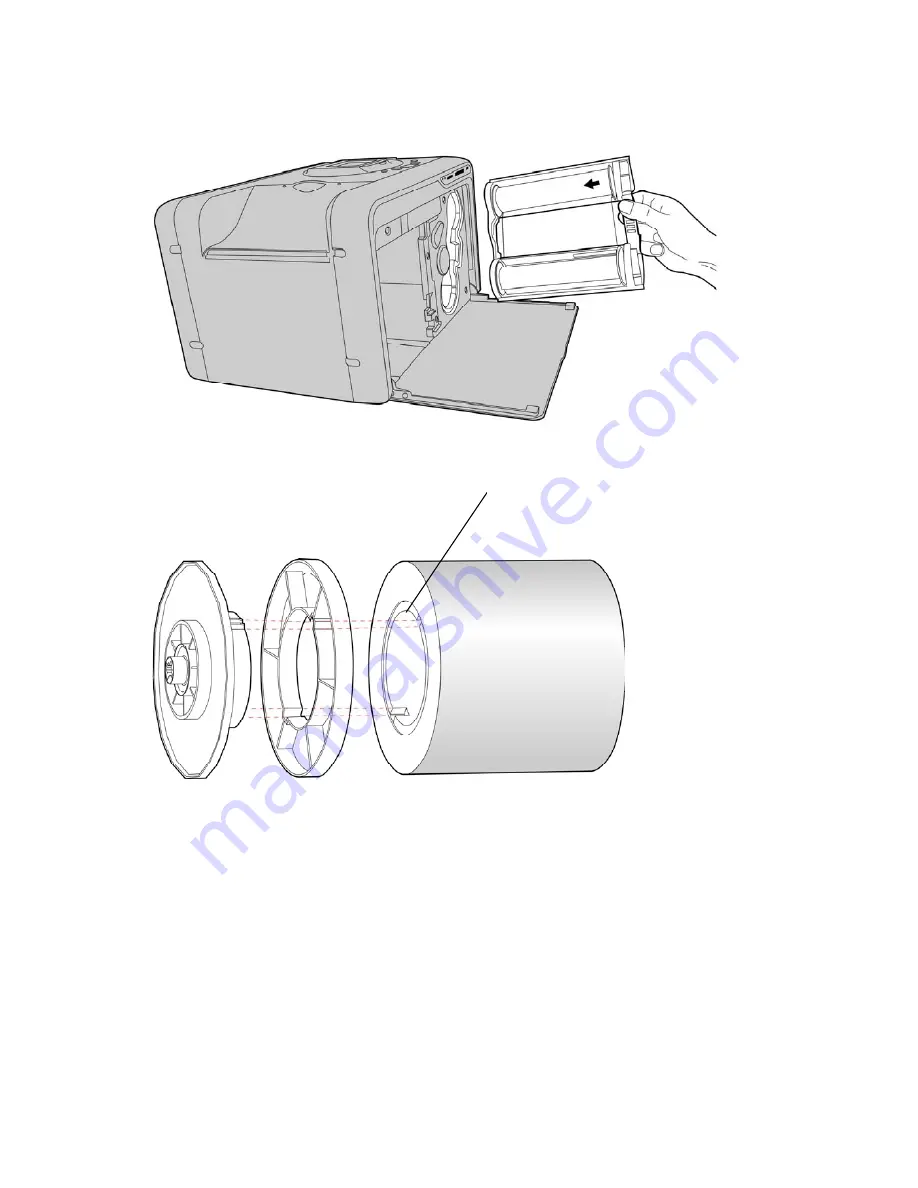
Making P510S Ready to Print
z
Installing the ribbon cartridge
z
Installing the paper box
a.
Assembling the paper roll and flange
9
❸
Paper Core
❶
❷
Paper roll
❶
= Flange (Two colors)
❷
= Spacer (Necessary only on 5x7 size paper roll installation)
❸
= Paper roll
Upon assembly, please install the spacers in the paper flange (green) and paper flange (orange) first
when using 5x7 size paper roll. The two spacers are identical.
Match the notch of paper flange and the notch of paper core. Note that one side of paper core has 2
notches, and the other has 3 notches.
Summary of Contents for P510S
Page 1: ...1 HiTi P510S P510Si User s Manual EN ENGLISH...
Page 21: ...Photo Finishing With eFrame On Photos are being printed with eFrame on 21...
Page 29: ...How to Use ID Creator to Make New ID Formats With Interval and White border 29...
Page 40: ...If setup is correct you will see signal shown on camera LCD FTP setup 40...


