background image

TIMER RECORDING 


33


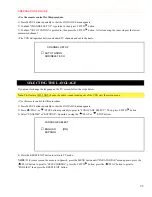
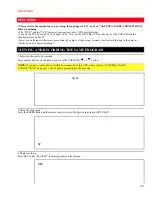
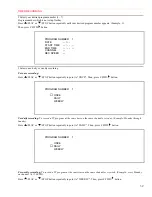
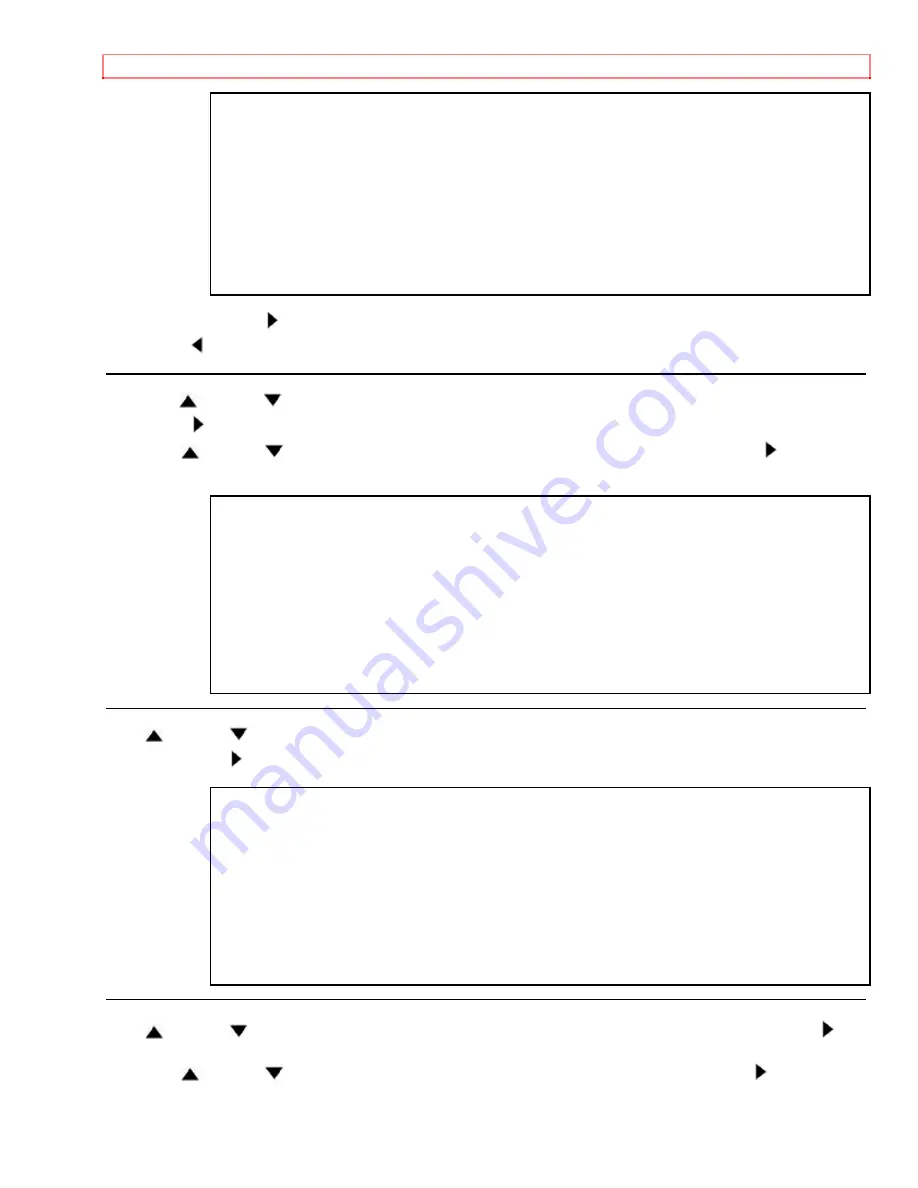
PROGRAM NUMBER  1 

 
  ONCE 


DAILY 


→ 

WEEKLY 


• When you press F.FWD/

 button during steps [4] to [10], you may forward to next step. 

• Press REW/

 button to go back one step from current step during steps [2] to [10]. 

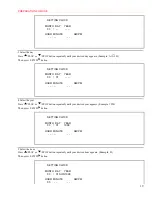
4 Set the date when you want to start 

First, press 

/PLAY or 

/STOP button repeatedly until your desired month appears. (Example: "05" for May) Then, 

press F.FWD/

 button. 

Next, press 

/PLAY or 

/STOP button repeatedly until your desired day appears, and then press F.FWD/

 button. 

(Example: "06" for 6th) 


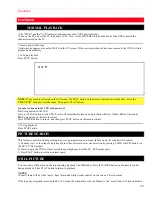
ONE TIME PROGRAM 


DATE   

05 / 06  WED 


START TIME 

- - : - -   - - 


END TIME 

- - : - -   - - 

 CHANNEL 


REC SPEED 

- - 


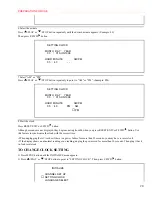
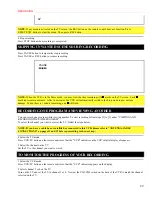
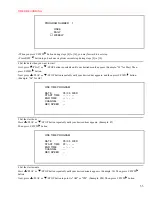
5 Set the start hour 

Press 

/PLAY or 

/STOP button repeatedly until your desired hour appears. (Example: 07) 

Then, press F.FWD/

 button. 


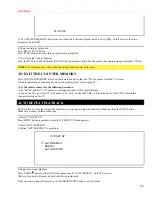
ONE TIME PROGRAM 


DATE   

05 / 06  WED 


START TIME 

07 : - -   - - 


END TIME 

- - : - -   - - 

 CHANNEL 


REC SPEED 

- - 


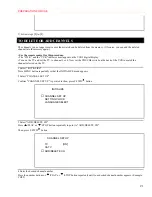
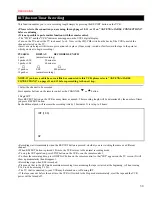
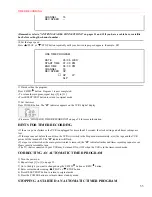
6 Set the start minute 

Press 

/PLAY or 

/STOP button repeatedly until your desired minute appears. (Example: 30) Then, press F.FWD/


button. 

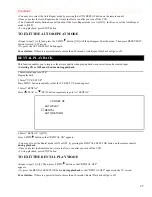
Next, press 

/PLAY or 

/STOP button to point to "AM" or "PM". (Example: PM) Then, press F.FWD/

 button. 

Summary of Contents for VTMX-231A

Page 1: ...ind when the end of a tape is reached n n n n Direct Button Operation n n n n 2 Step Picture Search Operation n n n n Still SLP n n n n Digital Auto Tracking DTR n n n n Auto Repeat n n n n Rental Play Mode n n n n Three different tape speeds SP LP SLP n n n n IRT Instant Recording Timer n n n n 1 Year 7 events including Daily and Weekly Timer Recording n n n n Auto Return HITACHI HOME HITACHI SAL...

Page 2: ...T SELECT 15 A V TERMINALS 15 INSTALLING THE BATTERIES 16 CHANNEL SET UP Automatic 16 TO SELECT A DESIRED CHANNEL 18 CLOCK SET UP 18 TO CHANGE CLOCK SETTING 20 TO DELETE OR ADD CHANNELS 21 CHANNEL SET UP AGAIN 22 SELECTING THE LANGUAGE 23 PLAYBACK 24 NORMAL PLAYBACK 24 PICTURE SEARCH 24 STILL PICTURE 24 NOISE CANCEL in the Still mode 25 VERTICAL HOLD CONTROL 25 TRACKING ADJUSTMENT 25 COUNTER MEMORY...

Page 3: ...IDE 40 MAINTENANCE 41 SERVICING 41 CABINET CLEANING 41 HEAD CLEANING 41 TECHNICAL SPECIFICATIONS 42 CABLE CHANNEL DESIGNATIONS 43 WARNING TO REDUCE THE RISK OF FIRE OR ELECTRIC SHOCK DO NOT EXPOSE THIS APPLIANCE TO RAIN OR MOISTURE CAUTION TO REDUCE THE RISK OF ELECTRIC SHOCK DO NOT REMOVE COVER OR BACK NO USER SERVICEABLE PARTS INSIDE REFER SERVICING TO QUALIFIED SERVICE PERSONNEL THIS SYMBOL IND...

Page 4: ...e indicated on the marking Label If you are not sure of the type of power supply to your home consult your appliance dealer or local power company For products intended to operate from battery power or other sources refer to the operating instructions 11 Grounding or Polarization This video product is equipped with a polarized alternating current line plug a plug having one blade wider than the ot...

Page 5: ...of other controls may result in damage and will often require extensive work by a qualified technician to restore the VCR to its normal operation e If the VCR has been dropped or damaged in any way f When the VCR exhibits a distinct change in performance this indicates a need for service 20 Replacement Parts When replacement parts are required be sure the service technician has used replacement pa...

Page 6: ...ure condensation may occur inside the unit when it is moved from a cold place to a warm place or after heating a cold room or under conditions of high humidity Do not use the VCR at least for 2 hours until its inside is dry FCC WARNING This equipment may generate or use radio frequency energy Changes or modifications to this equipment may cause harmful interference unless the modifications are exp...

Page 7: ...PRECAUTIONS 7 Model No Serial No ...

Page 8: ... recording 2 Step Picture Search Operation You can view a video program at a high speed or super high jspeed in either a forward or reverse direction in LP and SLP mode Still Freeze the picture at any time for close viewing of a particular scene Only tapes recorded in SLP mode will show a fairly clear picture Digital Auto Tracking DTR Adjusts the tracking automatically for each tape you play Auto ...

Page 9: ... with your fingers THREE DIFFERENT TAPE SPEEDS Before recording select the tape speed from SP mode Standard Play LP mode Long Play or SLP mode Super Long Play The table below shows the maximum recording playback time using T60 T120 or T160 tapes in each mode Tape Speed Recording Playback Time Type of tape T60 T120 T160 SP mode 1 hour 2 hours 2 2 3 hours LP mode 2 hours 4 hours 5 1 3 hours SLP mode...

Page 10: ...CASSETTE TAPE INFORMATION 10 You can prevent accidental erasing of recording by breaking off the tab on the back edge of the cassette If you decide to record on the tape again cover the hole with plastic tape ...

Page 11: ...rmine your selection and proceed to a next step you want to input Press to determine setting modes from on screen menu Press to add or delete channel numbers during channel preset only on the remote control 6 PAUSE button Press to temporarily stop the tape during recording or to view a still picture during playback only on the remote control 7 POWER button Press to turn VCR on and off Press to act...

Page 12: ...set counter to 0 00 00 only on the remote control 22 Power cord Connect to a standard AC outlet 120V 60Hz 23 AUDIO OUT jack Connect to the audio input jack of your audio equipment or another VCR 24 AUDIO IN jack Connect to the audio output jack of your audio equipment or another VCR 25 ANT IN terminal Connect to an antenna Cable system or Satellite system 26 VIDEO OUT jack Connect to a video input...

Page 13: ...ing on page 20 Note The connection of an indoor antenna with a VCR may not always give acceptable TV reception Fig 2 VHF UHF Combination Antenna or Cable from the Cable Company click for image of VHF UHF combination hookup You can record one channel while viewing another The same goes for Automatic Timer Recording and IRT For details please refer to Recording on page 20 Continued on next page Fig ...

Page 14: ...tep 9 on page 23 7 Set the A B switch to the other side or for AUTOMATIC TIMER RECORDING set the A B switch to the other side after step 12 on page 23 8 Select the channel to be viewed on the TV Note If you wish to see the VCR menu view what you are recording or playing a tape with this connection make sure the A B switch is on the correct side Fig 6 click for image of alternate satellite hookup T...

Page 15: ...r source use audio video input jacks Fig 7 INPUT SELECT 1 The PWR and the VCR indicator must appear on the VCR s digital display 2 Turn on the TV and set the TV to channel 3 or 4 Now set the CH3 CH4 switch on the back of the VCR to match the channel selected on the TV 3 Connect the audio video cables to the audio video input jacks on the back of the VCR Now connect the other end of the cables to t...

Page 16: ... a power failure or if the VCR is unplugged for more than 30 seconds In these cases the programmed channels are erased You must follow the steps below attempting to play or record a video tape BEFORE programming the tuner you must first turn off the VCR Then press the POWER button again to turn it back on To program the tuner again see CHANNEL SET UP AGAIN on page 16 CHANNEL SET UP Automatic 1 Plu...

Page 17: ... or STOP button Then press MENU or F FWD button LANGUAGE SELECT ENGLISH ON ESPAÑOL NOTE This WILL NOT change the audio sound coming out of the VCR only the screen menu 5 Begin channel preset Press MENU F FWD or REW button once The tuner scans and memorizes all the active channels in your area The VCR distinguishes between standard TV channels and cable channels CH 01 TUNER SET UP 6 After scanning ...

Page 18: ... In the example below the clock is to be set to DATE March 1st 1997 SETTING TIME 5 40PM Use the remote control for this procedure When in the Menu mode the following buttons only work PLAY F FWD REW STOP RESET EXIT POWER and MENU VCR power must be turned on The PWR and the VCR indicator must appear on the VCR s digital display Turn on the TV and set the TV to channel 3 or 4 Now set CH3 CH4 switch ...

Page 19: ...CK MONTH DAY YEAR 03 01 HOUR MINUTE AM PM 4 Select the year Press PLAY or STOP button repeatedly until your desired year appears Example 1998 Then press F FWD button SETTING CLOCK MONTH DAY YEAR 03 01 1998 HOUR MINUTE AM PM 5 Select the hour Press PLAY or STOP button repeatedly until your desired hour appears Example 05 Then press F FWD button SETTING CLOCK MONTH DAY YEAR 03 01 SUN 1998 HOUR MINUT...

Page 20: ... Although seconds are not displayed they begin counting from 00 when you press RESET EXIT or F FWD button Use this feature to synchronize the clock with the correct time When unplugging the AC cord or if there is a power failure for more than 30 seconds you may have to reset clock If the display shows an abnormal reading or no reading unplug the power cord for more than 30 seconds Then plug it bac...

Page 21: ...H4 switch on the back of the VCR to match the channel selected on the TV 1 Select INITIALIZE Press MENU button repeatedly so that the INITIALIZE menu appears 2 Select CHANNEL SET UP Confirm CHANNEL SET UP is pointed to then press F FWD button INITIALIZE CHANNEL SET UP SETTING CLOCK LANGUAGE SELECT 3 Select ADD DELETE CH Press PLAY or STOP button repeatedly to point to ADD DELETE CH Then press F FW...

Page 22: ...D 6 Exit the preset mode Press RESET EXIT button to return to TV mode NOTE To confirm that channel s has been deleted or added press CHANNEL or button CHANNEL SET UP AGAIN Remember If your cable box or satellite box is connected as in Fig 4 on page 11 or Fig 5 on page 12 you DO NOT have to set up the channels Just select the TV and VCR to channel 3 or 4 and also have the CH3 CH4 switch on the back...

Page 23: ...low the steps below Note This feature WILL NOT change the audio sound coming out of the VCR only the screen menu Use the remote control for this procedure 1 Press MENU button repeatedly so that the INITIALIZE menu appears 2 Press PLAY or STOP button repeatedly to point to LANGUAGE SELECT Then press F FWD button 3 Select ENGLISH or ESPAÑOL Spanish by using the PLAY or STOP button LANGUAGE SELECT EN...

Page 24: ...rect Button Operation 2B Using button on the remote control Press POWER button to turn on and then press PLAY button on the remote control 3 To stop playback Press STOP button PICTURE SEARCH This feature is useful in finding or skipping over a particular scene on a tape In this mode the sound will be muted 1 You may view a video tape at a high speed in either a forward or reverse direction by pres...

Page 25: ...y Digital Tracking function when you start playback However when playing pre recorded tapes or tapes recorded on units other than your own noise lines black and white streaks may appear on the playback picture If this occurs you can adjust the tracking control manually by pressing CHANNEL or button on the VCR until the streaks disappear To return to the DTR function stop the tape once and start pl...

Page 26: ...o page 26 Use the remote control for the following procedure The PWR and the VCR indicator must appear on the VCR s digital display Turn on the TV and set the TV to channel 3 or 4 Now set the CH3 CH4 switch on the back of the VCR to match the channel selected on the TV AUTO REPEAT PLAYBACK The VCR has the auto repeat function that allows you to repeat a tape indefinitely without touching the PLAY ...

Page 27: ... playing back worn cassettes such as rented tapes Selecting ON or OFF must be done during playback 1 Insert rental tape into VCR Begin playback 2 Select VCR SET UP Press MENU button repeatedly so that the VCR SET UP menu appears 3 Select RENTAL Press PLAY or STOP button repeatedly to point to RENTAL VCR SET UP AUTO PLAY RENTAL AUTO RETURN 4 Select RENTAL to ON Press F FWD button so that RENTAL ON ...

Page 28: ...place If necessary rewind or fast forward the tape to the point at which you want to begin recording VIEWING AND RECORDING THE SAME PROGRAM 1 Select the channel to be recorded Press number buttons on the remote control or the CHANNEL or button NOTE If you have a cable box or satellite box connected to this VCR please refer to ANTENNA CABLE CONNECTIONS on pages 11 and 12 before proceeding to the ne...

Page 29: ...EWING ANOTHER You can record one program while viewing another To start recording follow steps 1 to 3 under VIEWING AND RECORDING THE SAME PROGRAM To select the channel you want to view at the TV follow the steps below NOTE If you have a cable box or satellite box connected to this VCR please refer to ANTENNA CABLE CONNECTIONS on pages 11 and 12 before proceeding to the next step 4 Select the TV m...

Page 30: ...next step 1 Select the channel to be recorded Press number buttons on the remote control or the CHANNEL or button 2 Begin IRT Press REC IRT button on the VCR as many times as needed The recording length will be determined by the number of times you press REC IRT button Each additional push will increase the recording time by 30 minutes It is set up to 8 hours IRT 1 30 SP Recording starts immediate...

Page 31: ...back of the VCR to match the channel selected on the TV Clock must be set to the correct time and date before setting the timer Insert a cassette tape with its erase prevention tab in place If necessary rewind or fast forward the tape to the point at which you want to begin recording Avoid overlap of programs There is a case that a program will not be performed When programs overlap The program th...

Page 32: ... STOP button repeatedly to point to ONCE Then press F FWD button PROGRAM NUMBER 1 ONCE DAILY WEEKLY For daily recording To record a TV program at the same time on the same channel every day Example Monday through Sunday Press PLAY or STOP button repeatedly to point to DAILY Then press F FWD button PROGRAM NUMBER 1 ONCE DAILY WEEKLY For weekly recording To record a TV program at the same time on th...

Page 33: ... STOP button repeatedly until your desired day appears and then press F FWD button Example 06 for 6th ONE TIME PROGRAM DATE 05 06 WED START TIME END TIME CHANNEL REC SPEED 5 Set the start hour Press PLAY or STOP button repeatedly until your desired hour appears Example 07 Then press F FWD button ONE TIME PROGRAM DATE 05 06 WED START TIME 07 END TIME CHANNEL REC SPEED 6 Set the start minute Press P...

Page 34: ...8 Set the end minute Press PLAY or STOP button repeatedly until your desired minute appears Example 30 Then press F FWD button Next press PLAY or STOP button to point to AM or PM Example PM Then press F FWD button ONE TIME PROGRAM DATE 05 06 WED START TIME 07 30 PM END TIME 08 30 PM CHANNEL REC SPEED AM PM 9 Set the channel number Press PLAY or STOP button repeatedly until your desired channel num...

Page 35: ...R RECORDING If there is a power failure or the VCR is unplugged for more than 30 seconds the clock setting and all timer settings are lost If the tape runs out before the end time the VCR will switch to the Stop mode immediately eject the tape and the VCR power will be turned off The þ indicator will flash If a tape is not inserted or the erase protection tab is removed the þ indicator flashes and...

Page 36: ...de AUTO RETURN If you choose auto return to AUTO from the menu when all the timer recordings finish the VCR will rewind to the beginning of the recorded programs s Make sure If there are any remaining programs Once Daily Weekly this function will not occur 1 Select VCR SET UP Press MENU button repeatedly so that the VCR SET UP menu appears 2 Select AUTO RETURN Press PLAY or STOP button repeatedly ...

Page 37: ...uto return programming repeat steps 1 to 2 Then press F FWD button AUTO will then disappear from the menu Press RESET EXIT button to return to TV mode WATCH THE RECORDED PROGRAM Press POWER button to turn on the VCR Then press PLAY button ...

Page 38: ...3 under Connecting to input jacks 5 Press REC button on the editing recording VCR 6 Begin playback of the tape in the source playing VCR For best results during dubbing use the VCR s front panel controls whenever possible The remote control might affect the playback VCR s operation Always use video quality shielded cables with RCA type connectors Standard audio cables are not recommended You can u...

Page 39: ...in VCR position 5 REC indicator Lights up when the VCR is in Recording mode Flashes when a recording has been paused 6 Clock Feature indicator Indicates the current time when the clock is set and briefly displays which feature the VCR is currently performing as the illustration Indicates the channel number when it is set SPECIAL FEATURES REAL TIME TAPE COUNTER This shows the elapsed recording or p...

Page 40: ... tracking control for a better picture by using the CHANNEL or button on the VCR No picture but the audio is OK in Head cleaning may be necessary playback consult our nearest Authorized Service Center No picture or poor picture on playback Set your TV to the VCR mode and or press the VCR TV button on the remote control so that the VCR indicator appears on the display Fine tune your TV On the air T...

Page 41: ...exposed surfaces HEAD CLEANING Playback picture may become blurred or interrupted while the TV program reception is clear Dirt accumulated on the video heads after long periods of use or the usage of rental or worn tapes can cause this problem If a streaky or snowy picture appears during playback the heads of your VCR may need to be cleaned 1 Please visit your local Audio Video store and purchase ...

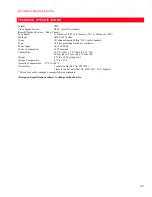
Page 42: ... Type Auto programming frequency synthesis Power Input AC120V 60Hz Power Consumption 16 W nominal Cabinet Size 14 1 4 W x 3 5 8 H x 9 1 16 D 36 0cm W x 9 2cm H x 23 0cm D Weight 5 51 lbs 2 5 kg approx Storage Temperature 4 F to 131 F Operating Temperature 41 F to 104 F Accessories 1 coaxial cable Part No 5857952 1 remote control unit Part No HL11071 2 AA batteries Check your cable company s compat...

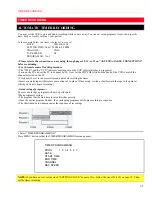
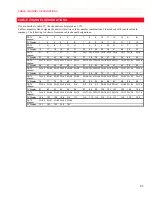
Page 43: ...42 43 44 45 CATV W 10 W 11 W 12 W 13 W 14 W 15 W 16 W 17 W 18W 19 W 20 W 21 W 22 W 23 W 24 channel TV Display 46 47 48 49 50 51 52 53 54 55 56 57 58 59 60 CATV W 25 W 26 W 27 W 28 W 29 W 30 W 31 W 32 W 33W 34 W 35 W 36 W 37 W 38 W 39 channel TV Display 61 62 63 64 65 66 67 68 69 70 71 72 73 74 75 CATV W 40 W 41 W 42 W 43 W 44 W 45 W 46 W 47 W 48W 49 W 50 W 51 W 52 W 53 W 54 channel TV Display 76 7...

Reviews: