background image

RECORDING 


40

RECORDING  

· Please refer to the connection you are using, through pages 10, 11, or 12 on 
"ANTENNA/CABLE CONNECTIONS" before continuing

•  Be sure to check that the "PWR." and the "VCR" indicators are both on. 
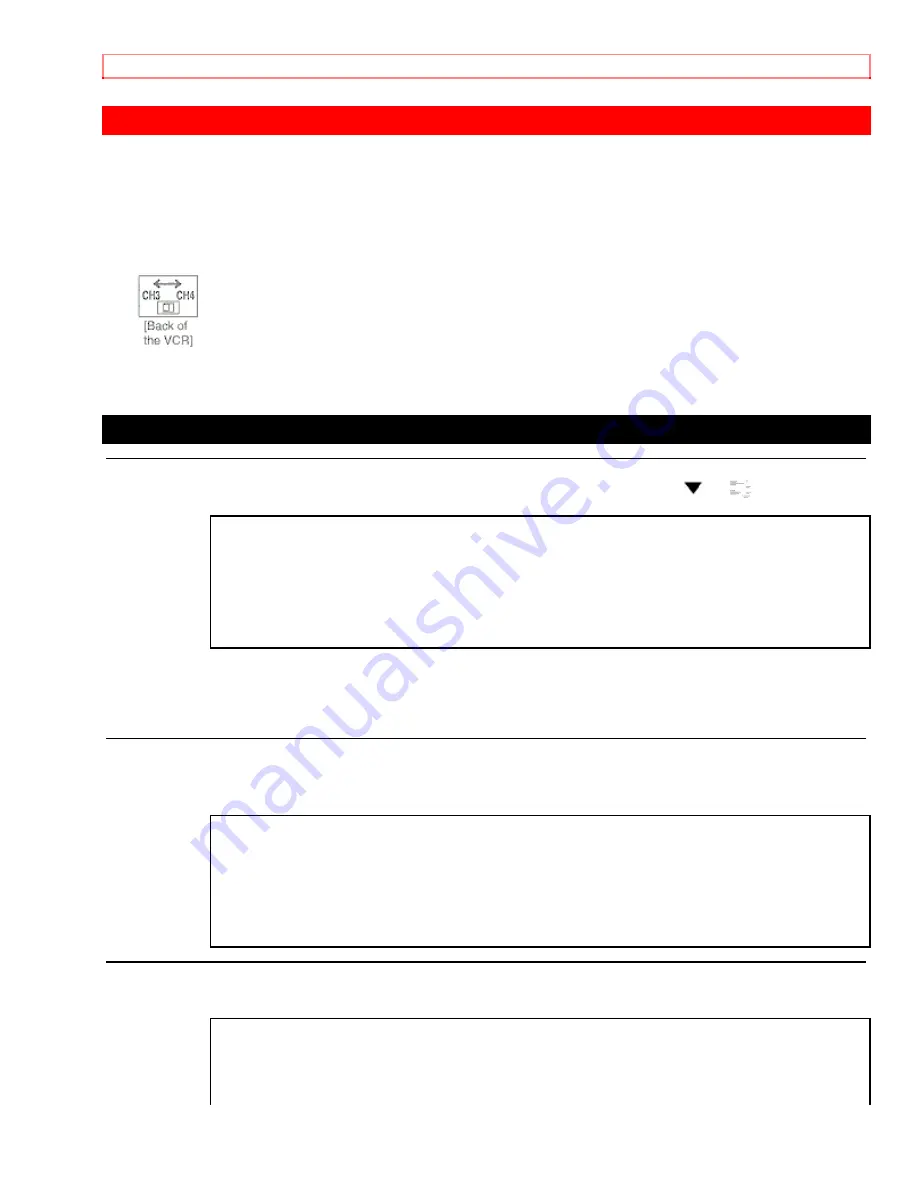
• Turn on the TV and set the TV channel to 3 or 4.  Now set the CH3/CH4 switch on the back 
of the VCR to match the channel selected on the TV. 

.  


• Insert a cassette tape with its erase prevention tab in place. (If necessary, rewind or fast 
forward the tape to the point at which you want to begin recording.) 

VIEWING AND RECORDING THE SAME PROGRAM 

1 Select the channel to be recorded 

Press the number buttons on the remote control or the CHANNEL (CH) 

 or 

 button. 


CH 32 


NOTE: If you have a cable box or satellite box connected to this VCR, please refer to 
"ANTENNA/CABLE CONNECTIONS" on pages 11 and 12 before proceeding to the next 
step. 

2 Select the tape speed 

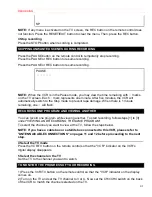
Press the TAPE SPEED button on the remote control to select the desired tape speed 
(SP/SLP). 


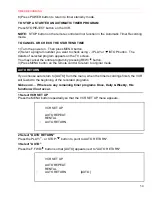
SP 

3 Begin recording 

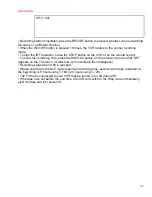
Press the REC button. The "REC" indicator appears on the display. 

REC 


Summary of Contents for VT-MX4430A

Page 1: ... station call Auto power on and off system Auto counter reset Auto rewind when the end of a tape is reached Direct Button Operation 2 Step Picture Search Operation Still Digital Auto Tracking DTR Auto Repeat Rental Play Mode Three different tape speeds SP LP SLP Two different recording tape speeds SP SLP IRT Instant Recording Timer 1 Year 7 events including Daily and Weekly Timer Recording Timer P...

Page 2: ...NT 19 RECORDING HINTS 19 RECORDING HINTS 20 SETTING THE CH3 CH4 SWITCH 21 A V TERMINALS 21 INSTALLING THE BATTERIES 22 SET UP FOR USE 23 CHANNEL SET UP Automatic 23 TO SELECT A DESIRED CHANNEL 24 CLOCK SET UP 25 TO CHANGE CLOCK SETTING 27 TO DELETE OR ADD CHANNELS 28 CHANNEL SET UP AGAIN 30 SELECTING THE LANGUAGE 30 NORMAL PLAYBACK 31 PICTURE SEARCH 31 STILL PICTURE 32 VERTICAL HOLD CONTROL 32 TRA...

Page 3: ...OGRAM 49 TO STOP A STARTED AN AUTOMATIC TIMER PROGRAM 50 TO CANCEL OR CHECK THE START END TIME 50 AUTO RETURN 50 WATCH THE RECORDED PROGRAM 51 SETTING THE GUIDE USER CHANNELS FOR THE VCR PLUS SYSTEM 51 TO CHECK A PAIR OF CHANNEL NUMBERS 53 TO CORRECT A PAIR OF CHANNEL NUMBERS 54 TO CANCEL A PAIR OF CHANNEL NUMBERS 54 TIMER RECORDING USING THE VCR PLUS SYSTEM 55 COPYING A VIDEO TAPE 59 TO MONITOR T...

Page 4: ...p cloth for cleaning EXCEPTION A product that is meant for uninterrupted service and that for some specific reason such as the possibility of the loss of an authorization code for a CATV converter is not intended to be unplugged by the user for cleaning or any other purpose may exclude the reference to unplugging the appliance in the cleaning description otherwise required in item 5 6 Attachments ...

Page 5: ...iance 13 Outdoor Antenna Grounding If an outside antenna or cable system is connected to the video product be sure the antenna or cable system is grounded so as to provide some protection against voltage surges and built up static charges Article 810 of the National Electrical Code ANSI NFPA No 70 provides information with regard to proper grounding of the mast and supporting structure grounding o...

Page 6: ...gisters stoves or other products including amplifiers that produce heat 14 Lightning For added protection for this video product during a lightning storm or when it is left unattended and unused for long periods of time unplug it from the wall outlet and disconnect the antenna or cable system This will prevent damage to the video product due to lightning and power line surges 15 Power Lines An out...

Page 7: ...formance this indicates a need for service 20 Replacement Parts When replacement parts are required be sure the service technician has used replacement parts specified by the manufacturer or have the same characteristics as the original part Unauthorized substitutions may result in fire electric shock or other hazards 21 Safety Check Upon completion of any service or repairs to this video product ...

Page 8: ...ing directly on top of the VCR WARNING Do not handle the power cord with wet hands Do not pull on the power cord when disconnecting it from AC wall outlet Grasp it by the plug If by accident water is spilled on your VCR unplug the power cord immediately and take the unit to an Authorized Service Center for servicing Do not put your fingers or objects into the VCR cassette holder Do not place anyth...

Page 9: ...nd on the back of the VCR No others have the same serial number as yours You should record the number and other vital information here and retain this book as a permanent record of your purchase to aid identification in case of theft Serial numbers are not kept on file Date of Purchase Dealer Purchase from Dealer Address Dealer Phone No Model No Serial No ...

Page 10: ...y clear picture Digital Auto Tracking DTR Automatically adjusts the tracking for each tape you play Auto Repeat Allows you to repeat a tape indefinitely without pressing the PLAY button Rental Play Mode Improves playback picture quality of worn tapes especially rental tapes Three different tape speeds SP LP SLP Two different recording tape speeds SP SLP IRT Instant Recording Timer Instant timed re...

Page 11: ...aterials are recyclable and can be reused Please dispose of any materials in accordance with your local recycling regulations Batteries should never be thrown away or incinerated but disposed of in accordance with your local regulations concerning chemical wastes ...

Page 12: ...pe with your fingers TWO DIFFERENT TAPE SPEEDS Before recording select the tape speed from SP mode Standard Play or SLP mode Super Long Play The table below shows the maximum recording playback time using T60 T120 or T160 tapes in each mode Tape Speed Recording Playback Time Type of tape TT16060 T120 T160 SP mode 1 hour 2 hours 2 2 3 hours SLP mode 3 hours 6 hours 8 hours Note You can play a tape ...

Page 13: ... Store the cassette in the case as shown ERASE PREVENTION You can prevent accidental erasing of recording by breaking off the tab on the back edge of the cassette If you decide to record on the tape again cover the hole with plastic tape ...

Page 14: ...ompartment 2 REW button Press to rewind the tape or to view the picture rapidly in reverse during the playback mode Rewind Search button Press to cancel a setting of timer program Press to correct digits when setting program For example setting clock or timer program Press to add or delete channel numbers during channel preset only on the remote control 3 STOP button Press to stop the tape motion ...

Page 15: ...he VCR or slow mode Press to stabilize the picture in the Sill mode when the picture begins to vibrate vertically 10 REC button Press for manual recording IRT button Press to activates Instant Recording Timer only on the VCR 11 NUMBER buttons Press to select desired channels for viewing or recording To select channels from 1 to 9 first press 0 button then 1 to 9 only on the remote control 100 butt...

Page 16: ...on the remote control 22 VCR TV button Press to select TV or VCR mode only on the remote control VCR position to view playback to monitor video recordings or watch TV using the VCR tuner TV position to watch TV or to view one program while recording another 23 VCR Plus button Press to program the automatic timer recording using the VCR Plus system only on the remote control 24 Power cord Connect t...

Page 17: ... 2 Connect the antenna or cable to the ANT IN Top jack of your VCR 3 Connect one end of the coaxial cable supplied to the ANT OUT Bottom jack of your VCR 4 Connect the other end of the coaxial cable supplied to the UHF VHF antenna jack of your TV Fig 1 Indoor Antenna You can record one channel while viewing another The same goes for Automatic Timer Recording and IRT For details please refer to Rec...

Page 18: ...d on the next page Fig 3 VHF UHF Separate Antenna You can record one channel while viewing another The same goes for Automatic Timer Recording and IRT For details please refer to Recording on page 22 Fig 4 Cable Box and Satellite Box You can ONLY record and view the SAME channel when using this connection There are no exceptions The same goes for Automatic Timer Recording and IRT ...

Page 19: ...r one of the connections below Satellite systems Neither one of these connection will work For satellite owner wishing to record one channel and view another please contact the manufacture of the satellite system Fig 5 You can record a scrambled channel while viewing another RECORDING HINTS 1 Be sure to check that the PWR and the VCR indicators are both on 2 Turn on the TV and Box 3 Set the channe...

Page 20: ...match the channel set on the TV and VCR 6 To view ONE channel while recording ANOTHER the VCR indicator must bo off For AUTOMATIC TIMER RECORDING the VCR indicator must be off after step 11 on page 25 7 Set the channel to be viewed on the Cable Box 8 Select the channel to be viewed on the TV Note If you wish to see the VCR menu view what you are recording or playing a tape with this connection the...

Page 21: ...se the audio video input jacks USING THE REAR JACK Fig 7 USING THE FRONT JACK You can use the audio and video input jacks on the front panel of the VCR instead of using the jacks on the back INPUT SELECT OF FRONT OR REAR To use the audio video input jacks select the L1 or L2 position 1 Be sure to check that the PWR and the VCR indicators are both on 2 Turn on the TV and set the TV to channel 3 or ...

Page 22: ...If your TV has A V input jacks you may connect your VCR s AUDIO VIDEO OUTPUT jacks to the audio video input jacks on back of your TV Direct audio video connections usually result in a better picture and sound quality for tape playback Please see your TV s owner s manual for A V input connections Fig 8 INSTALLING THE BATTERIES 1 Open the battery compartment cover by pressing the cover on the remote...

Page 23: ... want to play or record a video tape BEFORE programming the tuner you must first turn off the VCR Then press the POWER button again to turn it back on To program the tuner again see CHANNEL SET UP AGAIN on page 16 CHANNEL SET UP Automatic Plug in the VCR power cord Plug the VCR power cord into a standard AC outlet The indicator flashes on the display Remember If your cable box or satellite box is ...

Page 24: ... and cable channels CH 01 TUNER SET UP 6 After scanning The tuner stops on the lowest memorized channel The TV screen returns to TV mode If TUNER SET UP appears on the TV screen again check the cable connections Press the MENU F FWD or REW button once again and the VCR will begin preset again CH 01 TO SELECT A DESIRED CHANNEL You can select the desired channel by using the CHANNEL CH or button or ...

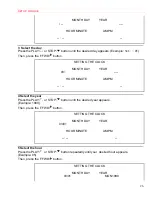
Page 25: ...he PWR and the VCR indicators are both on Turn on the TV and set the TV to channel 3 or 4 Now set the CH3 CH4 switch on the back of the VCR to match the channel selected on the TV 1 Select SETTING CLOCK Press the MENU button The SETTING CLOCK menu appears SETTING CLOCK MONTH DAY YEAR HOUR MINUTE AM PM The number buttons on the remote control do not work in this Menu mode When you press the F FWD b...

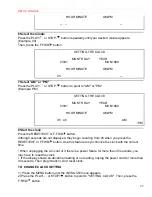
Page 26: ...NTH DAY YEAR 03 01 HOUR MINUTE AM PM 4 Select the year Press the PLAY or STOP button until the desired year appears Example 1999 Then press the F FWD button SETTING THE CLOCK MONTH DAY YEAR 03 01 1999 HOUR MINUTE AM PM 5 Select the hour Press the PLAY or STOP button repeatedly until your desired hour appears Example 05 Then press the F FWD button SETTING THE CLOCK MONTH DAY YEAR 03 01 MON1999 ...

Page 27: ...s the RESET EXIT or F FWD button Although seconds are not displayed they begin counting from 00 when you press the RESET EXIT or F FWD button Use this feature to synchronize the clock with the correct time When unplugging the AC cord or if there is a power failure for more than 30 seconds you may have to reset the clock If the display shows an abnormal reading or no reading unplug the power cord f...

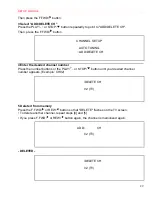
Page 28: ...in Use the remote control for this procedure Be sure to check that the PWR and the VCR indicators are both on Turn on the TV and set the TV channel to 3 or 4 Now set the CH3 CH4 switch on the back of the VCR to match the channel selected on the TV 1 Select INITIALIZE Press the MENU button on the remote control repeatedly so that the INITIALIZE menu appears INITIALIZE CHANNEL SET UP SETTING CLOCK L...

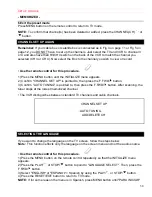
Page 29: ... the desired channel number Press the number buttons or the PLAY or STOP button until your desired channel number appears Example CH02 ADD DELETE CH 02 TV 5 Delete it from memory Press the F FWD or REW button so that DELETE flashes on the TV screen To delete another channel repeat steps 4 and 5 If you press F FWD or REW button again the channel is memorized again ADD DELETE CH 02 TV DELETED ADD DE...

Page 30: ... is pointed to then press the F FWD button 3 Confirm AUTO TUNING is pointed to then press the F FWD button After scanning the tuner stops at the lowest memorized channel The VCR distinguishes between standard TV channels and cable channels CHANNEL SET UP AUTO TUNING ADD DELETE CH SELECTING THE LANGUAGE If you want to change the language on the TV screen follow the steps below Note This function ef...

Page 31: ... the remote control does not function Press the RESET EXIT button on the remote control to clear the menu Then press the PLAY button If a tape is already in the VCR with power off 2A Using button on the VCR Just press the PLAY button on the VCR Power will automatically turn on and playback will start Direct Button Operation 2B Using button on the remote control Press the POWER button to turn on th...

Page 32: ...ver when playing pre recorded tapes or tapes recorded on units other than your own noise lines black and white streaks may appear on the playback picture If this occurs you can adjust the tracking control manually by pressing CHANNEL or button on the VCR until the streaks disappear To return to the DTR function stop the tape once and start playback again You can reduce the noise lines by pressing ...

Page 33: ...button on the remote control until M appears on the TV screen The COUNTER MEMORY button does not function if the Auto Repeat mod is set ot ON In this case set the Auto repeat mode to OFF M 0 00 00 4 Begin recording or playback Press REC or PLAY button Press the STOP button when recording or playback is completed 5 To activate the Counter Memory Press the REW or F FWD button the VCR will stop autom...

Page 34: ...l the VCR SET UP menu appears VCR SET UP AUTO REPEAT RENTAL AUTO RETURN 2 Select AUTO REPEAT Confirm AUTO REPEAT is pointed to 3 Begin Auto repeat playback Press the F FWD button so that ON will appear next to AUTO REPEAT on the TV screen When in Stop mode Repeat playback mode will start automatically Once you select the Auto Repeat mode it stays in effect even after you turn off the VCR The COUNT...

Page 35: ...L ON appears Once you select the Rental mode it stays in effect even after you turn off the VCR To stop playback press the STOP button TO EXIT THE RENTAL PLAY MODE Repeat steps 1 to 3 Then press the F FWD button so that RENTAL OFF appears on the TV screen Power failure If there is a power failure for more than 30 seconds Rental Playback will go to off INDEX SEARCH This feature provides a method of...

Page 36: ...nu appears SEARCH SELECT QUICK FIND INDEX SEARCH TIME SEARCH 2 Select INDEX SEARCH Press the PLAY or STOP button to point to INDEX SEARCH Then press the F FWD button 3 Enter your desired number Press the PLAY or STOP button until the number of programs that you want to skip appears Example 03 for 3 programs INDEX SEARCH 03 The Index Search mode will be cancelled if the procedures are not activated...

Page 37: ... index mark please see INDEX SEARCH section Tape must be fully rewound You can begin the Quick Find by pressing the QUICK FIND button on the remote control You can also begin the Quick Find by the following procedure 1 Select SEARCH SELECT Press the MENU button until the SEARCH SELECT menu appears SEARCH SELECT QUICK FIND INDEX SEARCH TIME SEARCH 2 Select QUICK FIND Confirm QUICK FIND is pointed t...

Page 38: ...ND INDEX SEARCH TIME SEARCH 2 TIME SEARCH Press the PLAY or STOP button to point to TIME SEARCH Then press the F FWD button 3 Enter your desired time Press the PLAY or STOP button until your desired time appears 2 50 stands for 2 hours 50 minutes The Time Search mode will be cancelled if the procedures are not activated in 30 seconds TIME SEARCH 2 50 4 Begin Time Search By pressing the REW or F FW...

Page 39: ...SPECIAL PLAYBACK 39 This function will not operate in the recording mode When you want to cancel the Time Search while in progress press the STOP button ...

Page 40: ...ecessary rewind or fast forward the tape to the point at which you want to begin recording VIEWING AND RECORDING THE SAME PROGRAM 1 Select the channel to be recorded Press the number buttons on the remote control or the CHANNEL CH or button CH 32 NOTE If you have a cable box or satellite box connected to this VCR please refer to ANTENNA CABLE CONNECTIONS on pages 11 and 12 before proceeding to the...

Page 41: ...te remaining one will flash RECORDING ONE PROGRAM AND VIEWING ANOTHER You can record one program while viewing another To start recording follow steps 1 to 3 under VIEWING AND RECORDING THE SAME PROGRAM To select the channel you want to view at the TV follow the steps below NOTE If you have a cable box or satellite box connected to this VCR please refer to ANTENNA CABLE CONNECTIONS on pages 11 and...

Page 42: ...ion tab in place If necessary rewind or fast forward the tape to the point at which you want to begin recording NOTE If you have a cable box or satellite box connected to this VCR please refer to ANTENNA CABLE CONNECTIONS on pages 11 and 12 before proceeding to the next step 1 Select the channel to be recorded Press the number buttons on the remote control or the CHANNEL CH or button 2 Select the ...

Page 43: ...the remaining time press the DISPLAY button on the remote control so that IRT appears on the TV screen It will show up momentarily then disappear Recording stops when 0 00 is reached Please note that in the SLP mode maximum recording time assuming the tape is started at the beginning is 8 hours using T 160 or 6 hours using T 120 The TV that is connected to your VCR may be turned on or off during I...

Page 44: ...at the PWR and the VCR indicators are both on to program it Turn on the TV and set the TV channel to 3 or 4 Now set the CH3 CH4 switch on the back of the VCR to match the channel selected on the TV Clock must be set to the correct time and date before setting the timer Insert a cassette tape with its erase prevention tab in place If necessary rewind or fast forward the tape to the point at which y...

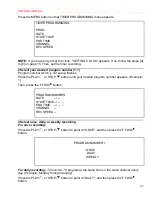
Page 45: ...t set up flashes Press the PLAY or STOP button until your desired program number appears Example 1 Then press the F FWD button PROGRAM NUMBER 1 DATE START TIME END TIME CHANNEL REC SPEED 3 Select once daily or weekly recording For once recording Press the PLAY or STOP button to point to ONCE and then press the F FWD button PROGRAM NUMBER 1 ONCE DAILY WEEKLY For daily recording To record a TV progr...

Page 46: ...e next step Press the REW button to go back one step from the current step during steps 2 to 10 4 Set the date when you want to start First press the PLAY or STOP button until the desired month appears Example 05 for May Then press the F FWD button Next press the PLAY or STOP button until the desired day appears and then press the F FWD button Example 06 for 6th ONE TIME PROGRAM PROGRAM NUMBER 1 D...

Page 47: ...o point to AM or PM Example PM Then press the F FWD button ONE TIME PROGRAM PROGRAM NUMBER 1 DATE 05 06 THUR START TIME07 30 PM END TIME CHANNEL REC SPEED 7 Set the end hour Press the PLAY or STOP button until the desired hour appears Example 08 Then press the F FWD button ONE TIME PROGRAM PROGRAM NUMBER 1 DATE 05 06 THUR START TIME07 30 PM END TIME 08 CHANNEL REC SPEED 8 Set the end minute Press ...

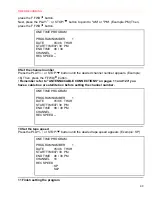
Page 48: ...ars Example 16 Then press the F FWD button Remember refer to ANTENNA CABLE CONNECTIONS on pages 11 and 12 if you have a cable box or satellite box before setting the channel number ONE TIME PROGRAM PROGRAM NUMBER 1 DATE 05 06 THUR START TIME07 30 PM END TIME 08 30 PM CHANNEL 16 REC SPEED 10 Set the tape speed Press the PLAY or STOP button until the desired tape speed appears Example SP ONE TIME PR...

Page 49: ...hich you want to shift forward using the PLAY or STOP button The details of the selected program appears on the TV screen 3 Press the REC button on the remote control when a program number is blinking Each additional push will shift forward the start end time for recording by 10 minutes It can be shift forward for up to 24 hours When the recording is already in progress each additional push will s...

Page 50: ...program by pressing REW button 3 Press MENU button on the remote control to return to original mode AUTO RETURN If you choose auto return to AUTO from the menu when the timer recordings finish the VCR will rewind to the beginning of the recorded programs Make sure If there are any remaining timer programs Once Daily Weekly this function will not occur 1 Select VCR SET UP Press the MENU button repe...

Page 51: ...oxes below 1 Write your local channel numbers in USER CH column which you can receive in your area by channel preset 2 Write local TV stations corresponding USER CH in Call letters column and write guide channel numbers corresponding call letters in GUIDE CH column using see your TV guide magazine or the TV listings of your local newspaper Remember If your cable box or satellite box is connected a...

Page 52: ...his VCR in another area by moving it 1 Select INITIALIZE Press MENU button until INITIALIZE menus appears INITIALIZE CHANNEL SET UP SETTING CLOCK LANGUAGE SELECT GUIDE CHANNEL SET GUIDE CHANNEL MAP 2 Select GUIDE CHANNEL SET Press PLAY or STOP button to point to GUIDE CHANNEL SET Then press F FWD button 3 Enter a guide channel number GUIDE CH Press the number buttons or the PLAY or STOP button unt...

Page 53: ...annels which are higher than 99 press the 100 button first then press the last two digits using the number buttons GUIDE CHANNEL SET GUIDE CH 25 USER CH 50 5 Memorize a guide channel number and a user channel number you have selected Press the MEMORY button To set another repeat steps 3 to 5 6 Exit the guide channel set up mode Press the RESET EXIT button TO CHECK A PAIR OF CHANNEL NUMBERS A list ...

Page 54: ...BERS 1 Press MENU button until the INITIALIZE menu appears 2 Press PLAY or STOP button repeatedly to point to GUIDE CHANNEL SET Then press F FWD button 3 Enter the correct guide channel number using the number buttons or PLAY or STOP button Then press F FWD button 4 Enter the correct user channel numbers using the number buttons or PLAY or STOP button Then press MEMORY button 5 Press RESET EXIT bu...

Page 55: ...timer using the PlusCode numbers that are printed in most newspaper TV listings and TV guide magazine You can set seven programs including normal timer recording to record within one month You need to coordinate guide channel numbers and user channel numbers before you program the automatic timer recording using the VCR Plus system Refer to SETTING THE GUIDE USER CHANNELS FOR THE VCR PLUS SYSTEM o...

Page 56: ...s VCR PLUS button Enter correct code and press VCR PLUS button again If the code flashes when you press VCR PLUS button this means that the number you entered was incorrect or the timer recording you just programmed and another timer recording overlapped 3 Select once daily or weekly recording The timer recording program using the VCR Plus system is memorized to the lowest program number which is ...

Page 57: ...rogram information is correct There are cases in which the program information does not match your area If the incorrect information appears select the number you want to change using the REW button Then enter the correct numbers using the PLAY or STOP button Remember If your cable box or satellite box is connected as in Fig 4 on page 11 or Fig 5 on page 12 the local channel number USER CH Then se...

Page 58: ...TIMER RECORDING 58 Please see HINTS FOR TIMER RECORDING on page 25 for more notes ...

Page 59: ...ing VCR to select the desired recording speed SP SLP on the editing recording VCR 4 Select the L1 or L2 position on the editing recording VCR See page 13 under Connecting to input jacks 5 Press the REC button on the editing recording VCR 6 Begin playback of the tape in the source playing VCR For best results during dubbing use the VCR s front panel controls whenever possible The remote control mig...

Page 60: ...COPYING A VIDEO TAPE 60 2 Press the VCR TV button on the remote control so that the VCR indicator on the display comes on ...

Page 61: ... Count Clock and Channel number press the DISPLAY button on the remote control Each time you press the DISPLAY button on the remote control TV screen will change as the illustration It is normal for the status display STOP PLAY etc and the tape speed display SP LP or SLP to disappear after 5 seconds ...

Page 62: ...er is turned on 2 indicator Lights up when a timer recording or an IRT has been set Flashes if a tape is not inserted in the VCR even if you set a timer 3 Cassette indicator Lights up when there is a tape in the VCR 4 VCR indicator Indicates that the VCR is in the VCR position 5 REC indicator Lights up when the VCR is in the Recording mode Flashes when a recording has been paused 6 Clock Feature C...

Page 63: ...d further than 0 00 00 on the tape counter 0 00 12 AUTO REWIND When the end of a tape is reached during recording playback or fast forward the tape will automatically rewind to the beginning After rewinding finishes the VCR will eject the tape and turn itself to off The tape will not auto rewind during timer recording or Instant Recording Timer When the Counter Memory is activated the tape will re...

Page 64: ...Adjust tracking control for a better picture by using the CHANNEL or button on the VCR No picture but the audio is OK in playback Head cleaning may be necessary Refer to HEAD CLEANING on page 34 No picture or poor picture on playback Set your TV to the VCR mode and or press the VCR TV button on the remote control so that the VCR indicator on the display comes on Fine tune your TV On the air TV pro...

Page 65: ...posed surfaces HEAD CLEANING Playback picture may become blurred or interrupted while the TV program reception is clear Dirt accumulated on the video heads after long periods of use or the usage of rental or worn tapes can cause this problem If a streaky or snowy picture appears during playback the heads of your VCR may need to be cleaned 1 Please visit your local Audio Video store and purchase a ...

Page 66: ...ynthesis Power Input AC120V 60Hz Power Consumption 16 W nominal Cabinet Size 14 1 4 W x 3 5 8 H x 9 1 16 D 36 0cm W x 9 2cm H x 23 0cm D Weight 5 51 lbs 2 5 kg approx Storage Temperature 4 F to 131 F Operating Temperature 41 F to 104 F Accessories 1 coaxial cable Part No 5857952 1 remote control unit Part No HL11183 2 AA batteries Check your cable company s compatibility requirements Design and sp...

Page 67: ... following is a chart of common cable channel designations DECLARATION OF CONFORMITY with FCC Rules for Electromagnetic Compatibility Products Video Deck Models VT MX4430A Trade Name HITACHI This device complies with part 15 of FCC Rules Operation is subject to the following two conditions 1 this device may not cause harmful interference and 2 this device must accept any interference received incl...

Page 68: ...CABLE CHANNEL DESIGNATIONS 68 Responsible Party Hitachi Home Electronics America Inc 905 East South Street Anaheim CA 92805 U S A Tel 714 780 0152 ...

Reviews: